

Want to save this post?
Enter your email below and get it sent straight to your inbox. Plus, I’ll send you budget recipes and money-saving tips every week!
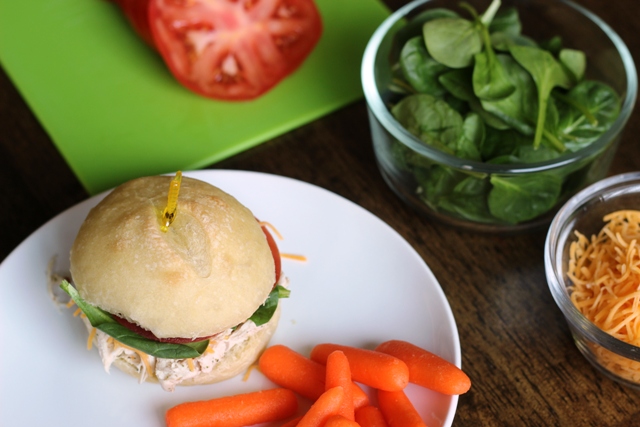
This Italian roll recipe is perfect for a bread basket for dinner, slathered in butter and only requires 5 simple ingredients! Or these sandwich rolls are great to serve with your favorite cold cuts for lunch.

These rolls. Oh my. Magic? No. Delicious? Absolutely. And what I love even more about that is the simplicity of making with just a few basic pantry ingredients that cost you very little. Let me break it down for you.
A five-pound bag of flour costs $2.99 at Trader Joe’s. It’s unbleached, all-purpose. If I want to take my baking up a notch, I can buy the white whole wheat flour for $3.99.
This, my friends, plus a little oil, water, and yeast, can bring you many meals of utter enjoyment. Of course there’s pizza, but there’s also homemade baguette, and of course sweet little Italian sandwich rolls.
For the unschooled, please know that there are “about” 16 cups of flour per bag. Since the average bread, pizza dough, or roll recipe calls for about 4 cups of flour, this means that for a buck plus the oil and yeast, you can make yourself a load of deliciousness.
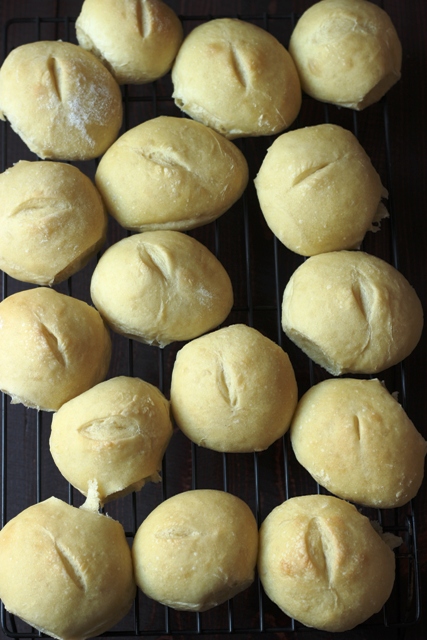
Case in point: these rolls. They were NOT difficult to prepare. The aforementioned ingredients have a party in the bread machine. I walk away. They don’t need me. Once they’ve danced the night away, I cover the pan and slip it into the fridge overnight.
In the morning, I form the sticky dough into rolls and again, walk away. An hour later I slide them into a hot oven. Mere minutes later, piping hot rolls appear.
Do I need to use a bread machine to make this Italian roll recipe?
No you don’t. I Love My Bread Machine and have used it in the past to make other tasty yeasty treats such as Honey-Sweetened Raisin Bread but you can definitely make this by hand.
I’ve included directions for both, so nothing can stop you from whipping up these Italian rolls for your family!
What kind of yeast should I use?
Active or instant will work just fine in this recipe.
If you are unsure whether or not your yeast has expired or not (and therefore, still active) you can add the yeast to some of the water called for in the recipe and wait to see if it bubbles. If it does, then you’re good to go!
Ingredients for this Italian roll recipe:
- water
- olive oil
- flour
- salt
- yeast
Seriously that’s it. And yes you can use half whole wheat flour, or white whole wheat flour if you want to make these more nutritious.
How do I make this Italian roll recipe?
How do I store these Italian rolls?
You want to allow these rolls to cool completely before storing. Baked and cooled rolls can be stored in an airtight container in the freezer for longest storage (up to 3 months). Then thaw at room temperature before serving.
What do I serve these Italian rolls with?
I served these as sandwich rolls. You can turn these into an Italian Sub Sandwich.
But you could easily just pass them in the bread basket as a side to tonight’s dinner. Serve them alongside my Bulk Batch Supreme Meatballs, My Favorite Slow Cooker Pot Roast, or keep it lighter and pair with a Pear and Blue Cheese Salad with Maple Spiced Pepitas. The batch makes 16 rolls. That means the normal family will have leftovers.
We, of course, are not normal. They were gone in one sitting. But, they are easy enough to make again.
And again.
How much does it cost to make your own rolls?
They’re good cheap eats! Here’s my price break-down for these rolls:
- oil $0.35
- flours $1.00
- allowance for leavening $0.25
Per batch: $1.60, or about 10 cents per roll.
Some of my favorite bread machine recipes include:
- Honey-Sweetened Raisin Bread in the Bread Machine
- Wholesome Energy Bars
- Whole Wheat Soft Pretzels
- Garlic Focaccia
- Whole Grain Cinnamon Rolls
- Easy Garlic Breadsticks
- Hot Cross Buns
- Pumpkin Onion Rolls
- Hot Dog Buns
- Pita Bread
How to make this good and cheap:
You know I don’t typically want to make something if I can’t make it good as well as cheap. Here are some of the strategies you can use to make this recipe more economical:
- Stock up on ingredients when they are on sale. When I find regular kitchen staples on sale, I buy a lot. I’m currently using a price book to track prices and that’s saving me money. For this recipe, keeping an eye on the price of flour and olive oil can help keep the price down.
- Buying in bulk – It’s rare that I would buy small bags of flour. I also have gotten into the habit of buying cases of flour from Bob’s Red Mill or VitaCost so that I always have baking supplies on hand.
How I make this recipe easy:
This recipe really couldn’t be easier than it is, but having the right kitchen tools can really make your time in the kitchen more enjoyable. Over time, I’ve honed my collection so that they are perfect for my needs.
Here are the tools that I use for this recipe:
- stainless steel mixing bowls
- glass measuring cup
- Rubber spatula
- parchment paper
- sheet pan
- Oster Bread Machine
Italian Sandwich Rolls
Ingredients
- 1 ½ cup water
- ¼ cup olive oil
- 4 cup unbleached, all-purpose flour (you can use unbleached, all-purpose or white whole wheat)
- 2 teaspoon salt
- 1 tablespoon active dry yeast
Instructions
To make the dough in a bread machine
- Combine the water, oil, flours, salt, and yeast in the pan of your bread machine according to the manufacturer’s directions. Set on the dough cycle and start the machine.1 ½ cup water, ¼ cup olive oil, 4 cup unbleached, all-purpose flour, 2 teaspoon salt, 1 tablespoon active dry yeast
- When the machine beeps or the dough has doubled in bulk, Refrigerate overnight to develop the flavors or proceed to the next step.
To make the dough by hand
- Place the water and oil in a medium saucepan and warm slightly. Transfer the mixture to a large bowl and add the yeast. Stir and allow the yeast to proof for 5 minutes.1 ½ cup water, 1 tablespoon active dry yeast
- Add the flour and the salt. Stir to combine well.4 cup unbleached, all-purpose flour, 2 teaspoon salt
- Turn the mixture onto a lightly floured surface and knead. Continue kneading for 5 minutes to create a smooth, elastic dough, adding more of the all-purpose flour as necessary.
- Transfer to a greased bowl and turn the dough ball to coat. Allow to rise until doubled in bulk, about 1 hour.
To form the rolls
- Line a large baking sheet with parchment paper or a silicone baking mat. Remove the dough from the pan and divide it into sixteen equal parts. Form each part into a short, thin oval and place equi-distance apart on the prepared baking sheet.
- Preheat the oven to 400ºF.
- Allow the rolls to rise for 20 minutes or longer, until doubled in bulk.
- Bake the rolls for 15 to 20 minutes until golden brown. Cool on a rack before serving.
- Baked and cooled rolls can be stored in an airtight container in the freezer for longest storage. Thaw at room temperature before serving.
Marci
Tried them today with all purpose flour. They taste great. Kids making tomato soup and its the perfect bread for dunking.
Jessica Fisher
Glad to hear you enjoyed them!
Lauren
OH boy, oh boy, oh boy!! I’m going to make a sourdough starter and (fingers crossed)if things go well, I want to try these with your recipe. They look amazing and so yummy!
Thank you for all the really easy, frugal recipes. I can’t wait now!
Rachel
This was amazingly easy and tasty! I could eat the whole batch straight out of the oven. 🙂 Thanks for the recipe and how-to! Can you explain how you get those fancy artisan looking tops? Do you slice them with a knife at some point during the rise period?
Jessica Fisher
I sliced them right before baking with a very sharp knife.
Cheri A
I made these last night to use with the pulled BBQ chicken in the new menu plan. They were delicious, they did not rise quite as big as I would have liked, but it was a cold day here yesterday. I may make them again and put in a preheated oven on the lowest heat and tut nit of to see if that helps.
Claire
Looking forward to making these! My 7 love bread as much as I do. I have 2 bread machines & use them all the time. Just made you recipe for pita bread twice last week. They loved it!
Angela
Made these and they were a huge HIT!! I made the dough on Friday night after we ate dinner, and put it in the fridge. Saturday, I got the dough back out and baked the rolls. My guys kept walking through the kitchen to grab one! They even said, ‘These would be really good for sandwiches.” WOO HOO!!!!!!!
Jessica Fisher
Yay! Love that!
Martha Artyomenko
This is similar to a recipe I stirred up tonight. I rolled the dough out into a rectangle and topped it with pepperoni and cheese, then rolled up like a cinnamon roll and cut into pinwheels and baked. They were really good along side potato soup.
Jessica Fisher
Great idea! I’ve done that with sundried tomato pesto and that is super yummy.
Karin Martinez
Hello! I am a new comer to your site and I am so excited to try some of your posts!
As a newbie to proper freezing, once the dough is frozen, how do I proceed to make them? Do I have to thaw them out or just bake them differently?
Jessica Fisher
I would bake and cool them. Then place in a ziptop freezer bag and remove as much air as possible. A straw is helpful for that. Alternatively, you could wrap each roll in foil or plastic wrap to insulate it against the air in the bag.
Karin Martinez
So I just made these…and clearly I need more working in the bread making dept.
They doubled fine in the first rising. I stashed in the fridge overnight. The next evening, I took them out, sectioned them and left them to rise. They seemed to have doubled fine (though I ended up leaving them at room temp for an hour or so because I had to leave the house). But when in the oven, their size didn’t change at all. Is this what’s supposed to happen?
Also, I plan to make your white whole wheat sub rolls next. How would you describe the difference in flavor and texture?
Jessica Fisher
Sorry for the delay in answering. Did they taste good? Have you tried it again?
Diana
I love bread that sits in the fridge for a while before baking–makes it almost sourdough without the work of feeding a starter 🙂
Do you know if the bread machine would handle a double batch of this dough? I haven’t experimented much with how much my machine will hold–guess it probably depends on the size? Have a single batch in this morning and looking forward to bbq from the freezer on them for supper!
Jessica Fisher
My bread machine could not handle a double batch, but when I make lots, I simply move the dough ball to a greased bowl and start over again.
Nicole Barron
I made these last night and they were wonderful! Used half wheat flour and served them alongside chicken soup. Thank you for such an easy recipe. My family loved it, and I hardly did a thing. Who knew fresh rolls could be so simple?!
Jessica Fisher
Yay! I love to hear success stories!
Heather M
Another silly question: What other ways can you form this dough for it to still turn out well, besides rolls? This dough sounds like something I could handle…
Jessica Fisher
This is very similar to a pizza dough, so you could use it for pizza or bread sticks as well.
Ana
Sorry for the silly question…..but can I freeze this rolls? …..thanks
Jessica Fisher
No question is silly. Yes. Cool completely and wrap as airtight as possible.
Jessie
Can you use ALL white whole wheat flour, or just 3 of the 4 cups?
Jessica Fisher
I didn’t test it with white whole wheat, just the unbleached, all-purpose because I was looking to make the least expensive. However, I use 1/2 or 3/4 white whole wheat all the time in other recipes. I usually stand by the machine during the initial mixing phase to make sure there’s enough moisture. Sometimes I add 1 to 2 tablespoons water if it looks dry. This is a pretty sticky dough made with ub, ap flour, so you should be fine using the wwwf.
LizA
No sugar to feed the yeast? A good 2 TBSP of dark honey would go a long way to darken the crust when baked — just a thought.
Jessica Fisher
I considered it, but I really wanted it to be a bare bones recipe, especially for those days when you don’t have much to work with or the budget is really tight. You could certainly add as little as a tablespoon of sugar to increase browning and change the flavor a bit.
cherie
What a helpful post
I live in the midst of a very italian area – and breads/rolls are plentiful and relatively cheap [I’d say .35 for bigger rolls than these – big as my 11yo’s face we always say LOL] and it’s easy
But there are plenty of times I am not interested in yet another stop just for lunch making materials! Or dinner!
Thanks for bringing this recipe up – will be posting it in my kitchen for when I’m planning on sandwiches and I’ll save a couple dollars and some junk ingredients from our plates
~allison
Have you ever tried making these without a bread maker? or gluten free?
Thank you!
Jessica Fisher
I don’t bake gluten-free so I can’t help with that. You can mix these up by hand, though I haven’t tried it myself. The bread machine makes everything easier.
Stephanie M.
Hi Jessica: I printed this recipe but here are my questions: Can you use “bread flour” because that’s what I typically make bread with. Also, I’m not quite sure about rolling the dough into eight equal parts and then having 16 rolls. Do you cut them after they’re baked?
Jessica Fisher
It should say divide into 16. Sorry for the confusion.
Chamayne
I used 1/2 talian 00 flour and 1/2 Einhorn flour and added a bit of bread flour. They turned out great!
Meredith
Looks delicious!! In step 4, it says to “divide it into eight equal parts” and then to “form each part into a long, thin oval”, but no additional instructions are included on how to get from the 8 parts to 16 servings. I assume you divide the long, thin ovals in half once they have risen again…?
Jessica Fisher
It should read 16 parts. I copied the directions from a similar recipe and didn’t proof as carefully as I should have. Sorry.
Roberta
Does this recipe really call for one Tablespoon of yeast? That’s a lot of yeast. 🙂 Most of the bread recipes I use call for just a couple of teaspoons, but I’m no expert.
Jessica Fisher
Most yeast packets are 2 1/4 teaspoons. A tablespoon is only 3 teaspoons. So, it’s a little bit more than normal, but not by much.
Roberta
Thanks! I buy my yeast in bulk and never knew how much those little packets contained (now I can finally use recipes that call for those packets–yea!).
I’m looking forward to trying these. They look delicious!
Roberta
Elisabeth
Is it the active yeast packets?
Jessica Fisher
Yes.
Maureen
In this case, forget the cost. If I made these my family would fall over dead in shock. Thank you for your clear and concise instructions. I am going to give it a try!