

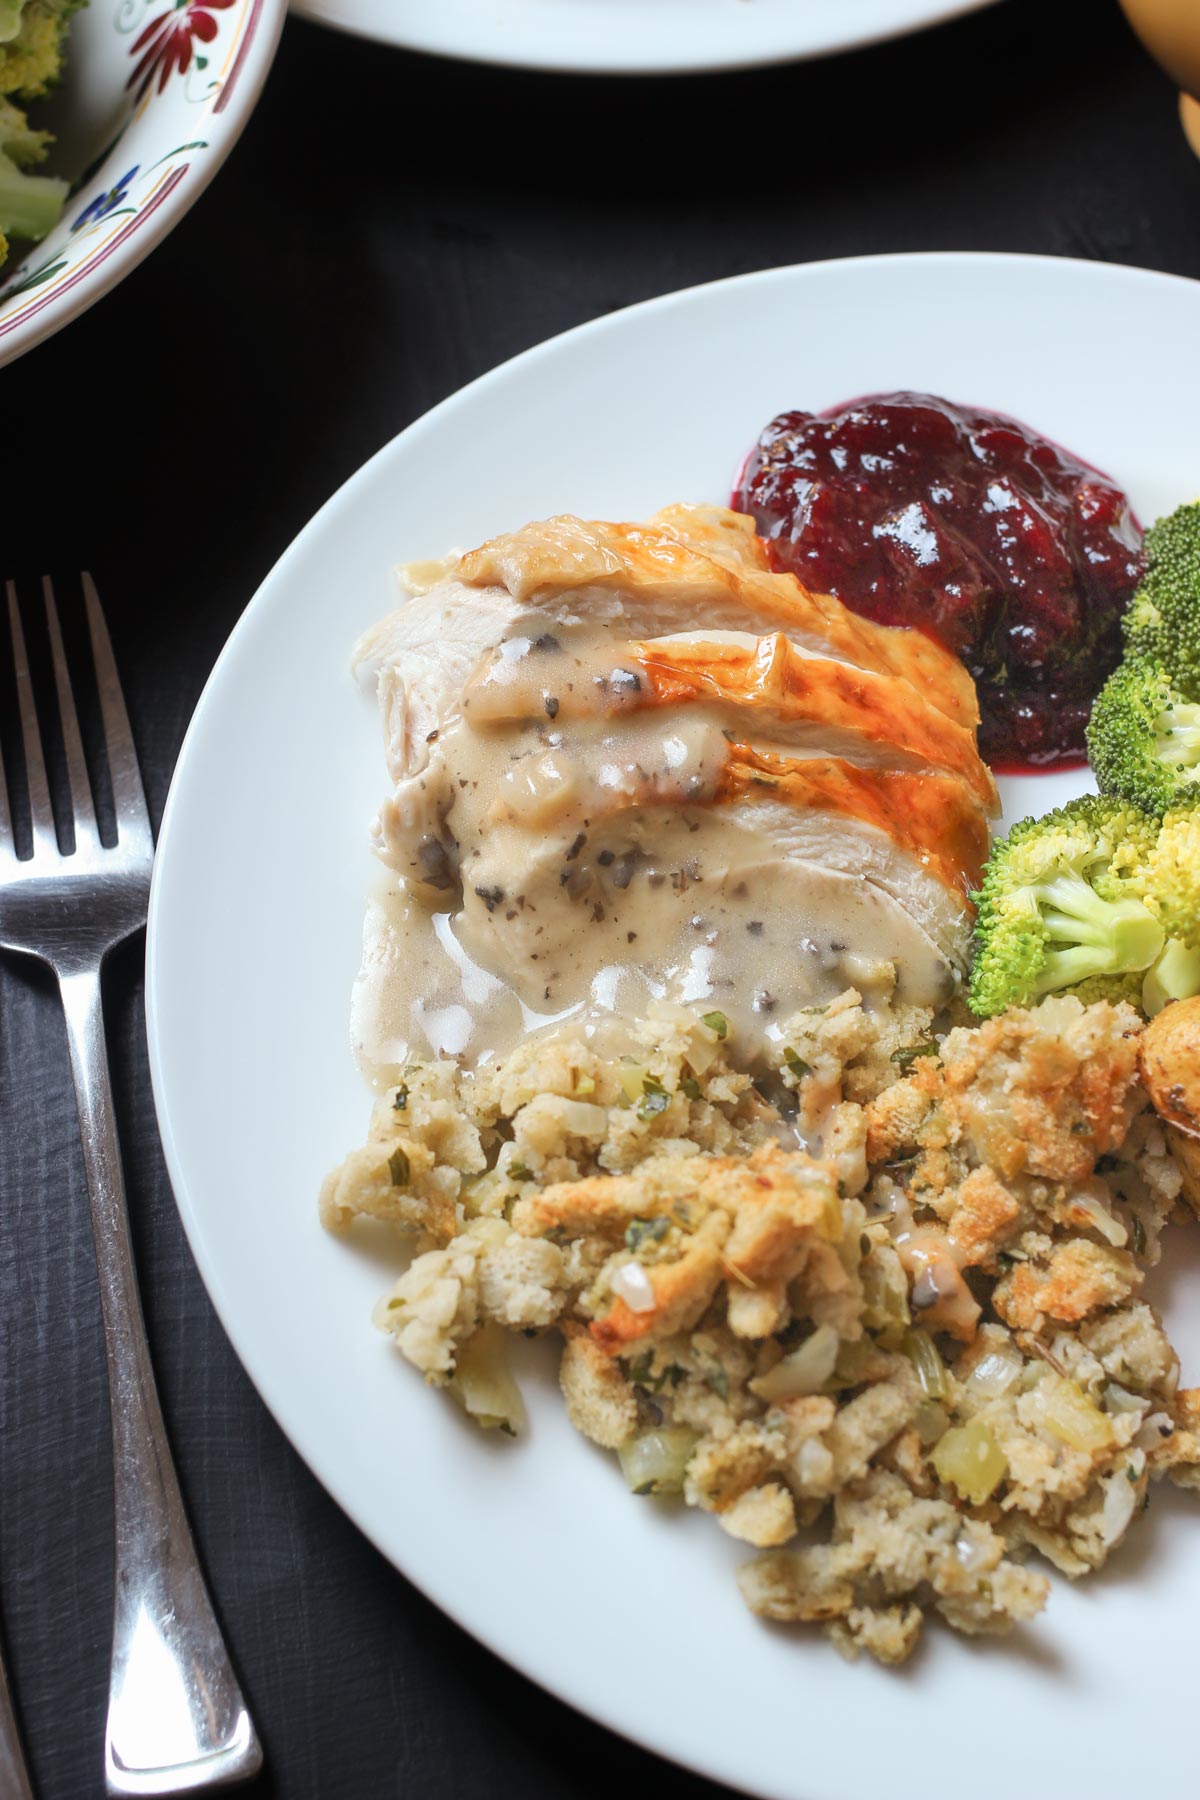
Wondering how to cook a turkey? We’ve got you covered with these easy tips that result in a delicious whole roast turkey.
Once you know how to cook a turkey, hosting Thanksgiving or another holiday meal will be easy and stress-free, leaving you plenty of room for delicious side dishes like Easy Roast Potatoes and Baked Stuffing.

Want to save this post?
Enter your email below and get it sent straight to your inbox. Plus, I’ll send you budget recipes and money-saving tips every week!
I’m hosting Thanksgiving, but I don’t know how to do it. I’m not sure how to cook a turkey. What in the world am I going to do?
Don’t panic. We’ve all been there. At least once.
Everyone who’s ever cooked a turkey has felt at a loss as to how to do it – the first time. Those who’ve cooked more than one turkey have learned from their mistakes.
If you find yourself wondering what in the world to do with this turkey — and all this stuff inside it! — this post is for you.
I have cooked a turkey — or turkey breast — at the holidays for almost thirty years. Holy smokes. (I started young.)
That’s a lot of turkeys now that I think about it.
And trust me, there have been some mishaps: not thawing the bird in time and running out for a fresh turkey the night before, flinging turkey all over the kitchen trying to lift it out of the roaster, throwing out my back trying to get it into the oven, you name it.
So far, though, the only casualties have been my back — and the turkey, of course.
While I don’t consider myself a turkey expert, I have learned a thing or two these past three decades. Namely: how to cook a turkey easily.
Why Do This
This method for how to cook a turkey requires no special tricks or techniques. No paper bag overnight method. No fancy-pants brines. No flipping the bird halfway to maximize tender breast meat.
Nope. No way. No how.
Just a classic method of how to cook a turkey that produces a delicious main dish protein without a lot of hassle, expense, or complexity.
Ingredients
Here’s what you’ll need to cook a whole turkey:
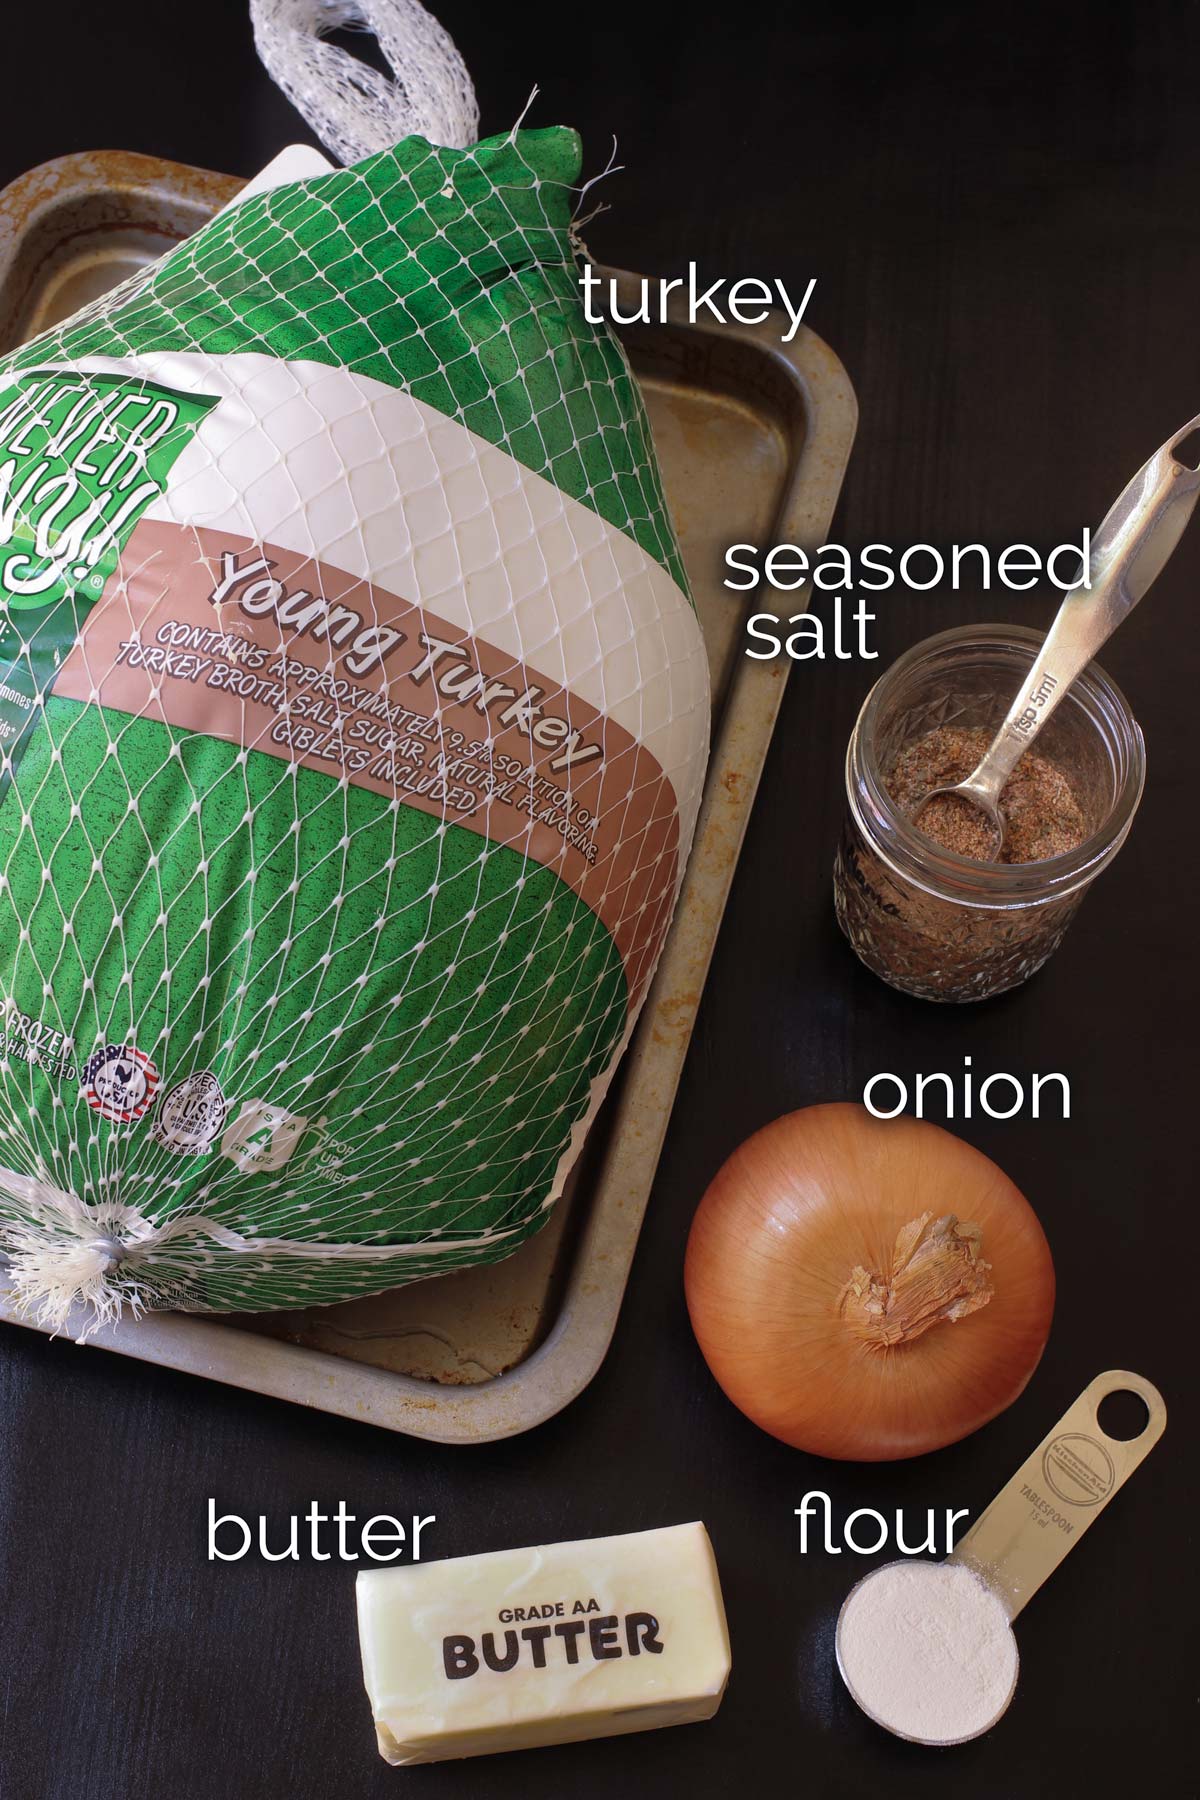
a whole turkey – You can use fresh or frozen, the size will vary depending on your needs. Typically, you’ll want 1 to 1 ½ pounds of turkey per person. This weight accounts for the skin and bones as well as the actual meat.
flour – I recommend that for the easiest, quickest cooking turkey, you use a turkey bag. This insulates the turkey in the oven and keeps things moist. The directions on the bag require that you add some flour to the bag to prevent its bursting. Per Reynolds, you can use a gluten-free flour blend or cornstarch if you need to cook gluten-free.
butter – Butter is going to go under the skin to marinate the turkey meat and keep it tender. I use dairy butter, but you can also use a plant-based butter or margarine if you prefer.
seasoning blend – Use your favorite spice mix to season the turkey. I use Homemade Seasoned Salt because it’s super flavorful and all-purpose.
onion – Adding an onion or two to the roaster will help flavor the juices as well as the turkey. You can add it to turkey stock afterward or puree it into gravy.
Supplies Needed
When you’re learning how to cook a turkey, it’s important that you have the right kitchen equipment. I’ve tried to wing it and it doesn’t work. Here’s what I’ve found to work best:
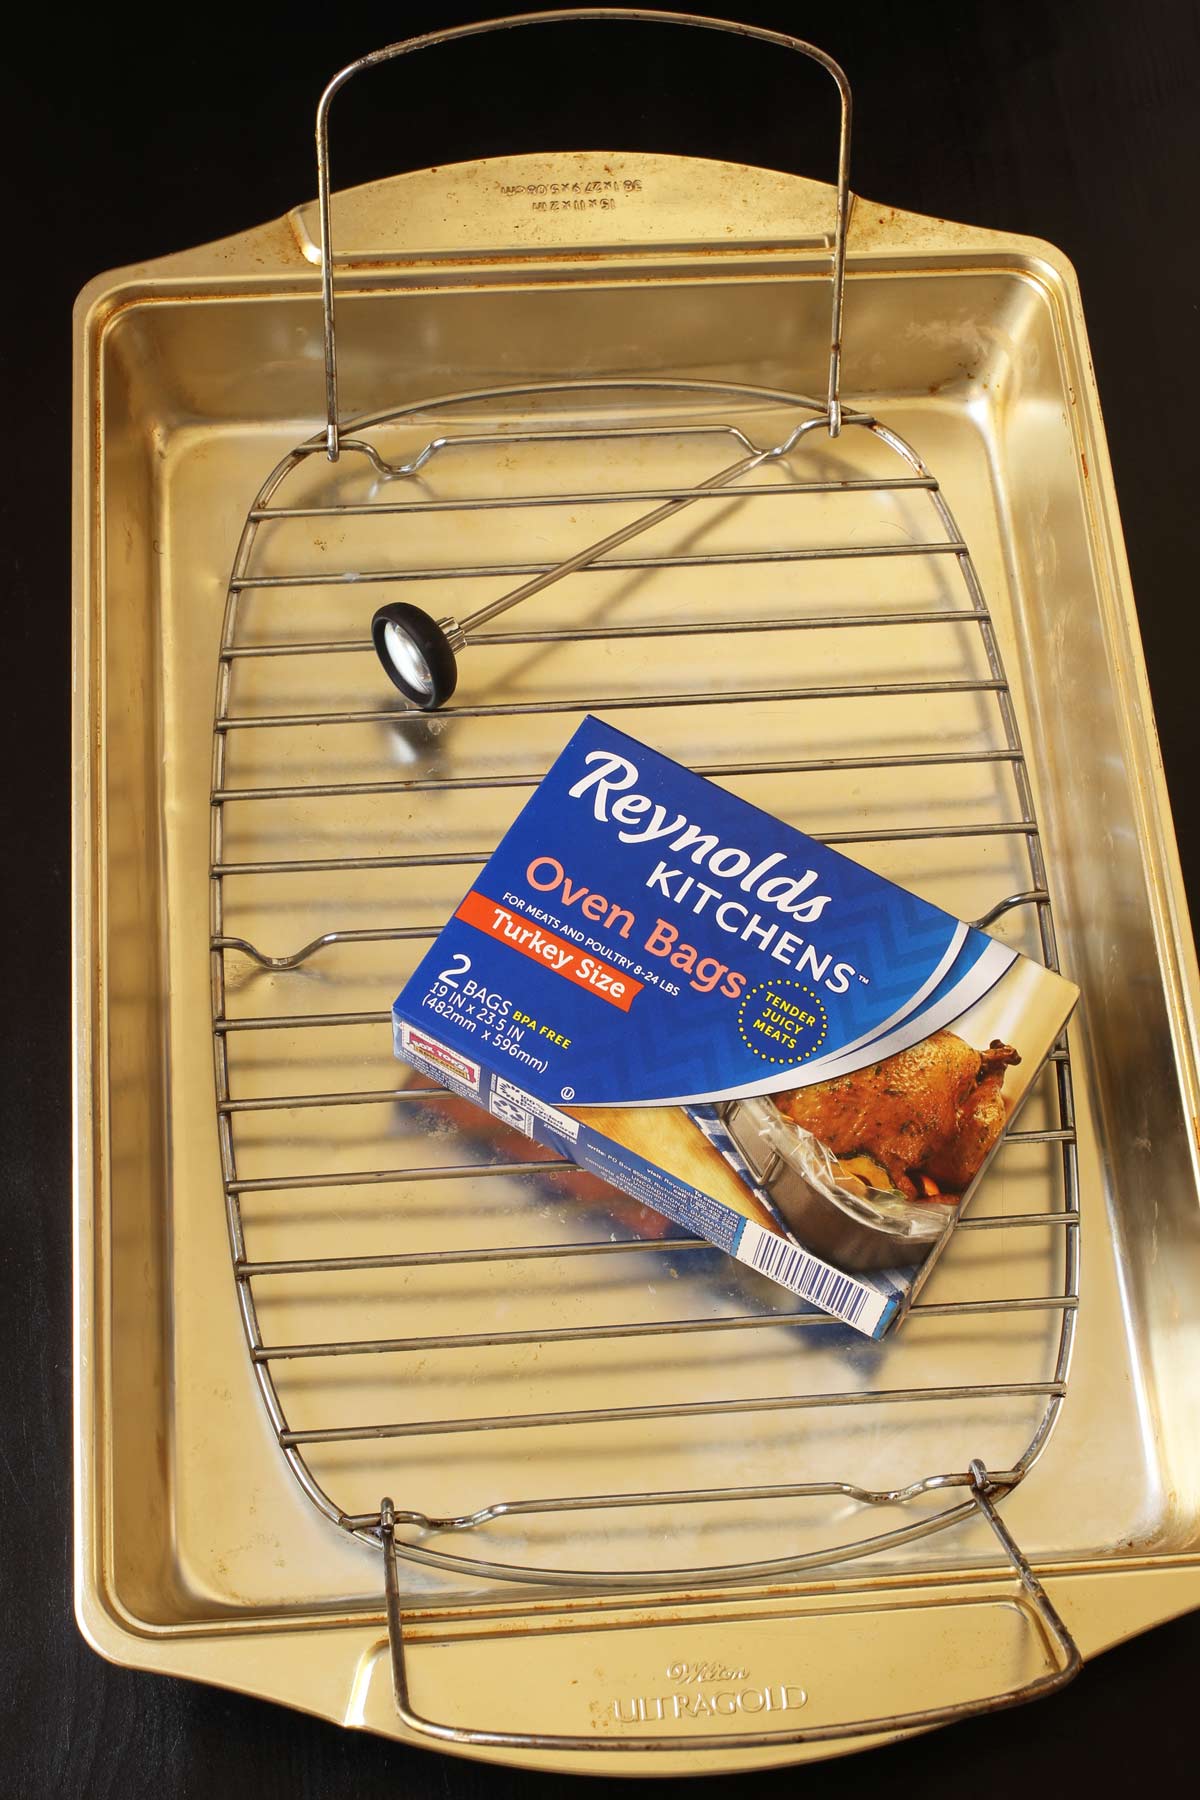
Roasting Pan and rack/lifter – We’re going to cook the turkey in the oven, so we need a roasting pan. You can get a roaster that comes with a removable rack or a standard roasting pan without a rack.
You can buy a turkey lifter separately if you’ve already got a large roasting pan. The turkey lifter is not a necessity, of course, but it will help you avoid flinging turkey all over the kitchen. Ask me how I know.
You can use a disposable aluminum roasting pan, but be sure to stabilize it with a baking sheet underneath.
Turkey bag – I am old school, and I love the turkey size oven bag. It may not be the fancy way, but it works for a foolproof turkey. I use the brand that I buy at the grocery store.
Inevitably, the little silicone tie will go missing. Don’t worry about it. You can use kitchen twine to tie the bag shut or trim off a half-inch off the open end of the bag and use that as a tie.
Instant-read thermometer: Whichever method you choose, you’ll want an instant-read meat thermometer. Testing the internal temperature of the bird is the only truly accurate way to know that it’s been cooked enough. 165 degrees F is ideal.
There’s a small notch in the side of a standard instant-read thermometer. Make sure you’ve inserted it until the notch is covered. You also don’t want to hit bone or an air pocket (like the inside of a whole turkey). You want to measure the temperature of the meat.
Since the dark meat takes longer to cook, you’ll want to measure the temp of the dark meat. If it’s done, the whole bird should be done. Insert the thermometer into the thigh, parallel to the bird. There’s a great explanation of this over at The Kitchn.
Large stock pot or slow cooker – You don’t need this for the turkey, but you’ll want to have this ready for making turkey stock afterward. Likewise, make a note to have your turkey stock ingredients ready.
Step-by-Step Instructions
Some forethought is necessary in getting the bird to table. Read through these steps in enough advance time to complete them.
Thaw the turkey in advance.
A turkey will cook best if it’s not frozen. While there are methods out there for cooking a frozen turkey, thawing ensures that your turkey will cook in a reasonable amount of time.
For ultimate food safety, thaw the turkey in the refrigerator in a pan to catch the drips. I knew a lady whose turkey dripped all over her pumpkin pies. Ewww. Make sure you place it in a pan to catch drops.
Allow sufficient time for thawing, about 6 hours per pound. Hop on over to the Butterball site for a nifty thawing calculator.
Yes, you can quick thaw it in a sink of cold, runnning water. But, seriously, who wants to mess with that?
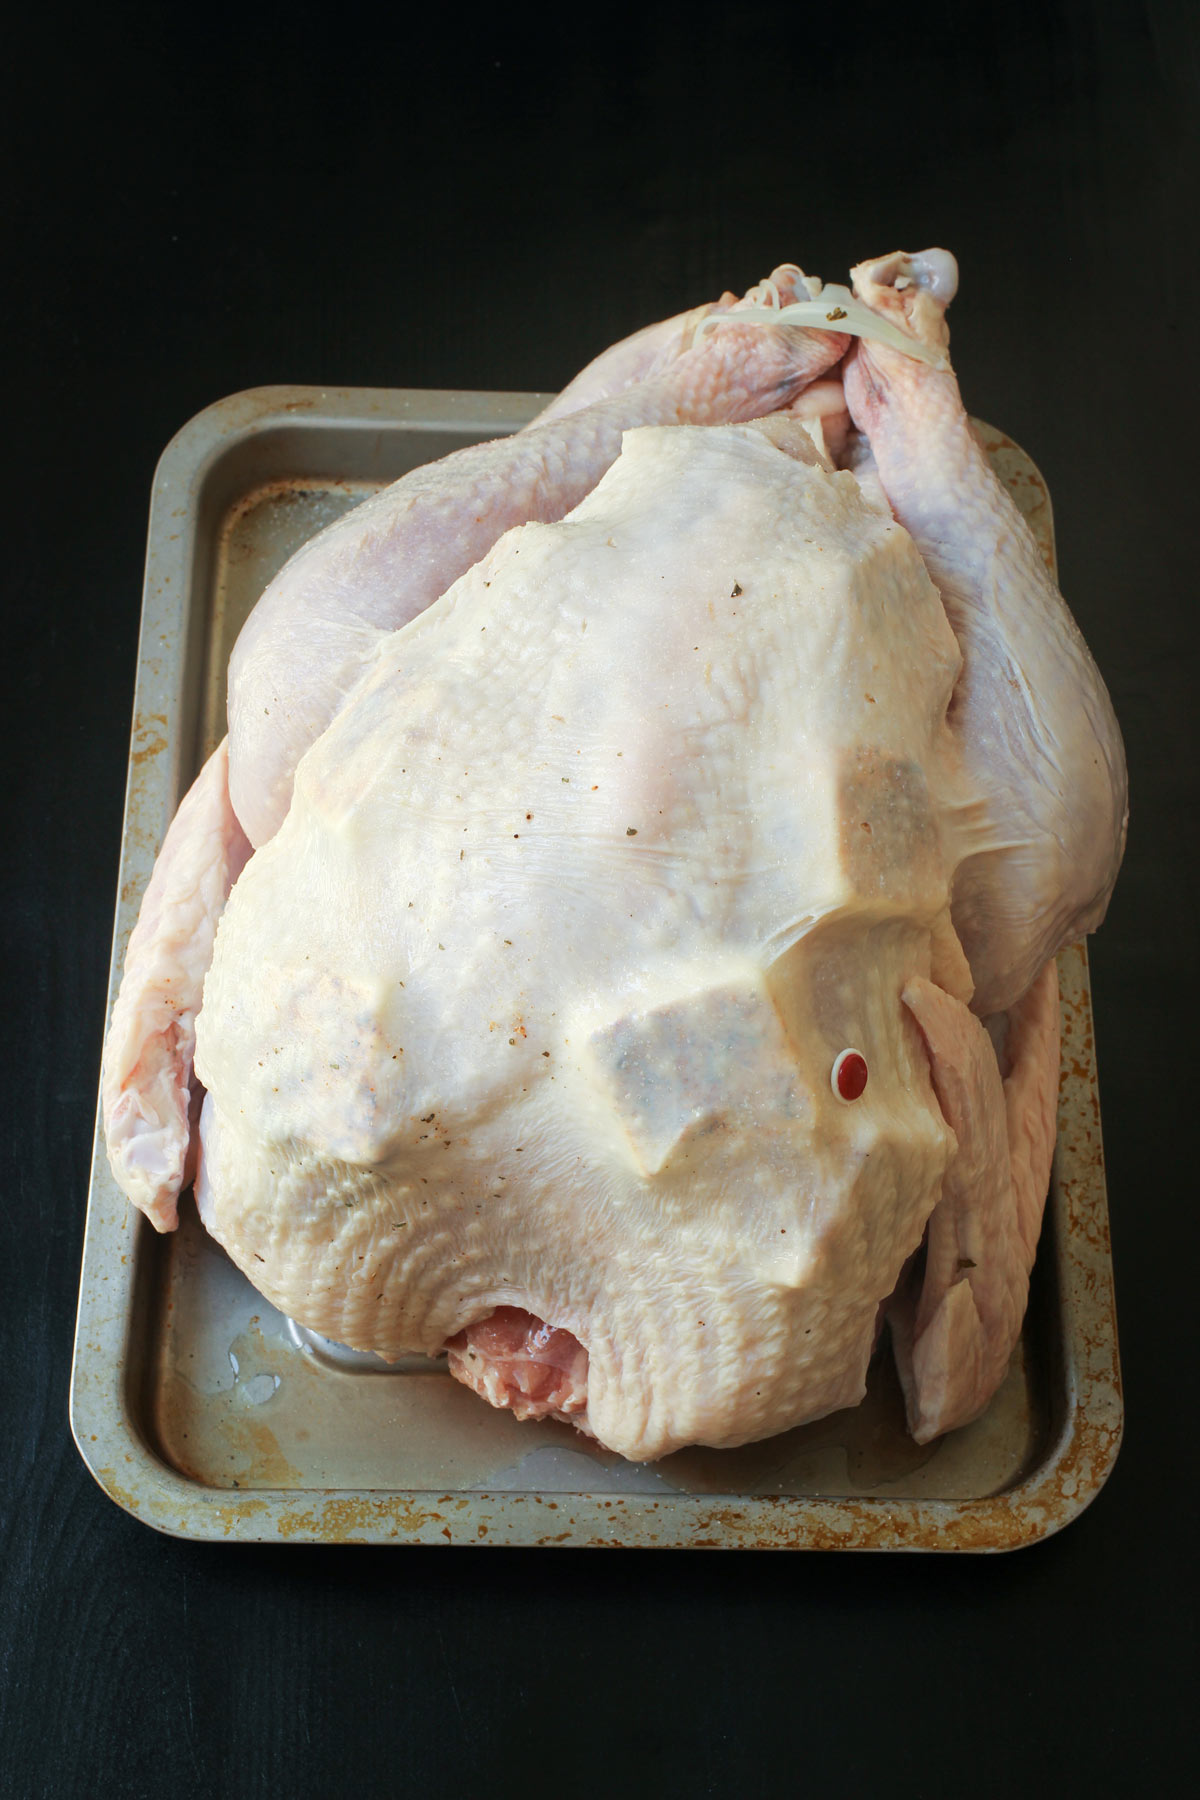
Remove the turkey from the wrappings.
In the old days it was considered standard practice to rinse the turkey prior to cooking. Due to cross contamination concerns, the USDA now advises against washing poultry.
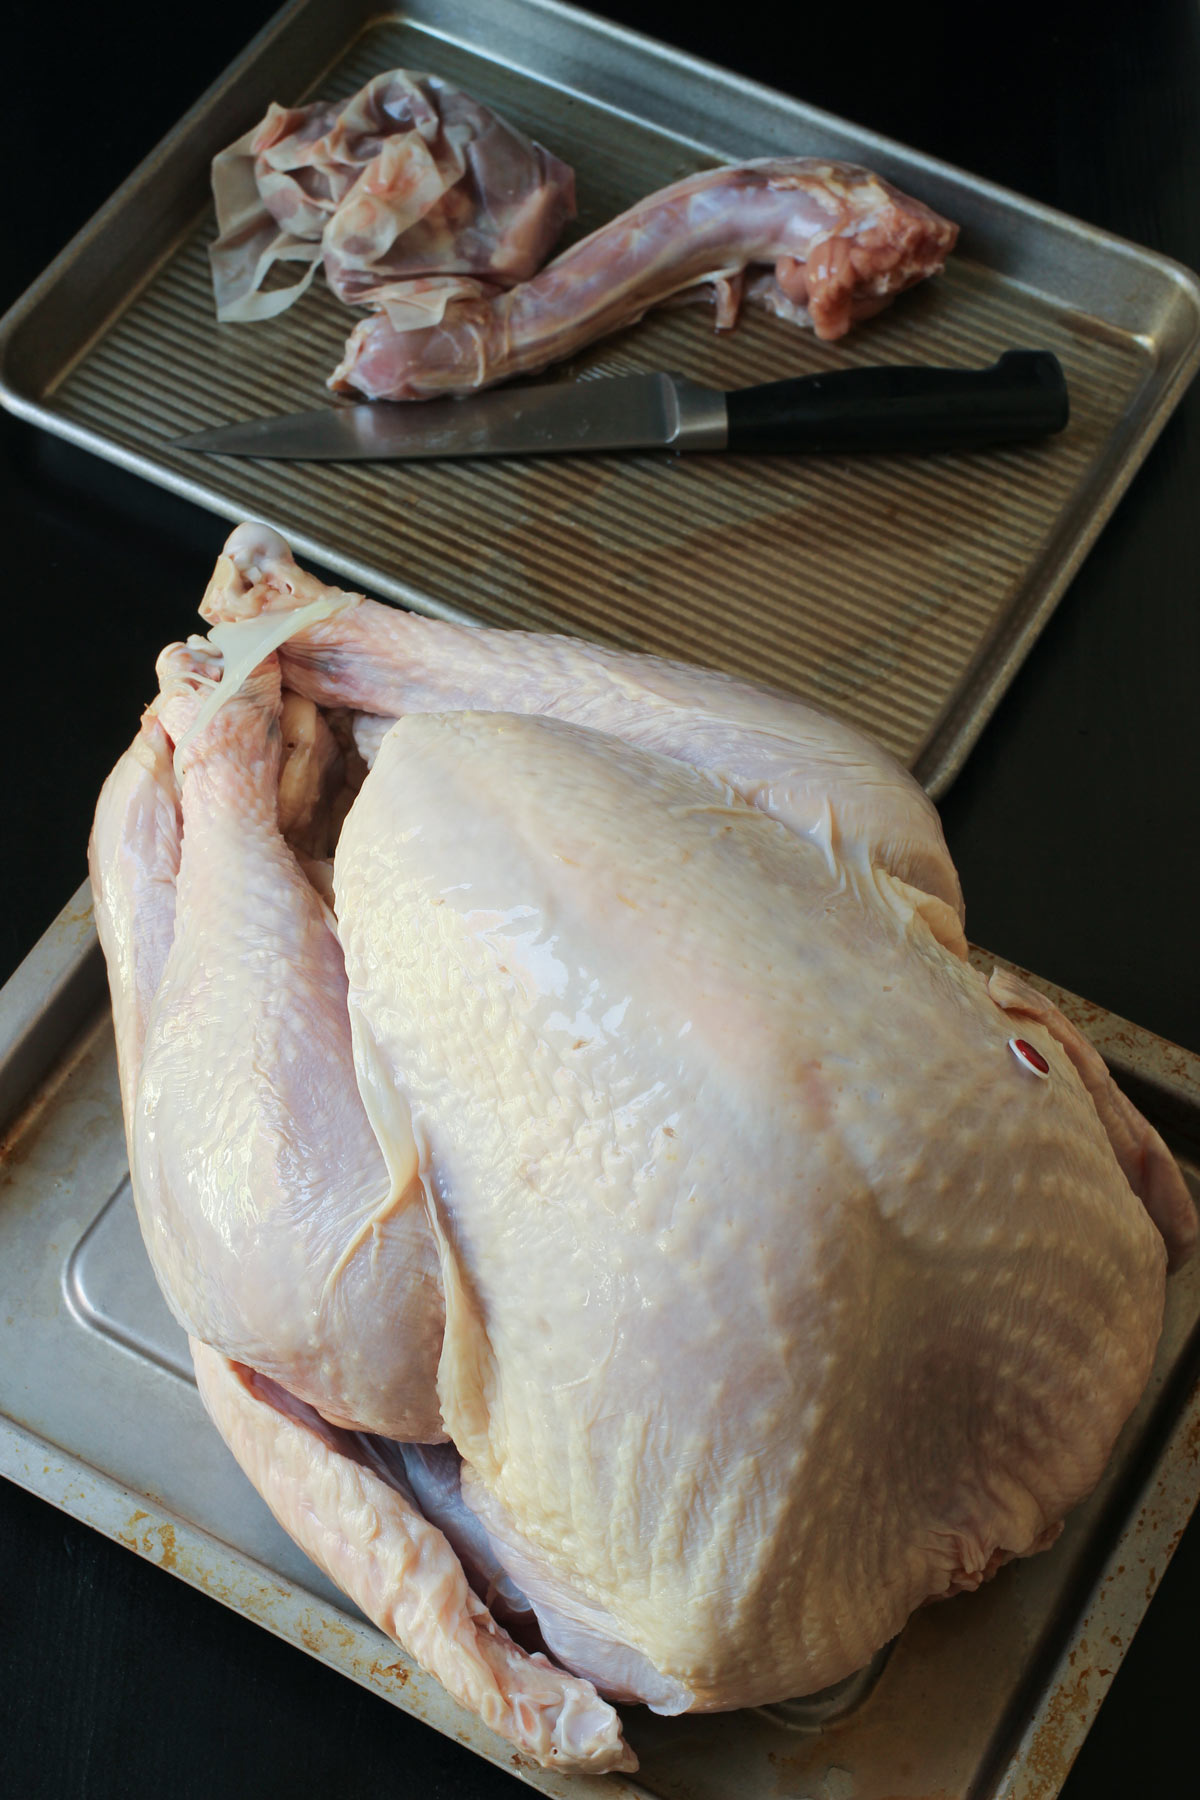
Instead, remove the turkey to a tray, discarding the wrappings. There will be a fair amount of juices in the wrappings, so have the trash can nearby and be sure to wash your hands and any surfaces that come in contact with raw juices.
You will also need to pull out the bag of giblets and the neck from inside the bird. These are often in two separate ends of the turkey. Don’t ask me why.
And yes, you’ll be fine touching the guts. No big deal. You can discard them or cook them to use in broth, gravy, and stuffing.
Season the turkey.
There are a range of seasoning options. I am pretty lazy most of the time because I count on the gravy to add zest to the plate. I use my Homemade Seasoned Salt, but you can use your favorite spice mix if you prefer.
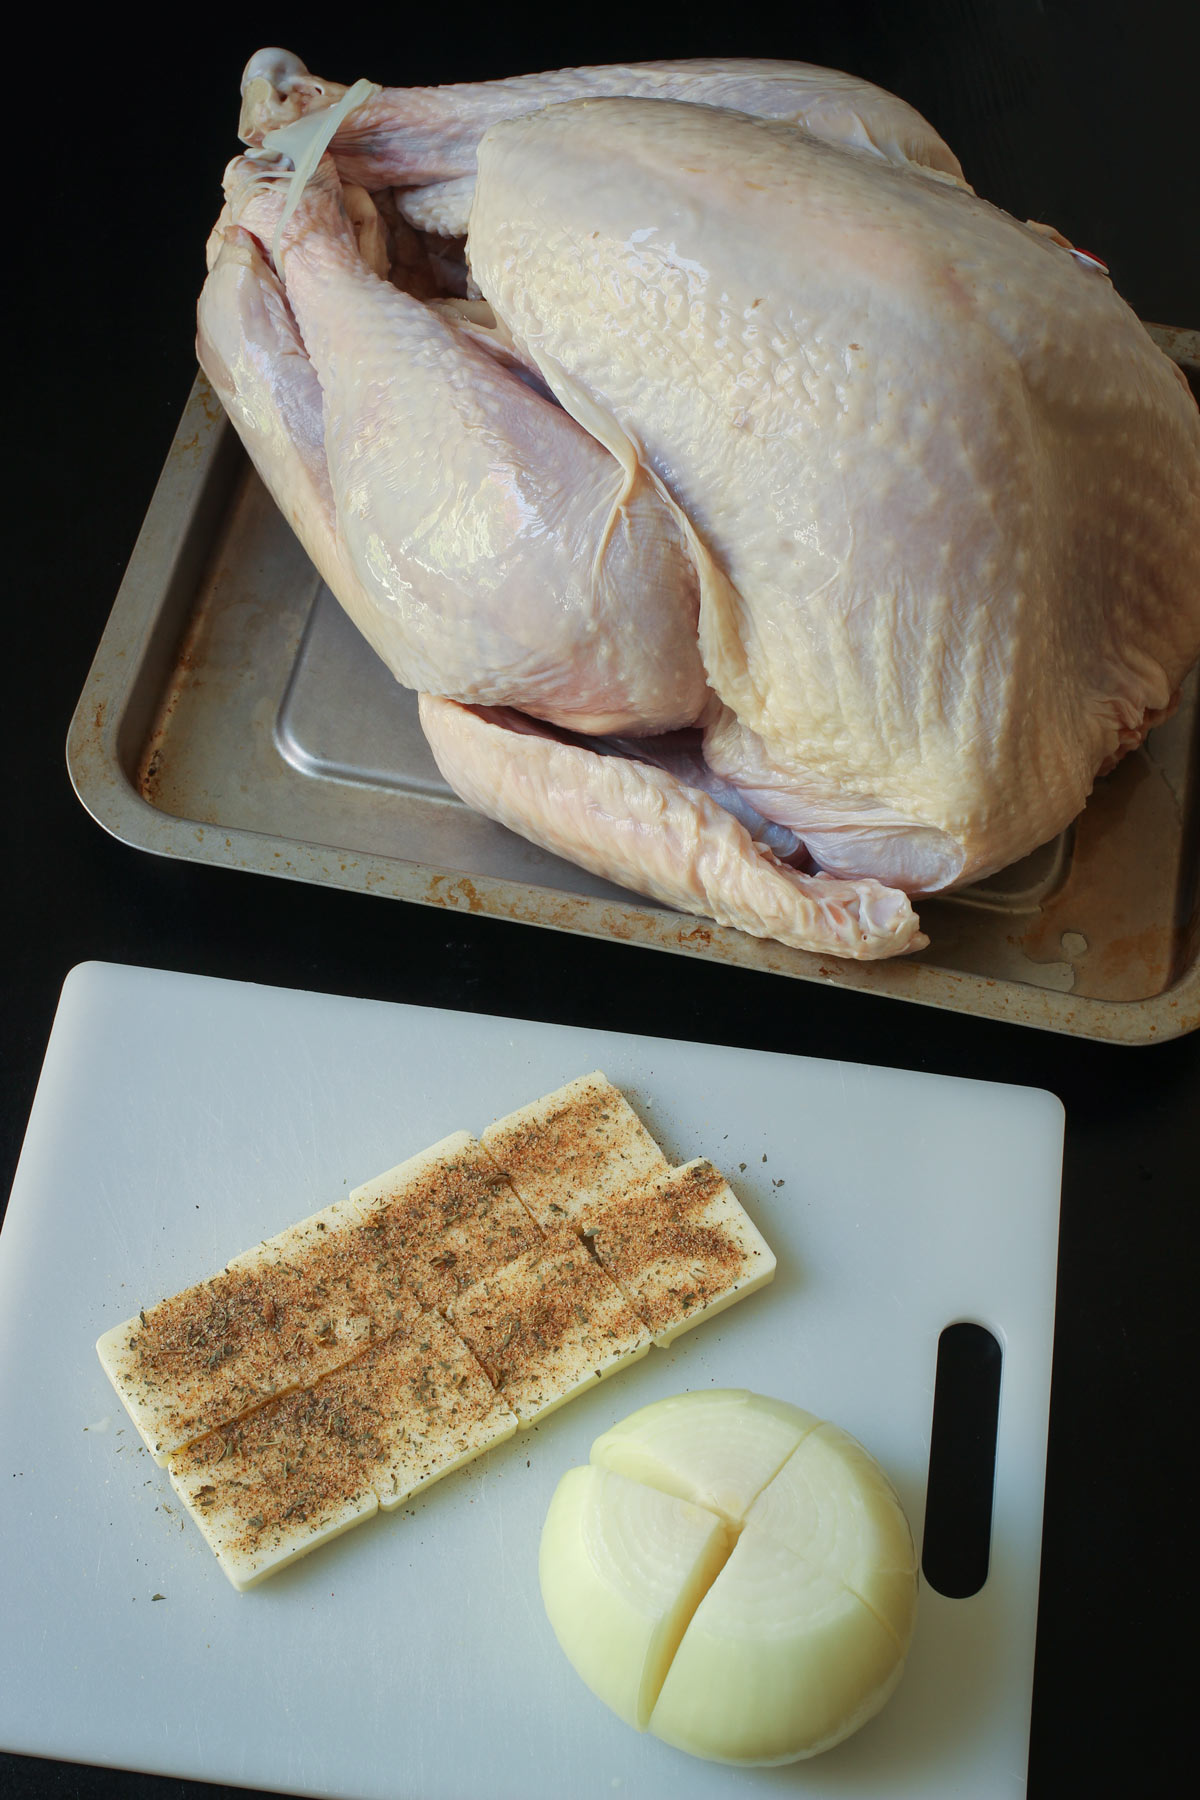
Many recipes will call for mixing the seasoning and herbs with soft butter and then spreading this all over the turkey. I prefer to take a little short cut, like I do with my roast chicken. It’s a lot less messy!
Cut the butter into thin slices. Season the slices generously with seasoning mix and slip the seasoned butter pats under the skin. This is much easier and way less messy.
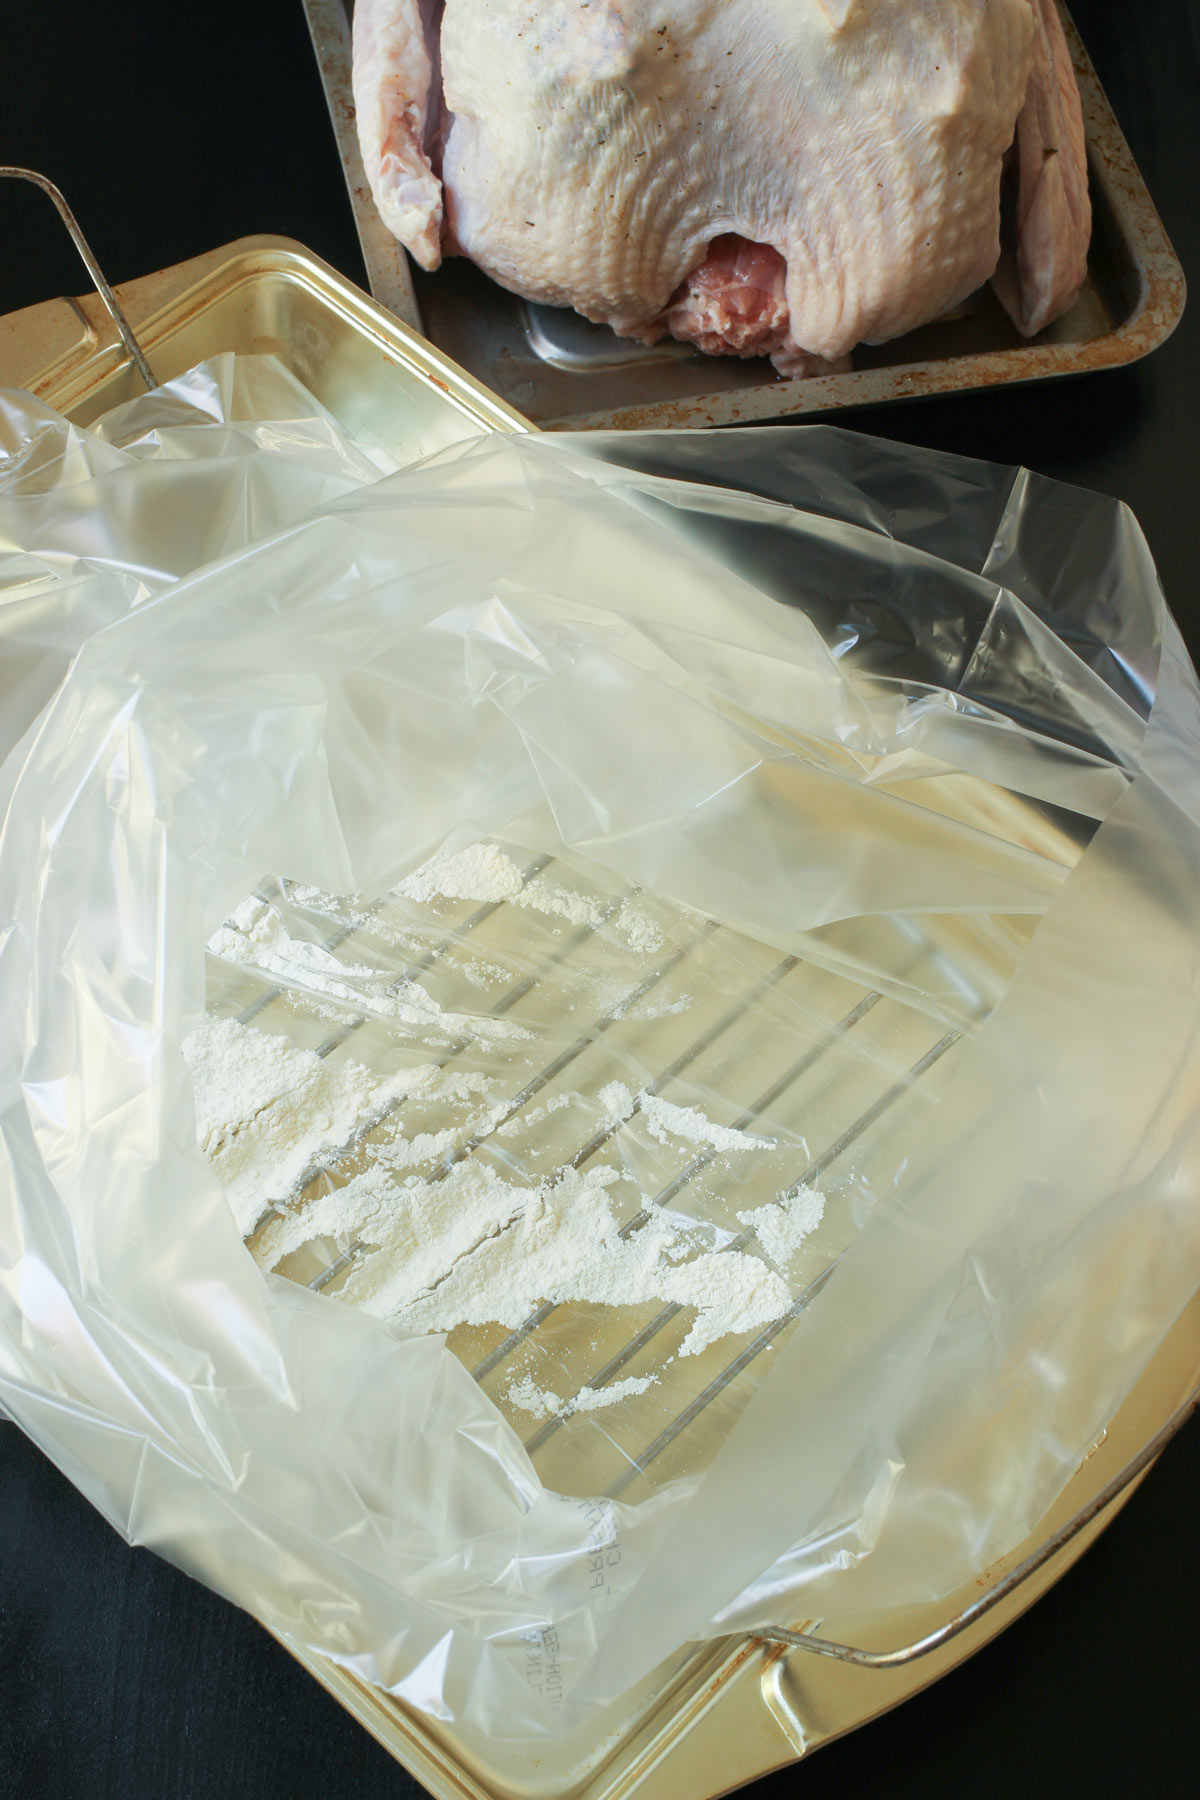
Place the turkey in the oven bag.
Place the turkey rack in the roasting pan. Place the turkey bag on the rack. Add 1 tablespoon flour to the bag. This is to prevent the bag from bursting.
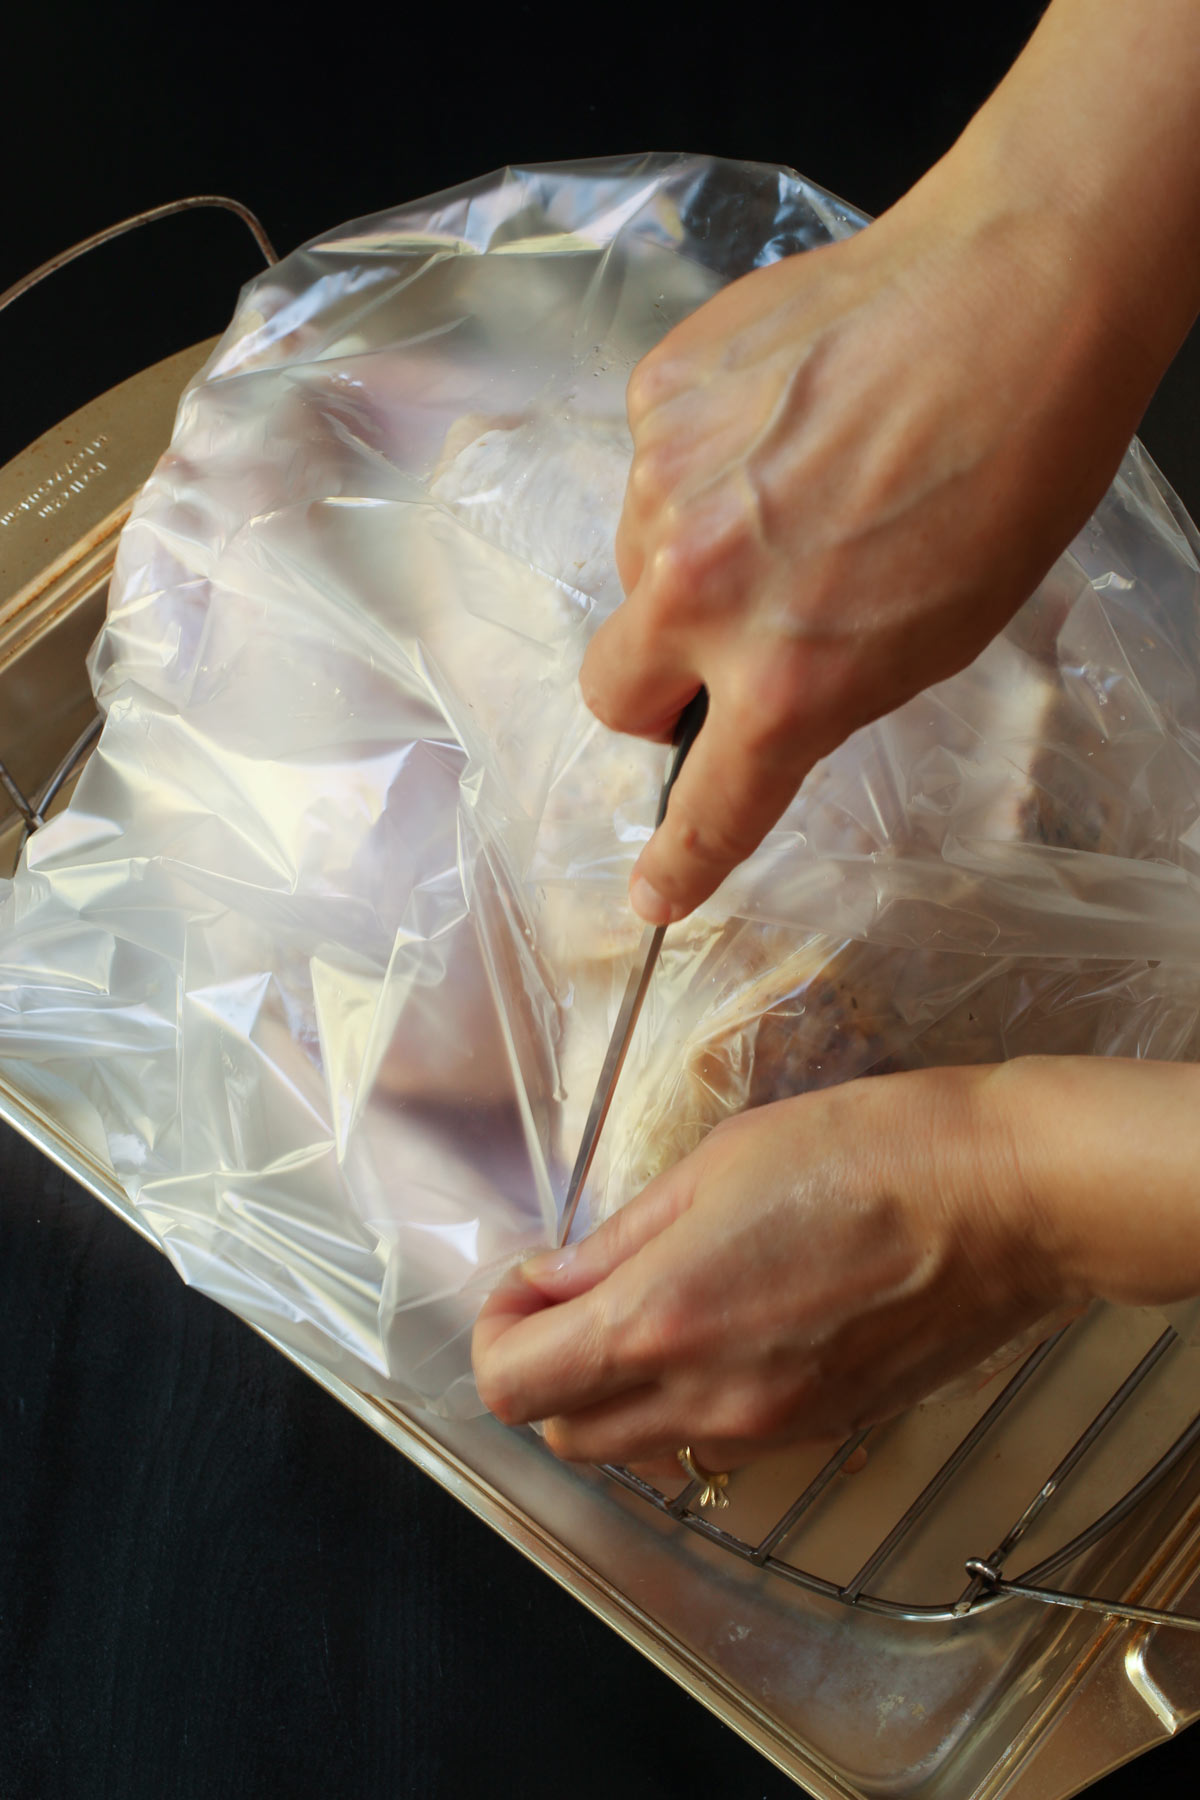
Place the turkey in the bag, adding the onions to the cavity. Tie the bag closed and cut six slits in the bag to allow air to escape.
Now place the roasting pan in the oven and set a timer, according to the chart in the box of bags. An 8 to 12 pound turkey should take about two hours, while a larger bird can take up to three hours.
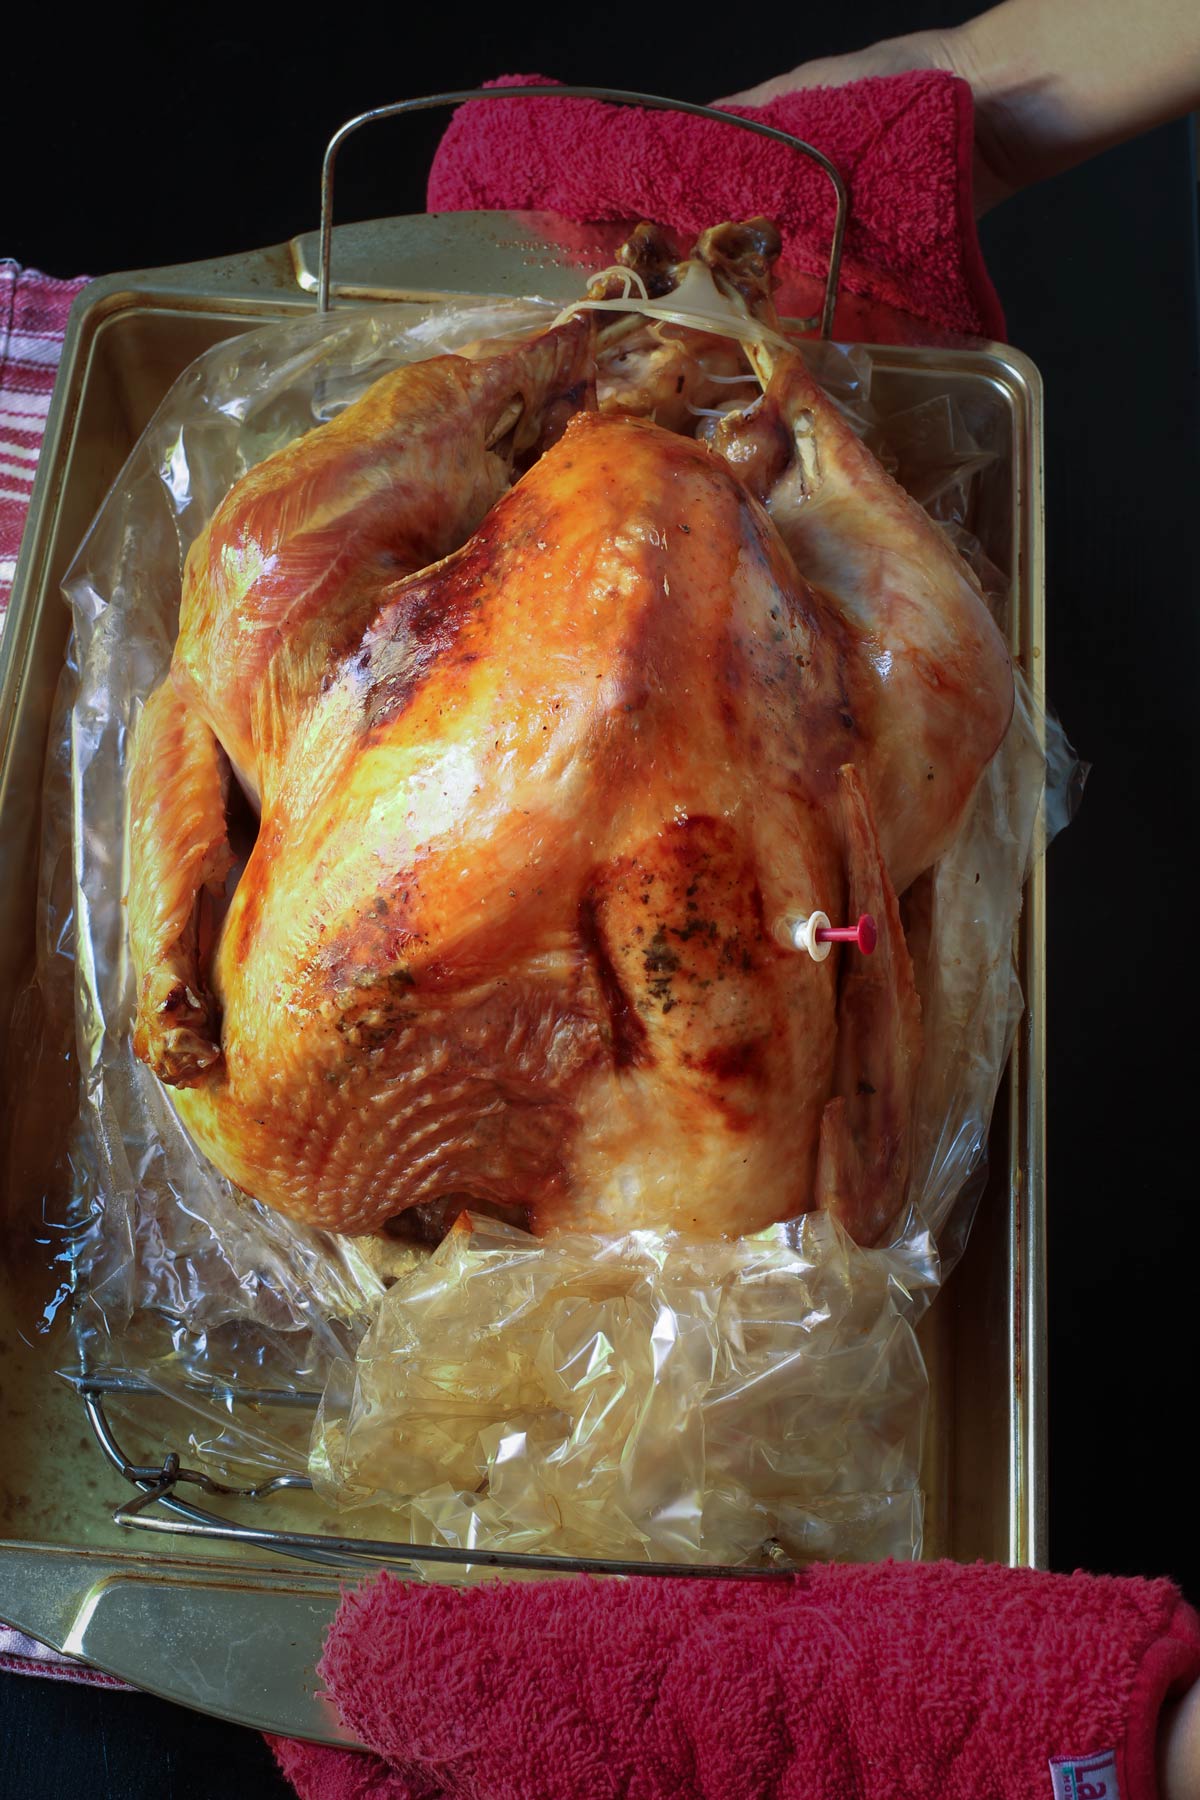
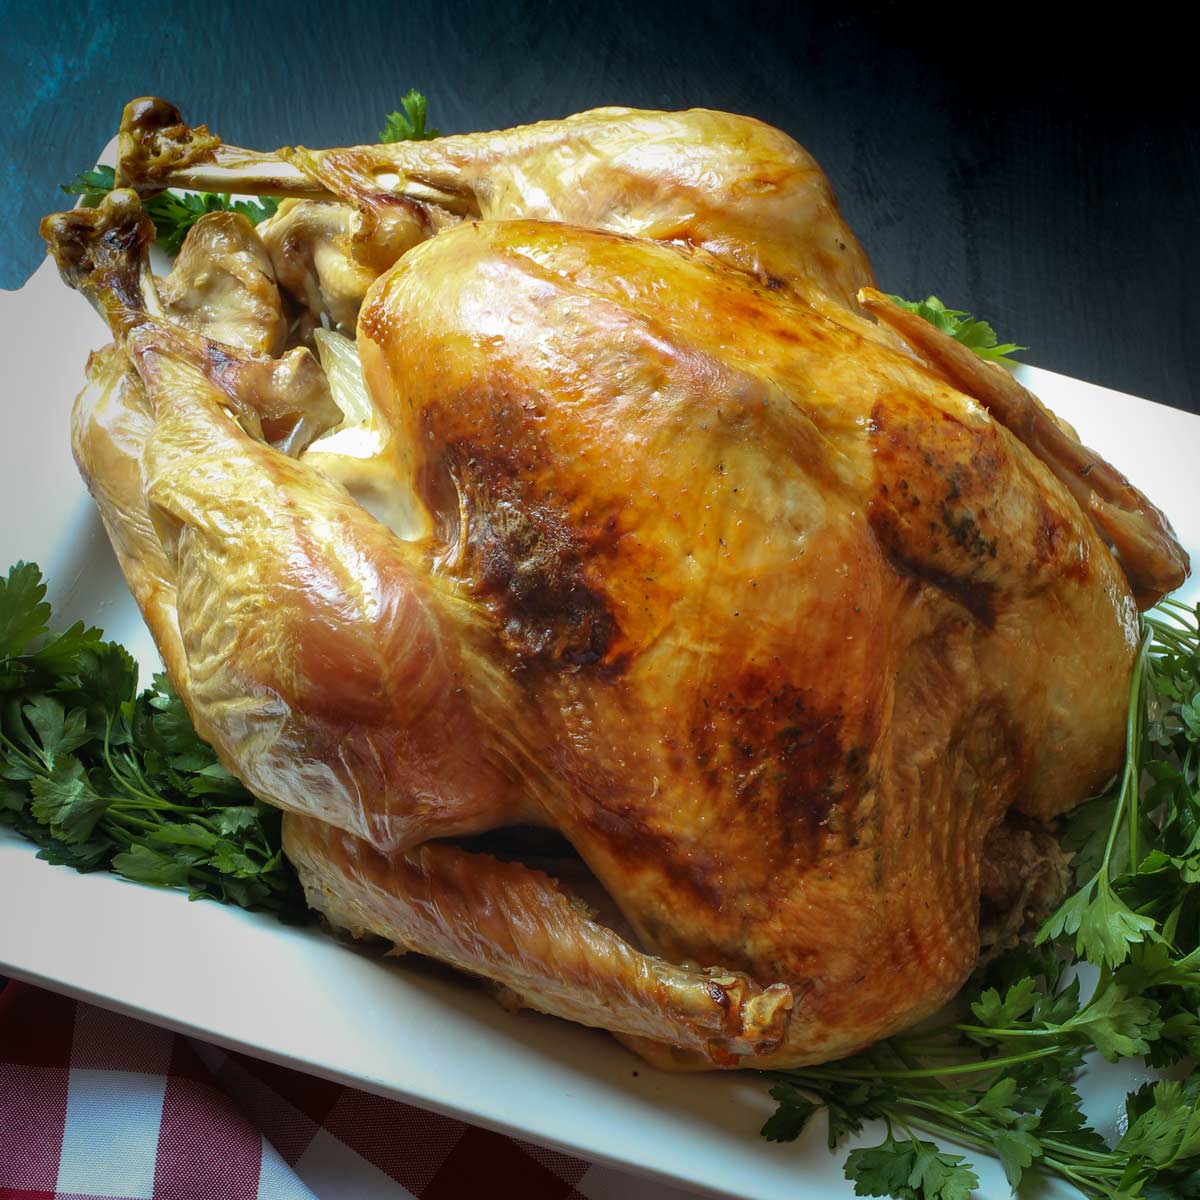
Remove the turkey from the bag.
Your turkey should look beautifully golden brown. Carefully cut the oven bag open and remove it from around the turkey. It will be full of delicious drippings.
Careful not to burn yourself, move the bag around so that the drippings pour into the pan. Using the turkey lifter, remove the turkey from the pan to a platter or carving surface and discard the bag.
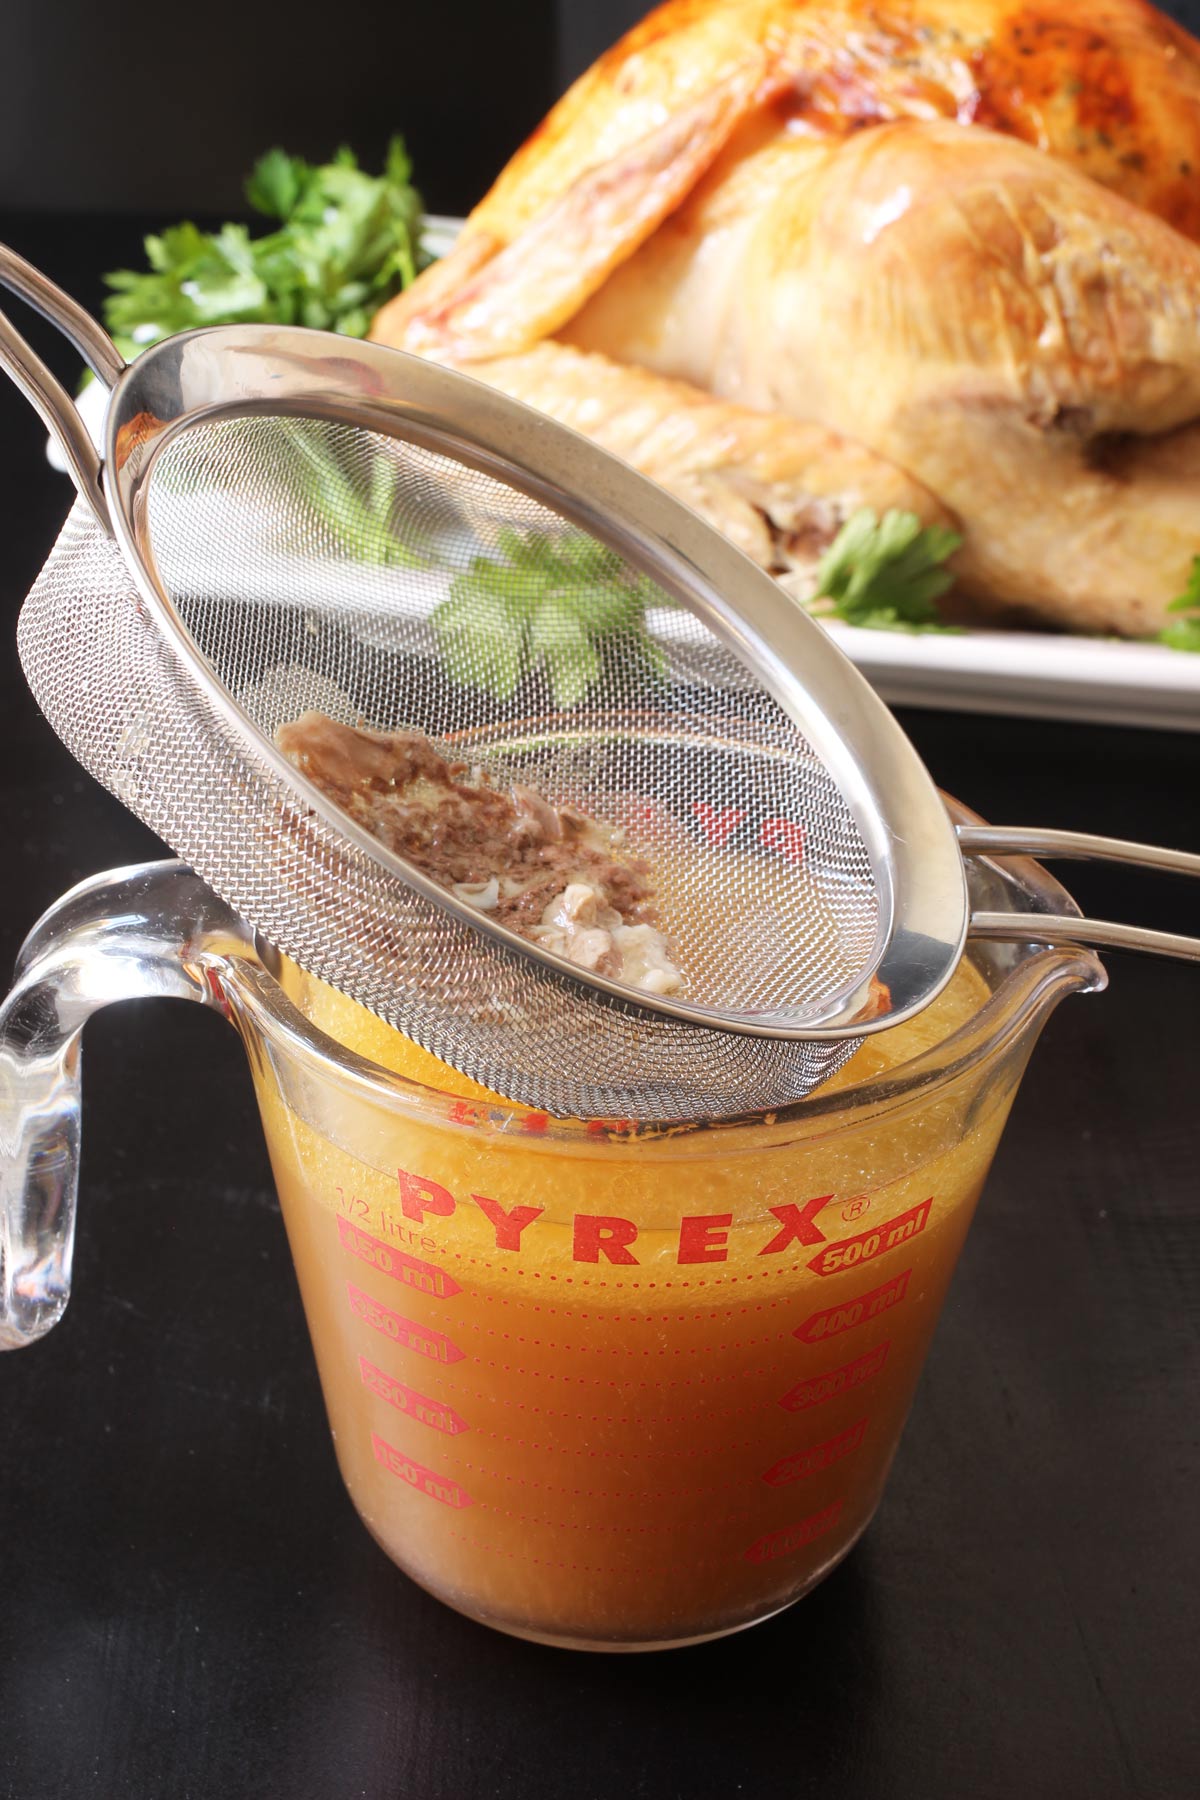
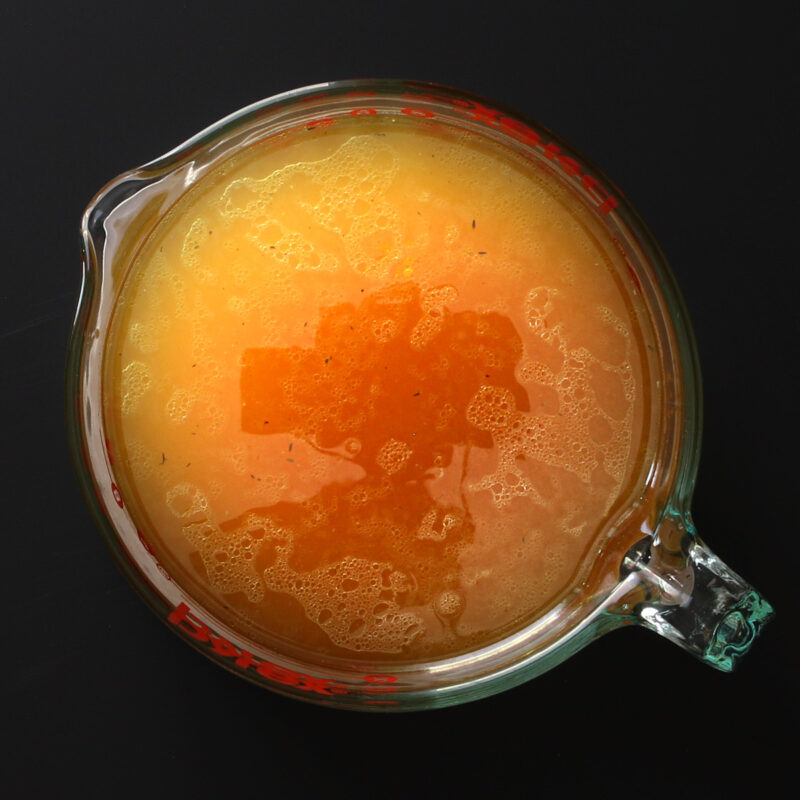
Strain the drippings and make gravy.
While the turkey is resting, you can finish off your other dishes as well as whip up some gravy.
Those juices in the bottom of the roasting pan? Those are liquid gold! Strain those into a glass measuring cup. The fat will rise to the top. You can skim this off or use it as a substitute for butter in your gravy recipe. Use the drippings as a replacement for the stock in the recipe.
If you don’t want to make gravy, save the drippings to add to soup and stock. So good!
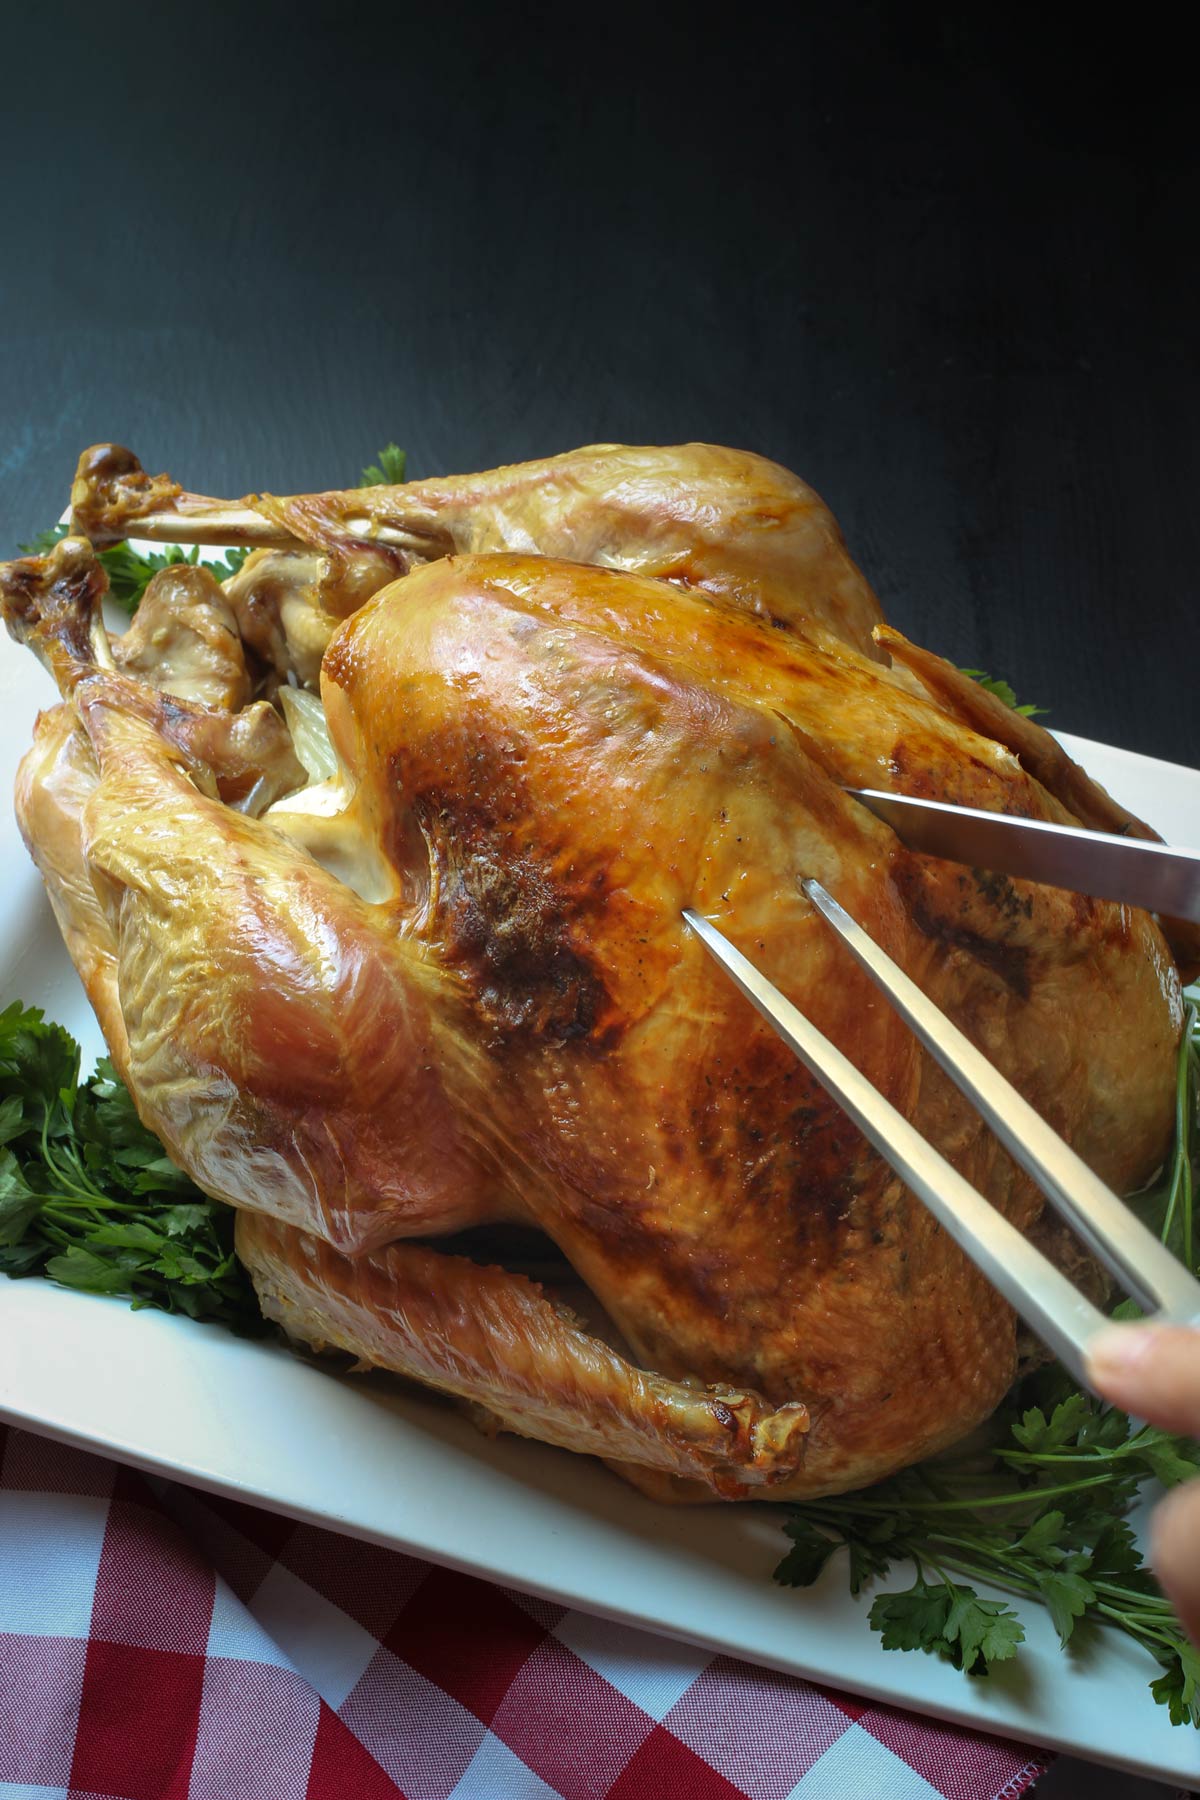
Carve the turkey.
Carving is a lost art. The men of Jane Austen’s time were raised to know how to carve the bird, the joint, and whatever big hunk of meat was served à table. Today, not so much.
It takes some practice to make it look good, so don’t feel bad about carving the turkey in the kitchen where no one can see you. Read my tutorial for how to carve a chicken. The same process works on turkeys.
Enjoy your meal, but don’t forget the the turkey leftovers!
Tips for Success
Make sure you’ve got room in your oven.
Unless you have a large oven or more than one oven, you’re going to need to make sure that the other hot dishes you plan to serve have adequate time to cook. Everyone wants some of that hot real estate, so plan accordingly.
Your turkey will need to rest for 30 to 40 minutes, so that should give you time to get the other hot things hot. If need be, arrange to use a toaster oven or crockpots to keep things warm.
Make sure your turkey’s cooked.
The best way to calculate the doneness of a bird is to measure the internal temperature. The USDA says 165° is safe. There is a chart inside the box of roasting bags for estimated roasting times.
FAQs
Turkey can be cooked in advance and either refrigerated or frozen for longer storage. Cook and carve the turkey, divide it into portions and drizzle a bit of the drippings over top to keep it from drying out. Wrap well and store in the fridge for up to 2 days. Once chilled completely it can be transferred to the freezer.
Sometimes a turkey comes trussed with cooking twine or even oven-safe plastic. Typically these are oven-safe. Read the packaging to verify.
There are varying opinions about cooking the turkey breast side up or breast side down. The former achieves a golden brown skin, the latter reduces the chances of the breast meat drying out. Some say to do both, flipping the bird halfway through to brown the skin. If yours is a very large bird, it may get tricky flipping the turkey halfway through in order to brown the skin. Using an oven bag eliminates the debate as it keeps the turkey tender while also browning the skin.
Dealing with Leftovers
Remove the meat from the bones.
Package any leftover meat, either to freeze or to eat later, within 2 hours of cooking to preserve food safety. Since you will probably feel too lazy to do it later, I recommend, trimming it from the bones, and chopping or slicing the cooked meat right away.
You’ll be glad you did when you go to mix up a Turkey Pot Pie or an Enchilada Casserole!
You can use the cooked meat over the next three days, storing it in the fridge in the meantime, or stash it in the freezer, wrapped and labeled, for another time. Head here for some great Leftover Turkey Recipes That Will Wow You.
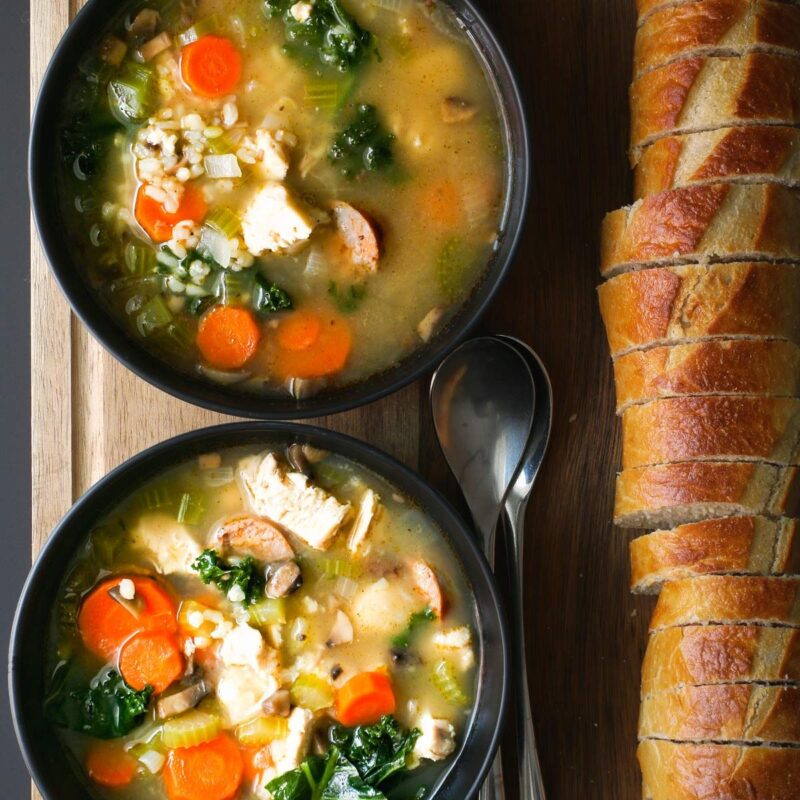
Make stock with the bones, etc.
Toss any bones, skin, drippings, or other turkeyish stuff that you have left and make turkey stock. The bones are full of flavor and nutrients that will go into the stock for fortifying soups and sauces later.
Do it right away so that you will feel extra productive when the meal is finished and you’re enjoying a second slice of pumpkin pie.
Recipes to Use Up Turkey Leftovers

Tell us what you think!
We love to hear your experiences with Good Cheap Eats. Click the STARS on the recipe card or leave a STARRED comment to let us know what you think of the recipe.
How to Cook a Turkey
Equipment
- roasting pan
- roasting rack
- instant read thermometer
- turkey size oven bag
- boning knife
- carving fork
- large serving platter
Ingredients
- 1 tablespoon unbleached, all-purpose flour can also use gluten-free blend or cornstarch
- 18 lb whole turkey size will vary depending on your needs
- ½ cup butter sliced into 8 slices
- 1 tablespoon Homemade Seasoned Salt
- 1 onion quartered
- salt and pepper
Instructions
- Preheat the oven to 350 degrees. Place a turkey size oven bag in a roasting pan lined with a rack. Place the flour inside the bag.
- Remove the turkey from the wrappings and place on a rimmed pan.
- Season the butter pats generously with the seasoning salt. Slide the butter pats under the turkey skin, distributing them evenly around the turkey.
- Season the outside of the bird generously with salt and pepper. Place the onion pieces inside the turkey cavity.
- Place the turkey inside the prepared bag. Tie it shut with the enclosed silicone zip tie. Tuck the corners of the bag into the roasting pan.
- Place the roasting pan into the heated oven and bake for several hours, according to the size of the turkey. Consult the time chart included with the oven bag. The turkey's internal temperature should be 165 degrees F.
- Remove the turkey from the oven. Slice open the bag and remove the turkey to a serving platter or carving surface. Allow to rest at least 30 minutes.
- Any drippings remaining in the bag or roasting pan are delicious for gravy, soups, and stocks. Drain and use for these purposes.
- Carve the turkey and serve.
Notes
Nutrition
This post was originally published in November 2011. It has been updated for content and clarity.

Paula
The turkey came out flavorful and delicious. I’ve made turkey many years, but wanted to try this recipe this year. A big thanks!
Jessica Fisher
Yay! So glad it was a success for you!
Carol
Made a turkey just this way last night. ( We like turkey and will be going away for the holiday.) It came out great. I really like using those oven bags!
Jessica Fisher
Glad you liked it!
Sandi
Cook it breast side down for some really moist and juicy white meat. If you want the breast skin to be browned, simply flip the bird over for the final half hour. It makes a world of difference.
Meagan
This is the first year I have ever roasted a turkey- both for Thanksgiving and Christmas and I was very surprised at how easy and delicious it was! I brined my turkeys overnight in a solution of water, sugar, salt, soy sauce, and herbs. When it was time to cook, I rinsed and dried the bird, stuffed a quartered onion, a halved head of garlic and bay leaves inside the cavity and rubbed the outside of the bird with butter. Because the bird had been brined, I didn’t have to baste it so I got to hang out with my family while the bird roasted in the oven. Only problem is there weren’t many leftovers so next time I will buy a bigger turkey! I really think brining is the key to a delicious bird. It’s super easy to do, but you just have to find room in your fridge to do it.
Janel
Thanks for the tips. Technically, I did make a turkey once…but that was at least 7 years ago. I think that was the year that you moved to Kansas. I sent Aimee the link so we will both know what we are doing!
Becki
This is my third time to cook a turkey in almost 20 years of marriage. We moved away from all our family due to my husband’s job and once the kids entered school it was too hard to fly back for the holiday. So I started making the entire dinner myself a few years ago (the first year we went with ham!).
Last year I made our turkey in a roaster oven and it was great. It freed up my oven for all the other dishes and it seemed easier to work with as it was all “counter level” rather than bending down to put the heavy bird in the oven.
Thanks for your post as I still consider myself a “newbie” on turkey. I will be checking out several of your links!
AllieZirkle
Paper towels!!! This is the one time I surely stock paper towels. Once you rinse the turkey, you’ll need to pat it dry. And when you clean up the sick and surrounding surfaces? You’ll want paper towels on hand for this too! Oh, and once you’ve pulled out the turkey to rest and you’re ready to carve the beauty, you’ll want paper towels ready to wipe hands on. There is nothing worse than wiping greasy, turkey hands on a gorgeous apron, and smelling like meat for another hour (unless the Mr. like that scent? 🙂 ).
Allie
Jessica
Great point! I do get pretty messy! We also carve the bird on a cutting board set inside a rimmed baking sheet. That catches the drips.
Ann
My best tip is to have a large crockpot ready when you are cleaning up from Thanksgiving. Cut up the carcass to fit in the crockpot and put in carrots/onions/celery/seasoning that you prepared ahead of time, add water to cover and then close up the crockpot and cook on low overnight. This way, when you wake up in the morning, have had your cup of coffee and feel less overwhelmed, your stock is ready!! No need to babysit a pot on the stove!! Just strain it, pick out the useable meat and either freeze the stock and turkey meat or else serve turkey soup for lunch or dinner that night!
LOL – Just looked at the video you had on making stock and you have the same idea!! 🙂 I find it just makes Thanksgiving dinner clean-up that much easier!
Jessica
Great minds. 🙂