

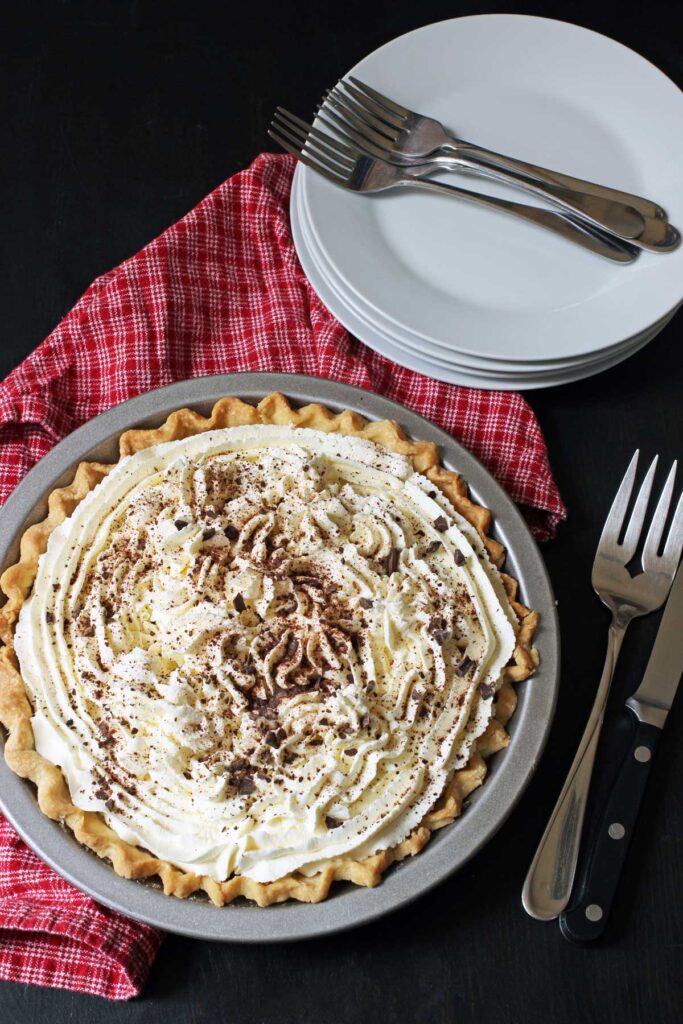
Ditch the frozen pie crust and boxed pudding mixes. You can make a Homemade Chocolate Cream Pie without breaking the bank! With sugar, cocoa powder, milk, chocolate chips, and a few other baking staples, you can easily pull off this tasty treat.
One of our favorite Homemade Pies, this chocolate cream concoction is delicious alongside a cup of tea or French Press Cold Brew Coffee for a delicious dessert. It’s a delicious recipe for using a lot of milk.

Want to save this post?
Enter your email below and get it sent straight to your inbox. Plus, I’ll send you budget recipes and money-saving tips every week!
OK, who’s ready for dessert? I am a big believer in homemade pies. Homemade pie crust. Homemade filling. Homemade whipped cream. Chocolate whipped cream if you want to be a little extra.
Sure, it’s easy enough to buy a few cans and boxes of stuff from the store and throw together an “almost homemade” pie, but that really can’t compete with the real thing.
The beauty of homemade pies is that they are not terribly difficult to make and they taste SO much better than anything store bought.
Don’t even get me started on the pies in the grocery store bakery. You deserve better, baby.

Different kinds of pie
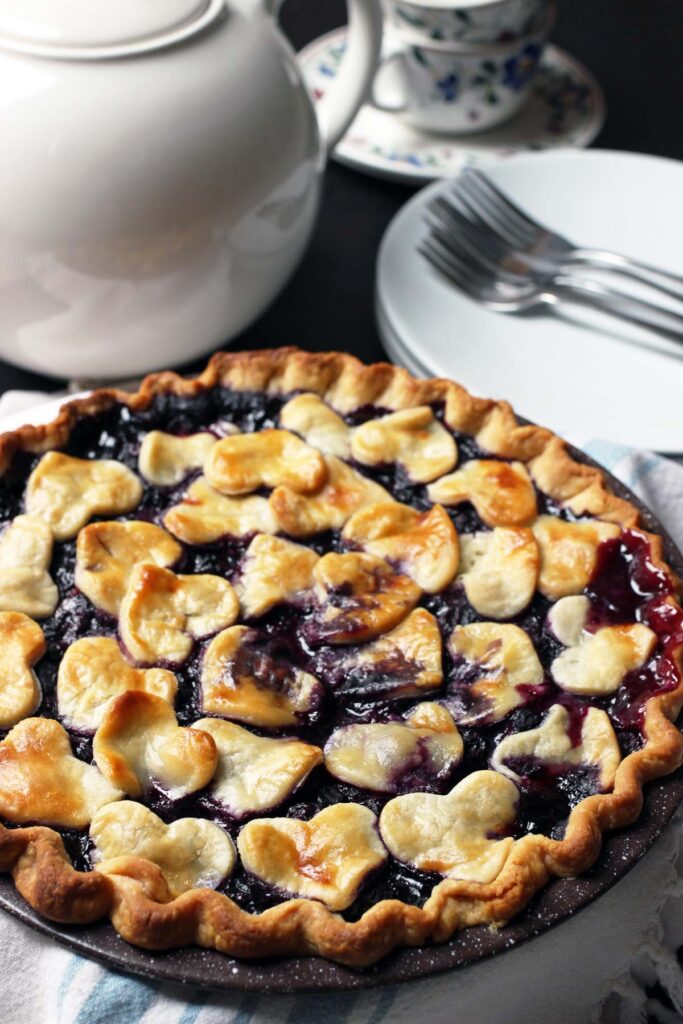
There are a few basic categories of pies: fruit, custard, ice cream, and pudding. All of them as delicious as they are easy to make.
Fruit pies are basically fresh (or frozen or canned) fruit combined with sugar and spices tumbled into an unbaked pie shell. Typically you might use berries, cherries, apples, or peaches. You can top with another layer of pie dough or a streusel topping.
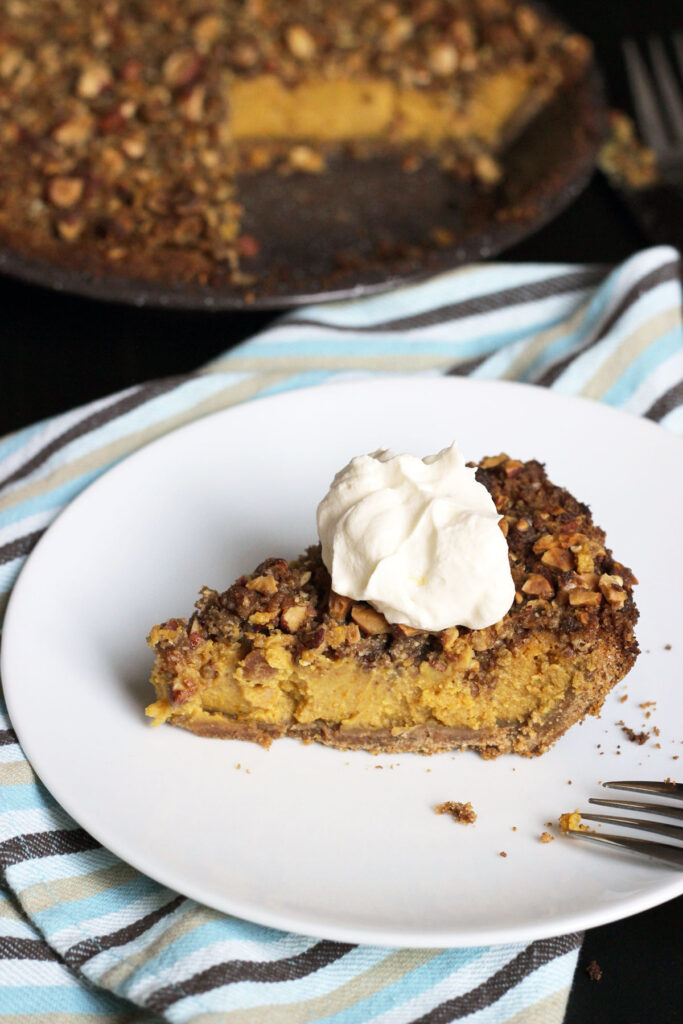
Custard pies, like pumpkin or buttermilk chess, involve a creamy mixture baked into a pie shell. This Streusel-Topped Pumpkin Pie is the bomb.
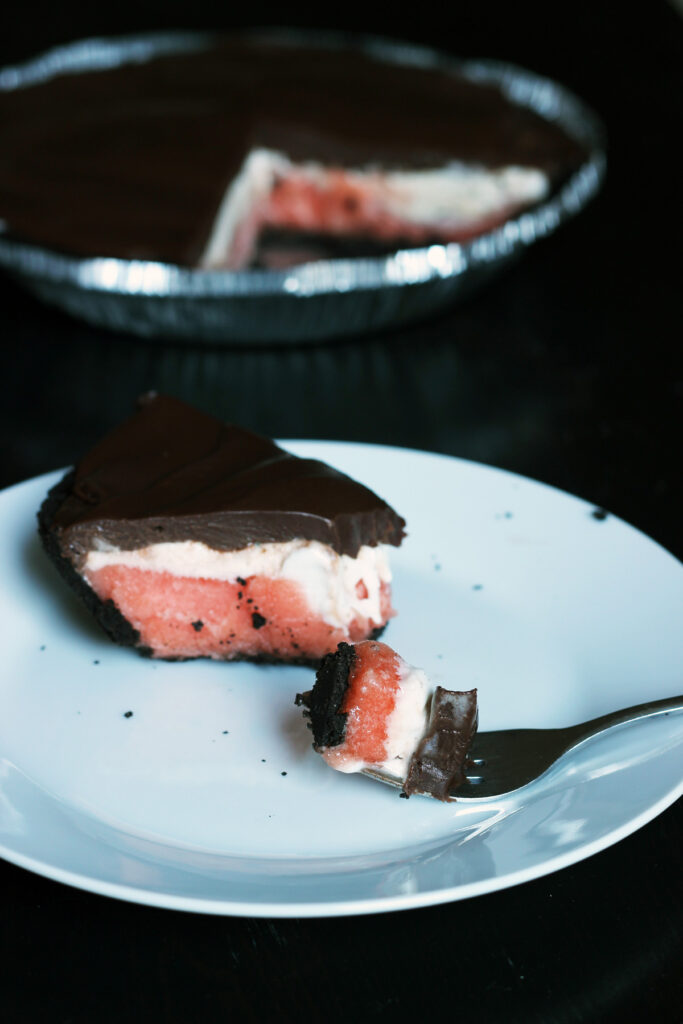
An ice cream pie involves softened ice cream and/or sorbet piled into a baked pie shell.
And lastly, a pudding pie is a pudding, like vanilla or chocolate pudding, cooked in a pan on the stove and spooned into a prebaked pie shell. It’s usually topped with whipped cream.
Today we’re talking about my homemade version of Chocolate Cream Pie. It’s one of my people’s favorites!
What is Chocolate Cream Pie?
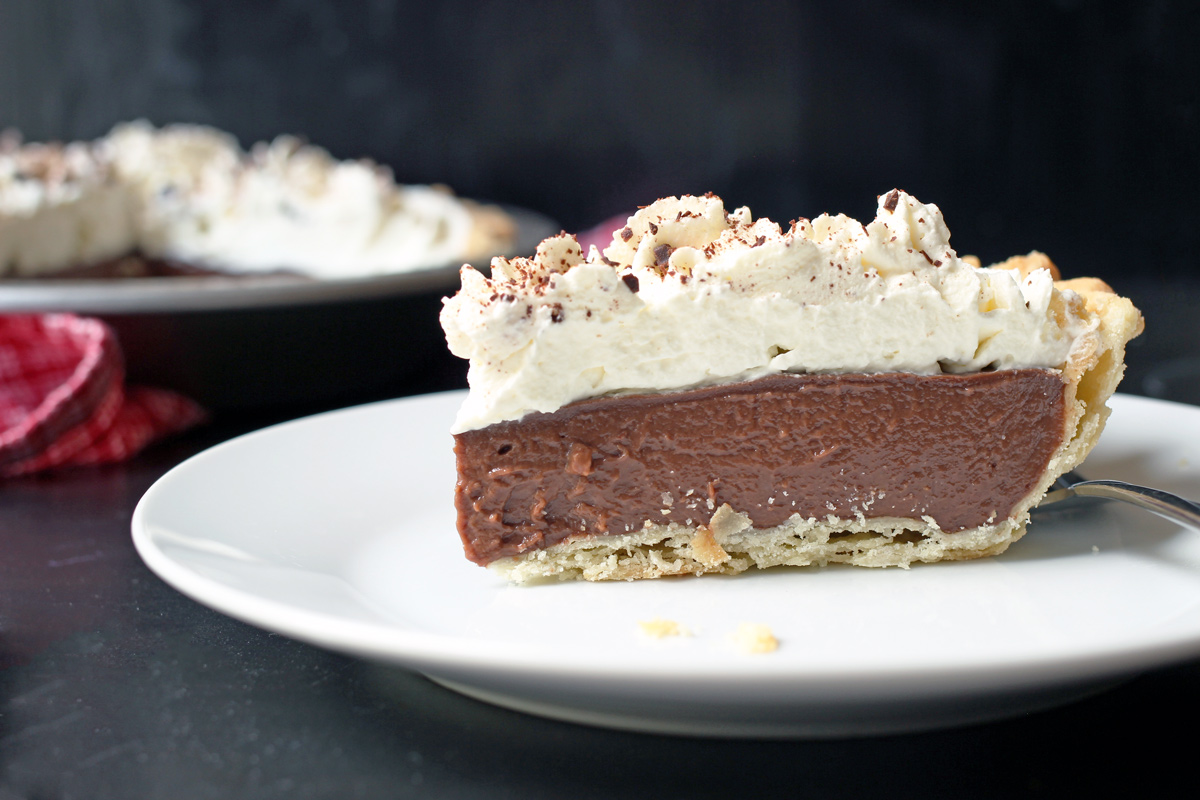
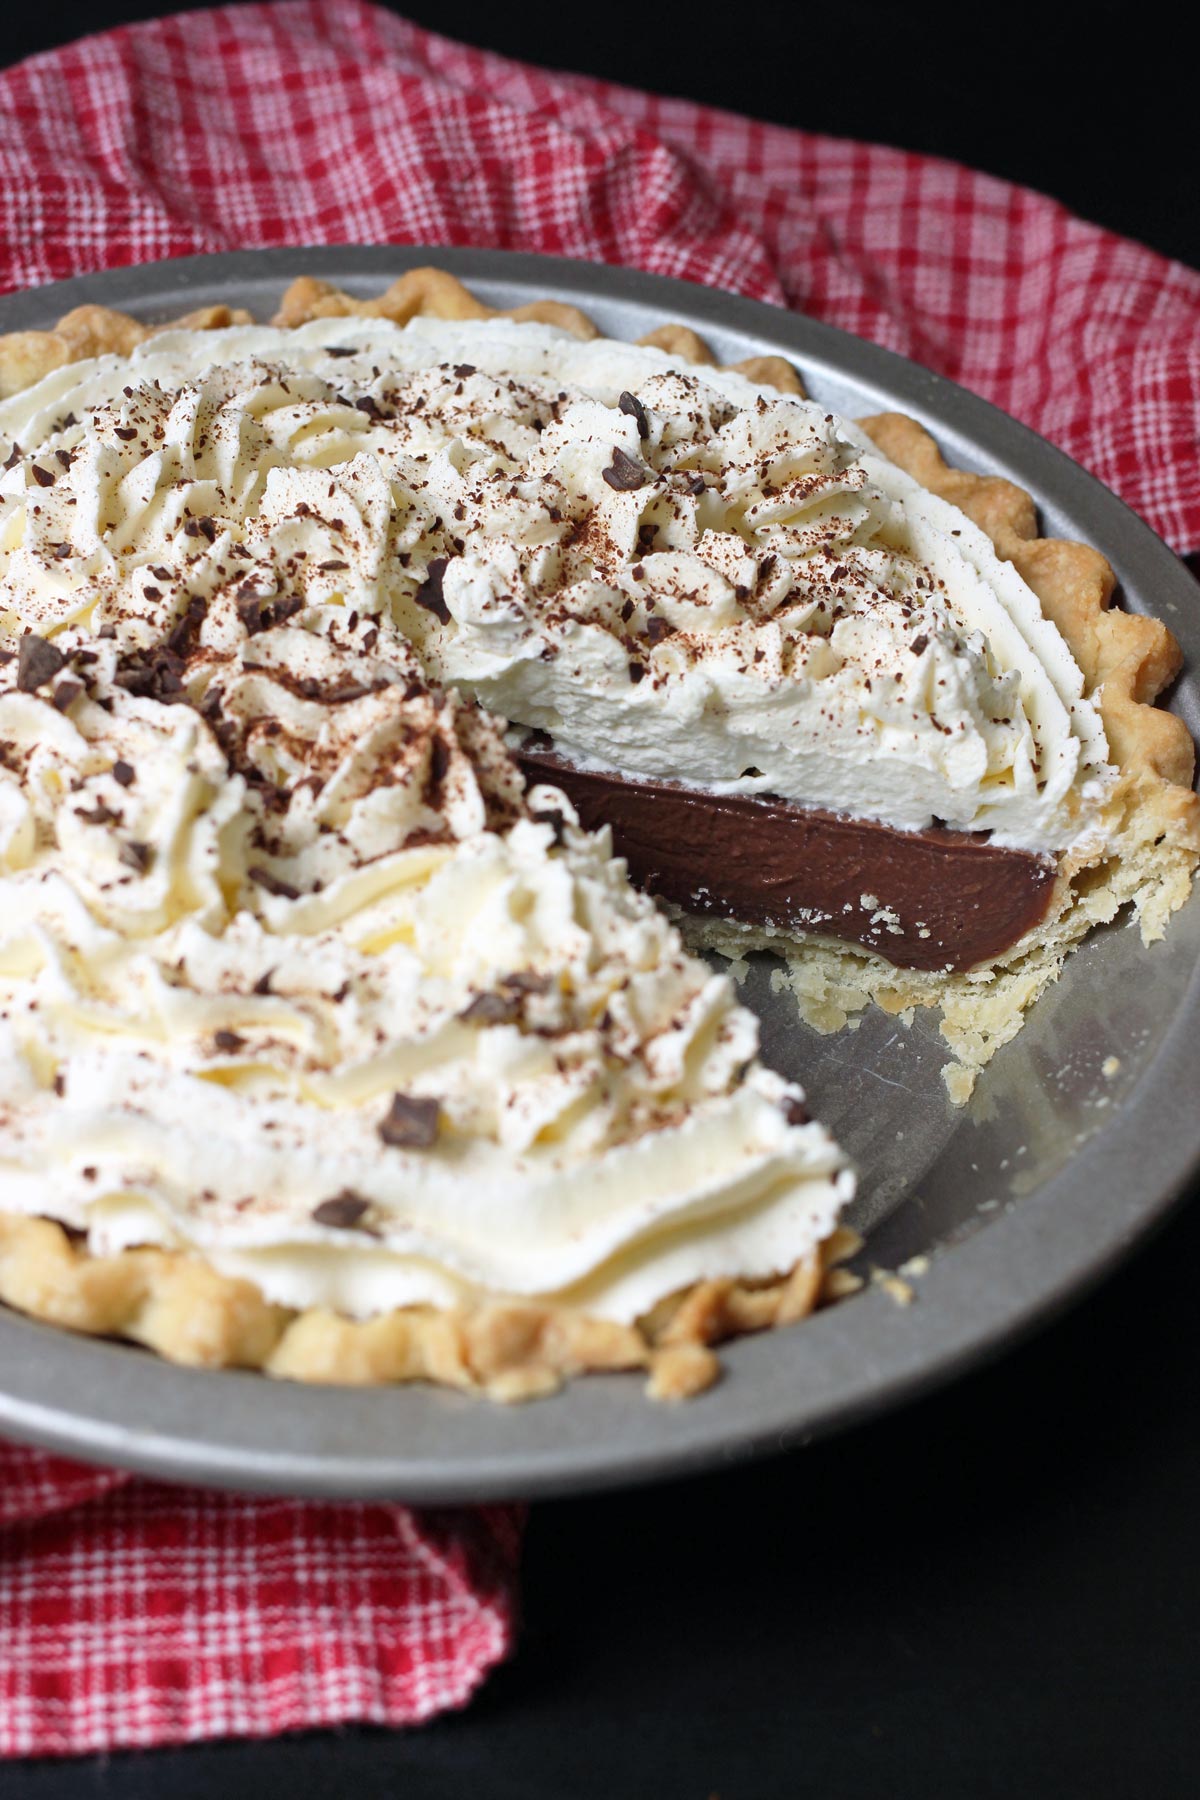
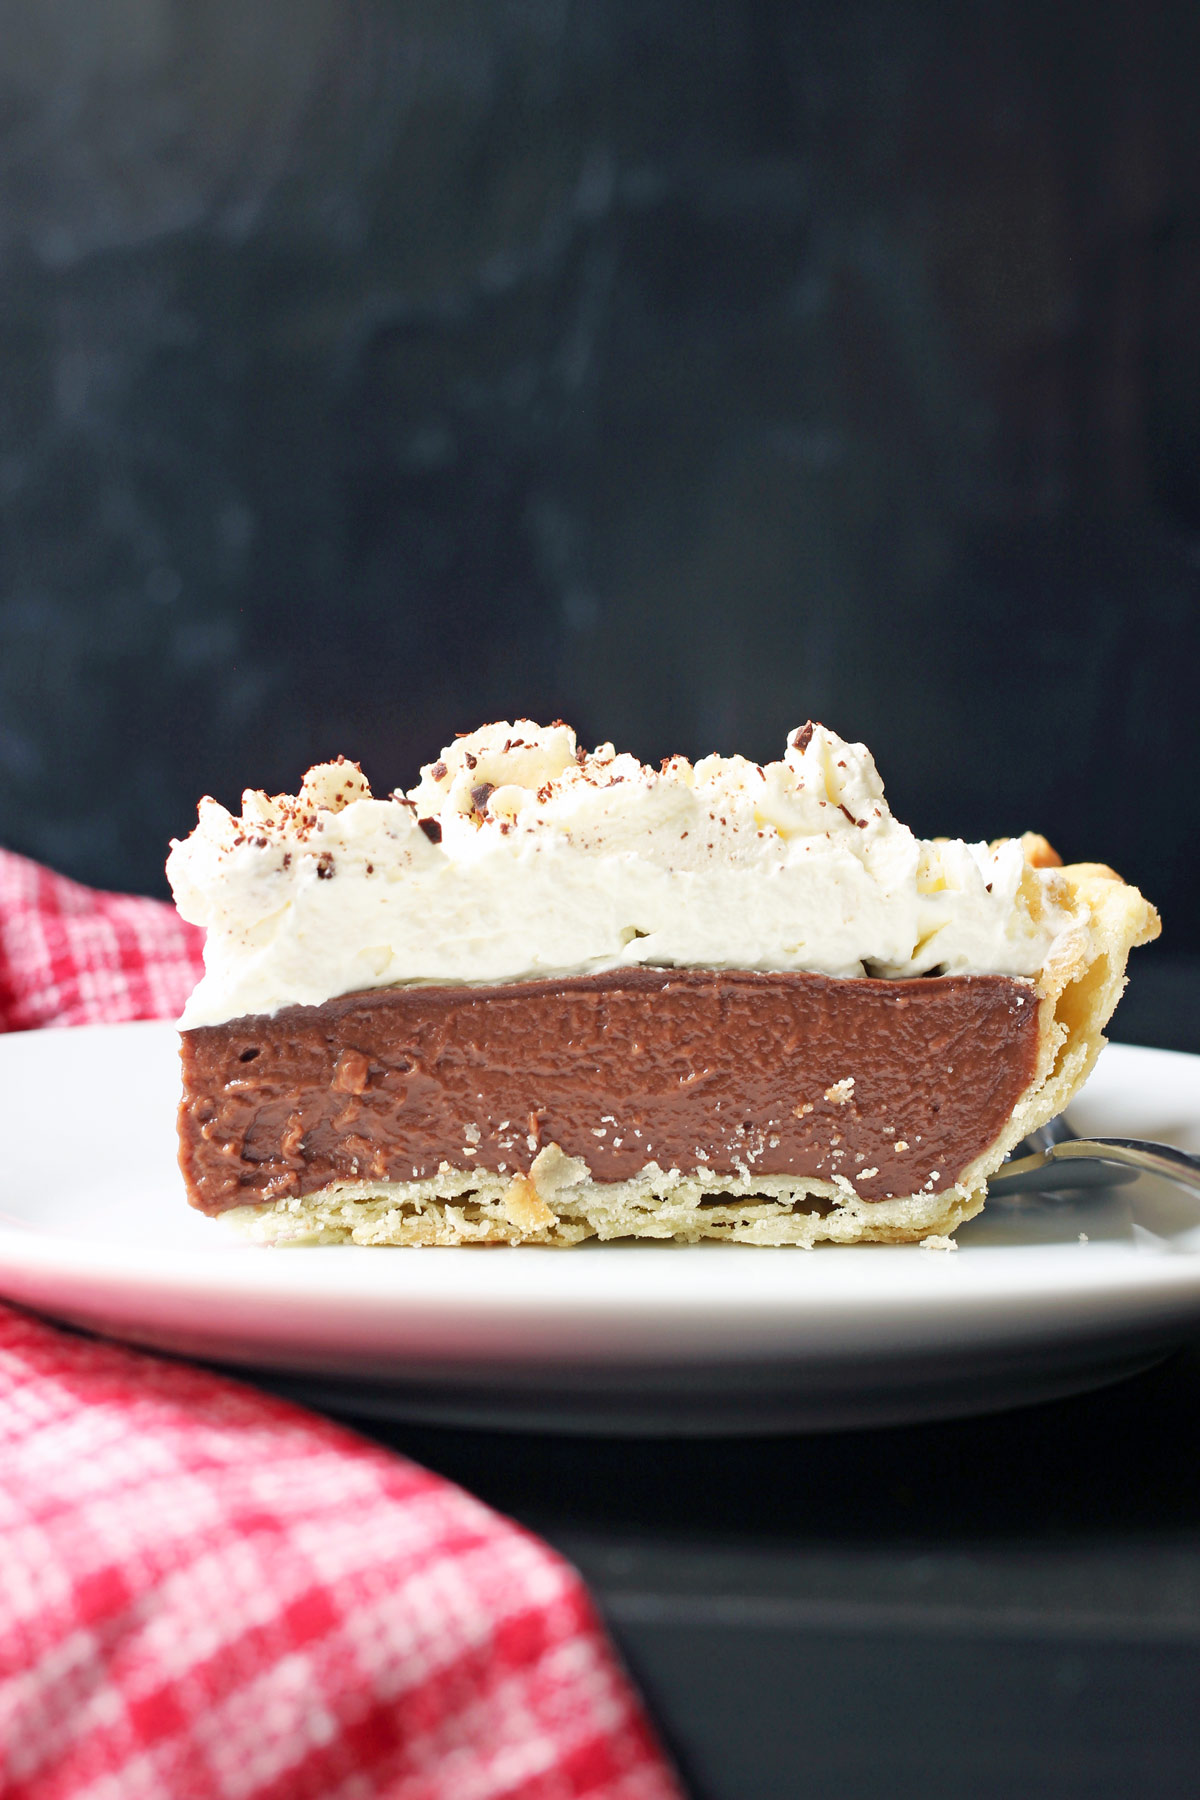
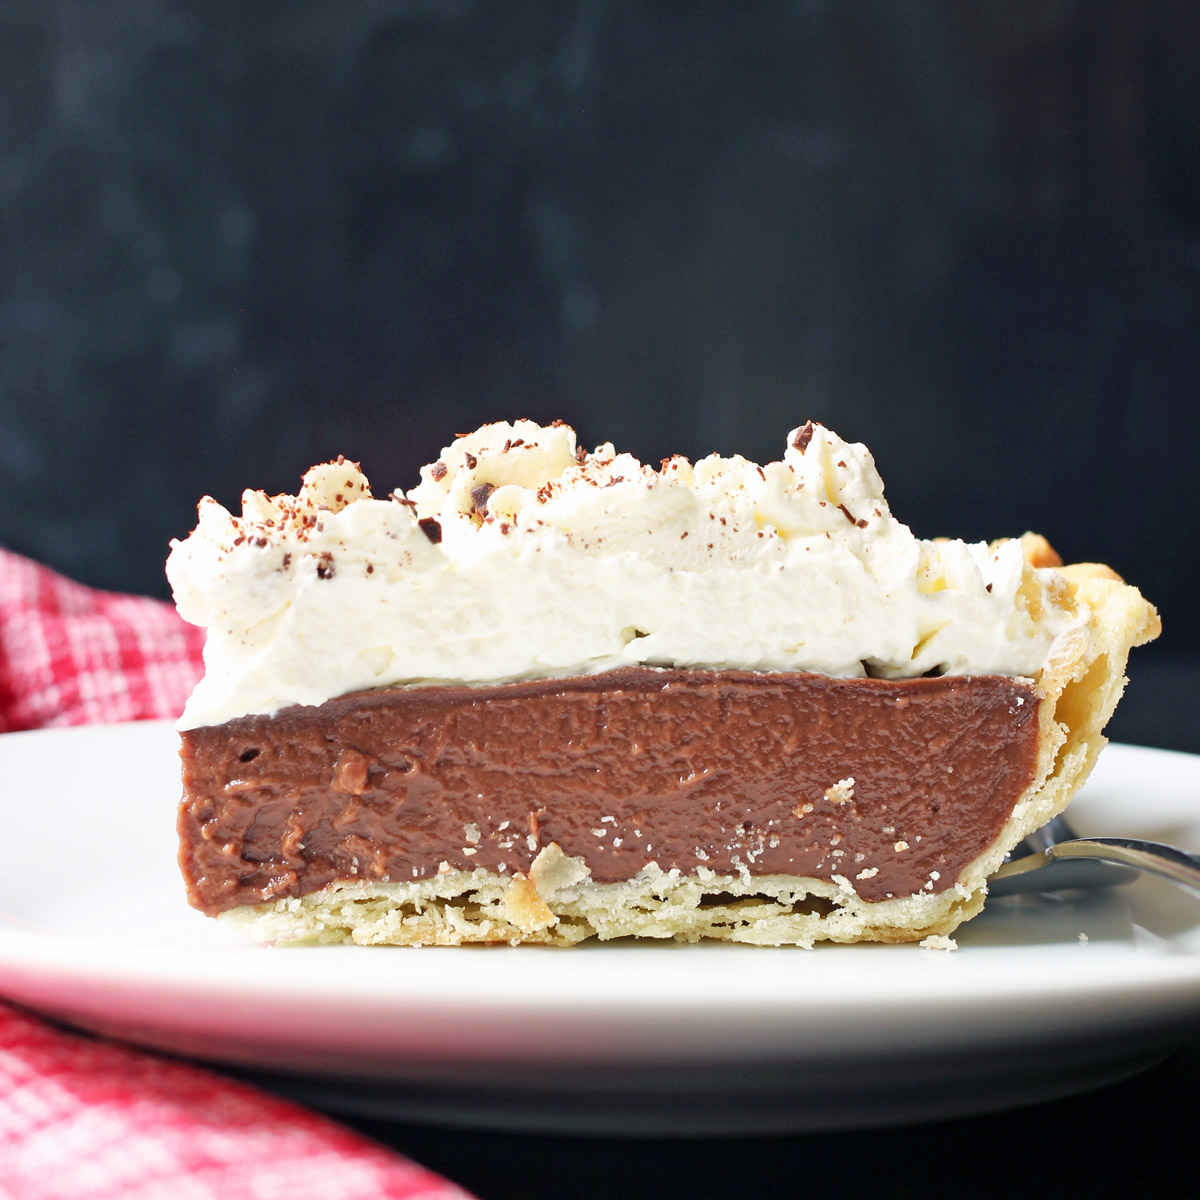
Chocolate Cream Pie is one of those pudding pies I mentioned. It can be made with a standard pie crust, a Graham Cracker Crust, or a crumb crust made with chocolate cookies. This is prebaked as the assembled pie does not go in the oven.
Instead, a cooked, rich and chocolatey filling like pudding is poured into the cooled crust and topped with whipped cream.
Serving suggestions
Chocolate Cream Pie is best served cold as a dessert alongside tea, coffee, or espresso.
Ingredients
You may be familiar with the refrigerated or frozen pie crust, Jell-O chocolate pudding, and Cool Whip version of Chocolate Cream Pie. And that’s fine. But this takes little more work than using those convenience items—and it tastes loads better!
Plus, it doesn’t have all those funky ingredients that you can’t pronounce. So, ready to make a pie?
Lucky for you, the ingredients are pretty minimal. You’ll need
- pie crust (butter, flour, salt) or a prepared crumb crust of graham crackers or chocolate cookies
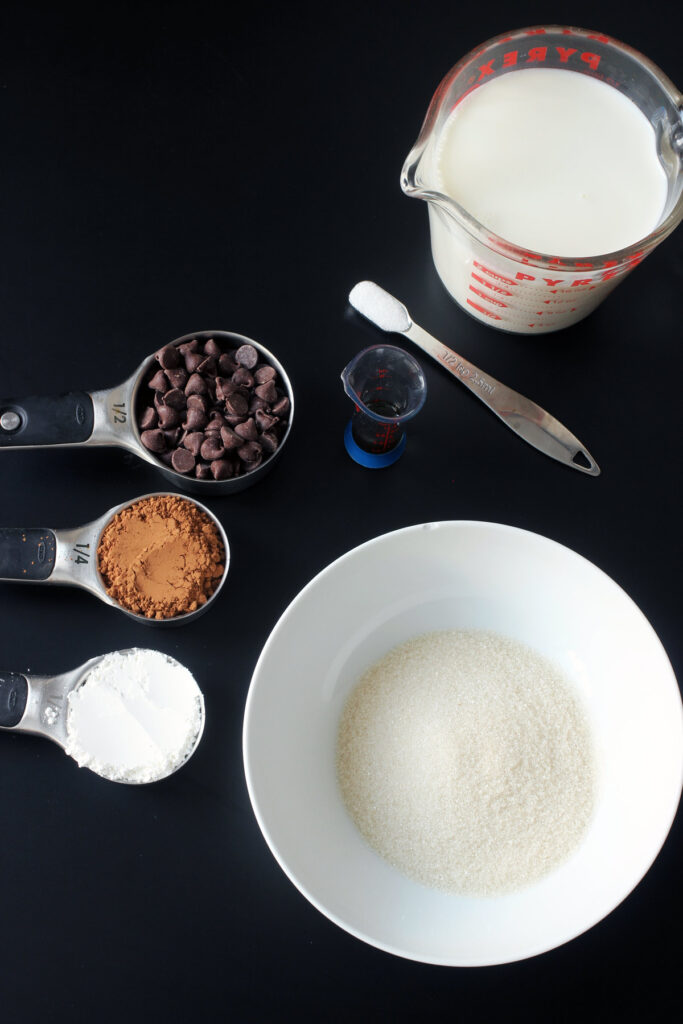
- chocolate filling (sugar, cornstarch, cocoa powder, milk, salt, vanilla, and semisweet chocolate)
- whipped cream (whipping cream, sugar, vanilla)
Added together, you’re looking at a total of ten ingredients. Boom. Much fewer than would be listed on a commercial pie crust, boxed pudding, and can of whipped topping.
Some chocolate fillings call for eggs; this one does not, making it super versatile where food allergies and preferences are concerned.
Can you make this vegan or dairy-free then?
Yes! I have one child who prefers to eat vegan, so we have made this pie dairy-free. Simply make sure your crust has plant-based butter and that you use a plant-based milk in the filling.

Instructions
There are three basic components to this pie: the crust, the filling, and the whipped cream top. You can make these in stages if you need to, prepping the crust well in advance of the filling.
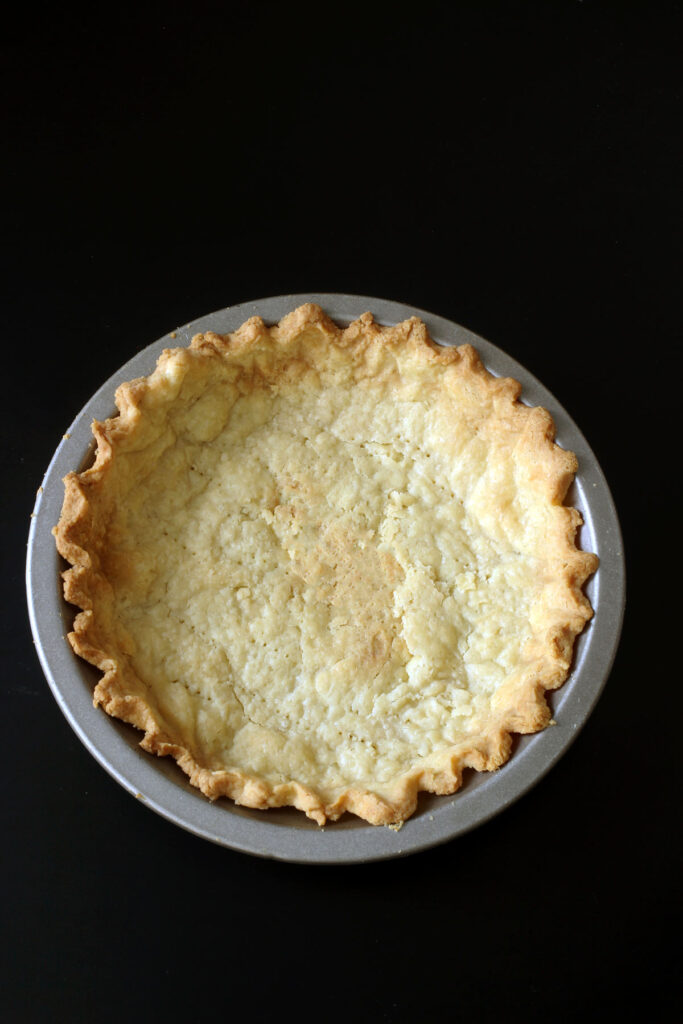
- Prepare the pie crust. You’ll see a traditional pastry crust in the photos here, but remember you can make a crumb crust if you prefer. If using pastry, prepare the crust, blind bake it, and allow it to cool completely.
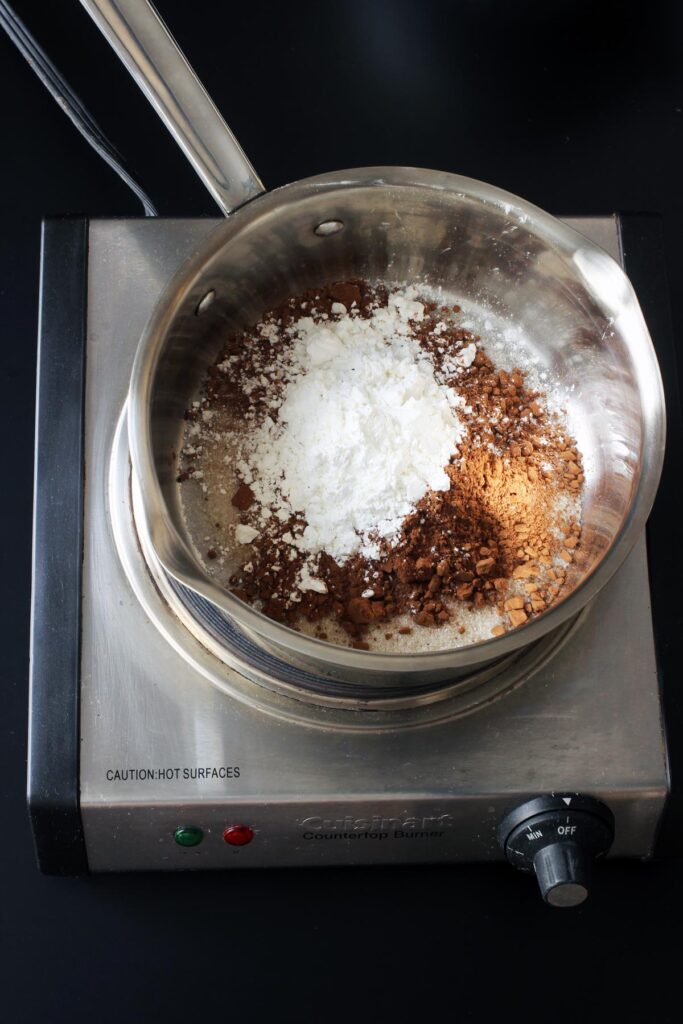
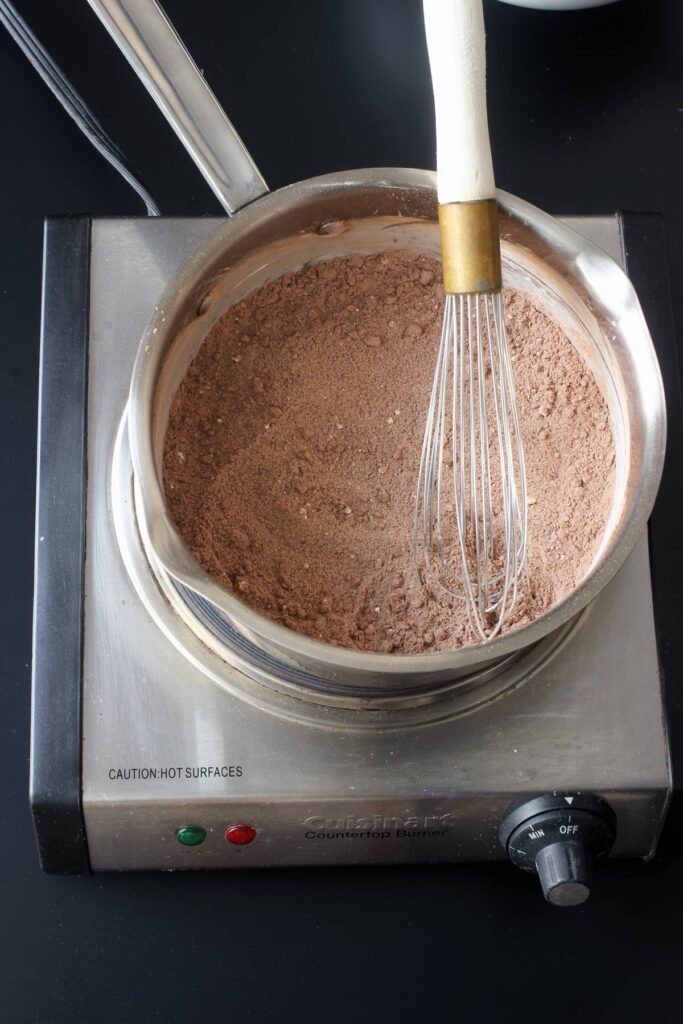
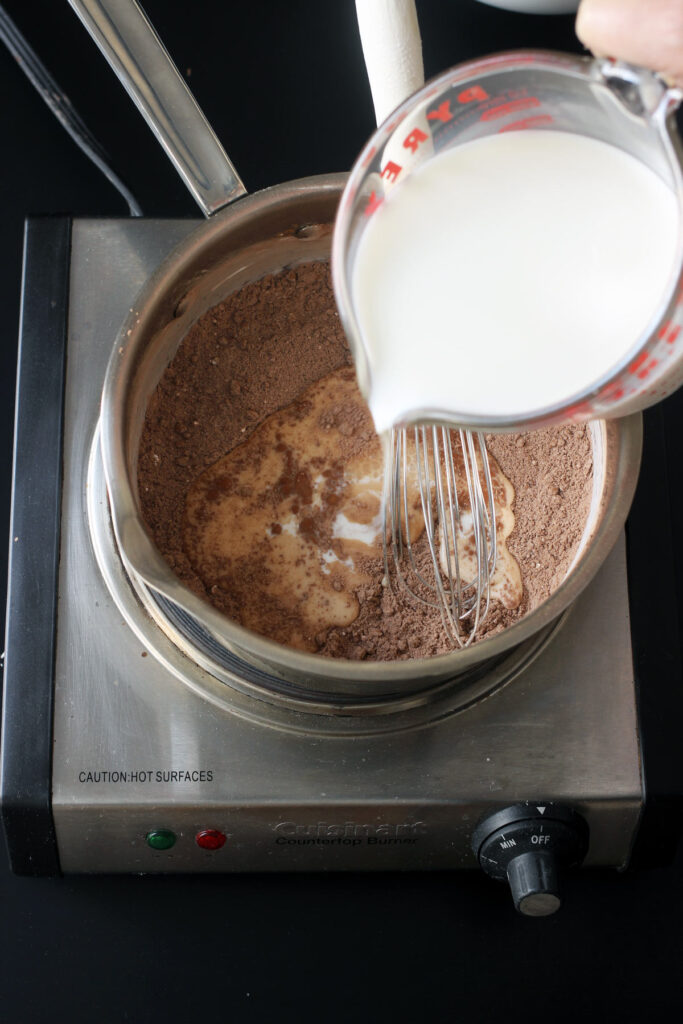
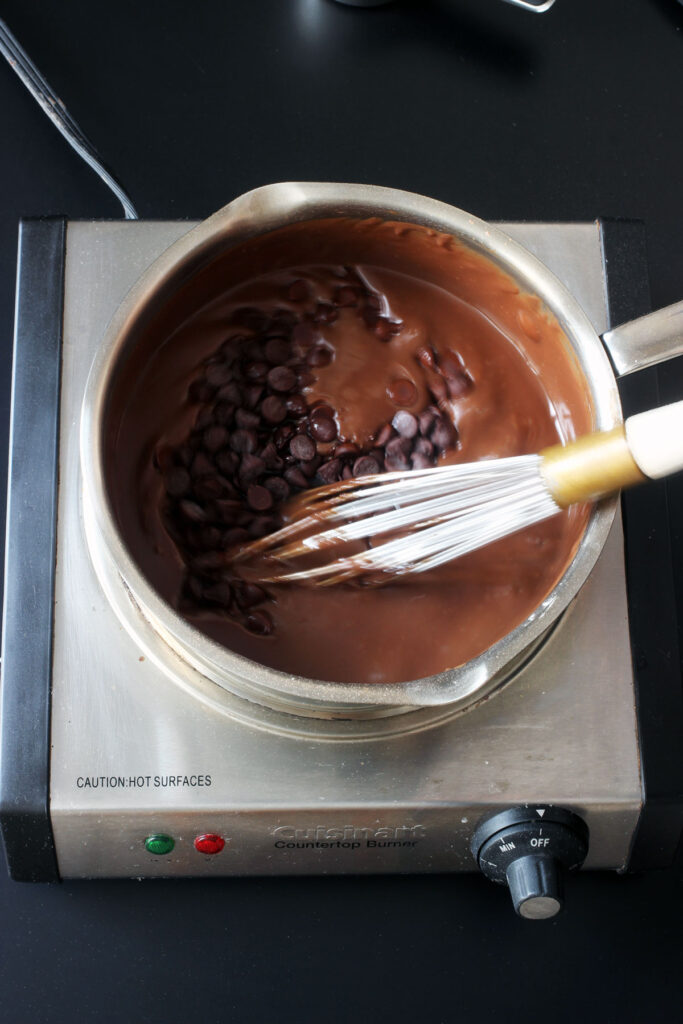
- Next, cook up the filling in a saucepan. It takes less than ten minutes! Assemble the ingredients and whisk together the sugar, cocoa powder, cornstarch, and salt in a saucepan.
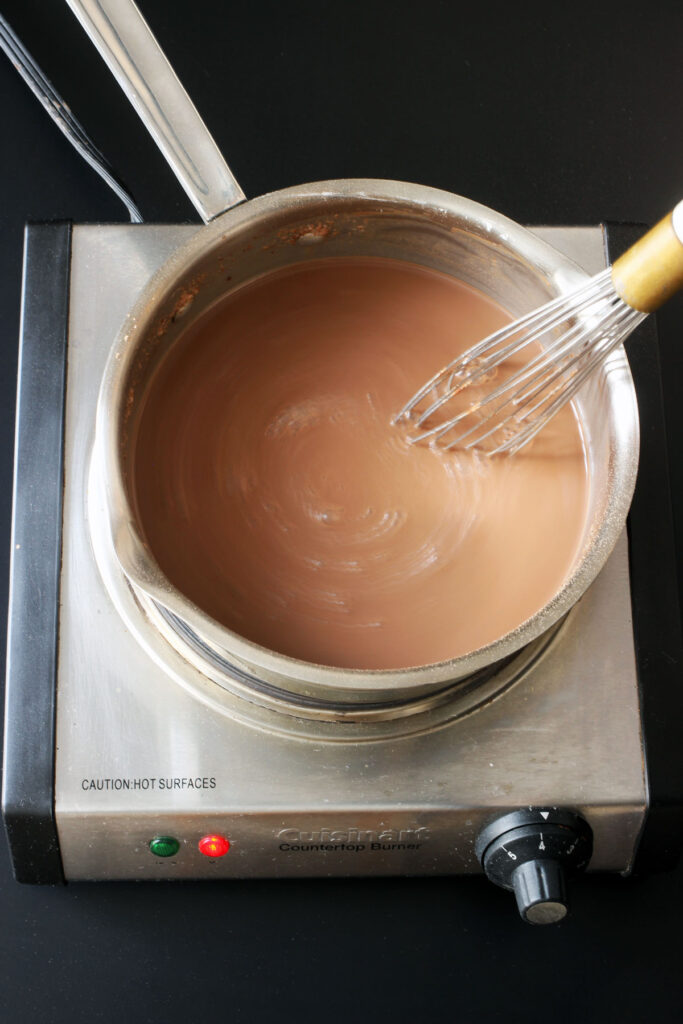
- Whisk in the milk, stirring to get all the dry bits from the corners of the pan.
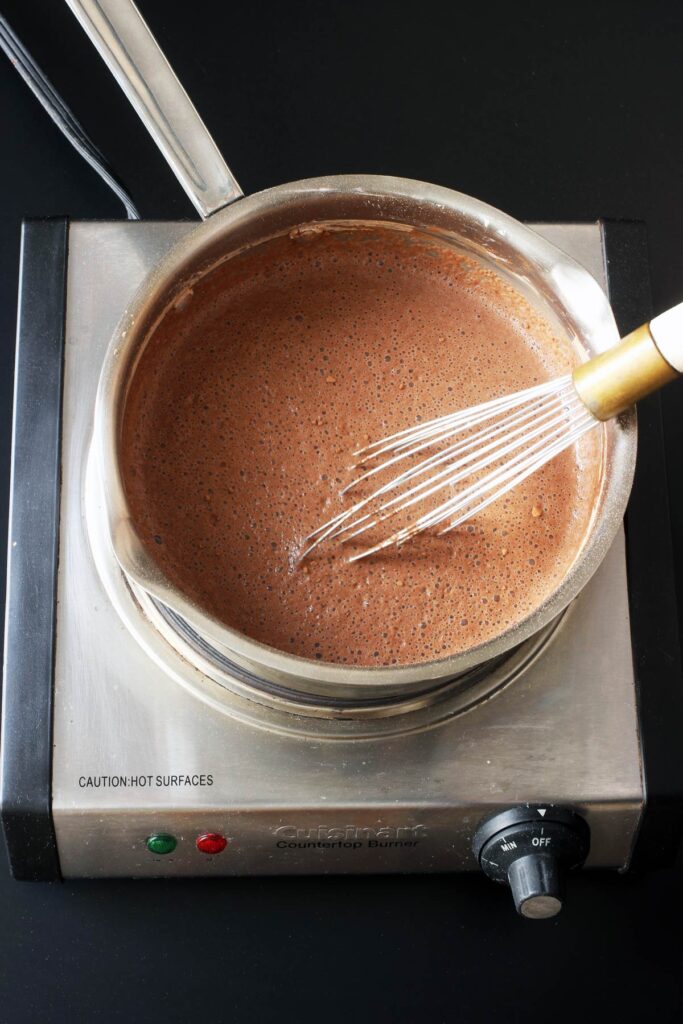
- Whisking constantly, bring the mixture to a boil. Allow this to simmer before adding the chocolate chips and vanilla extract.
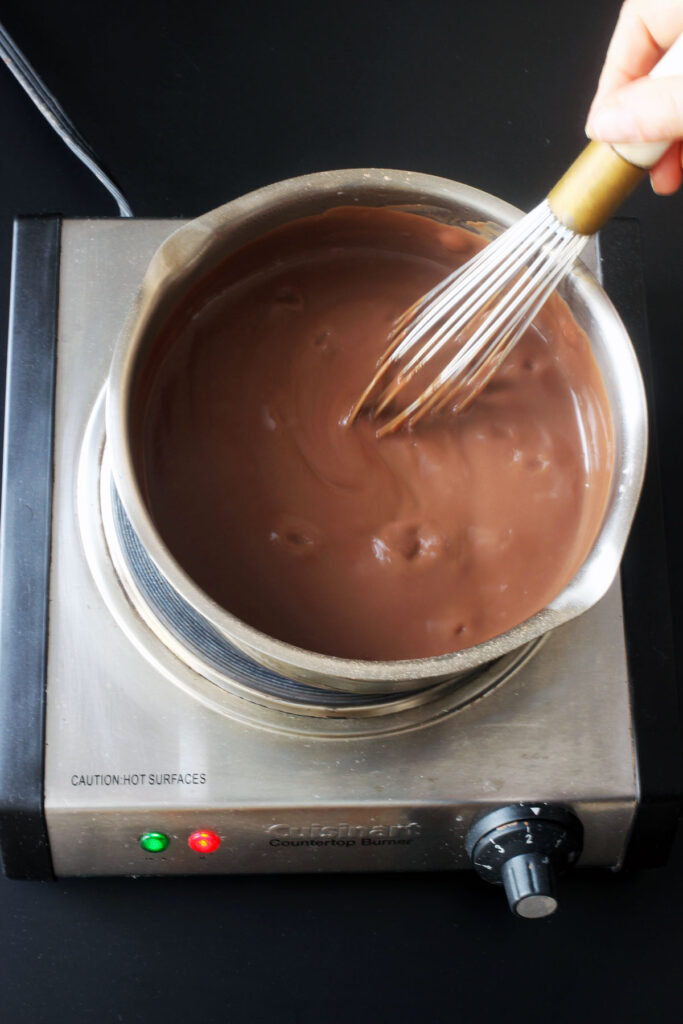
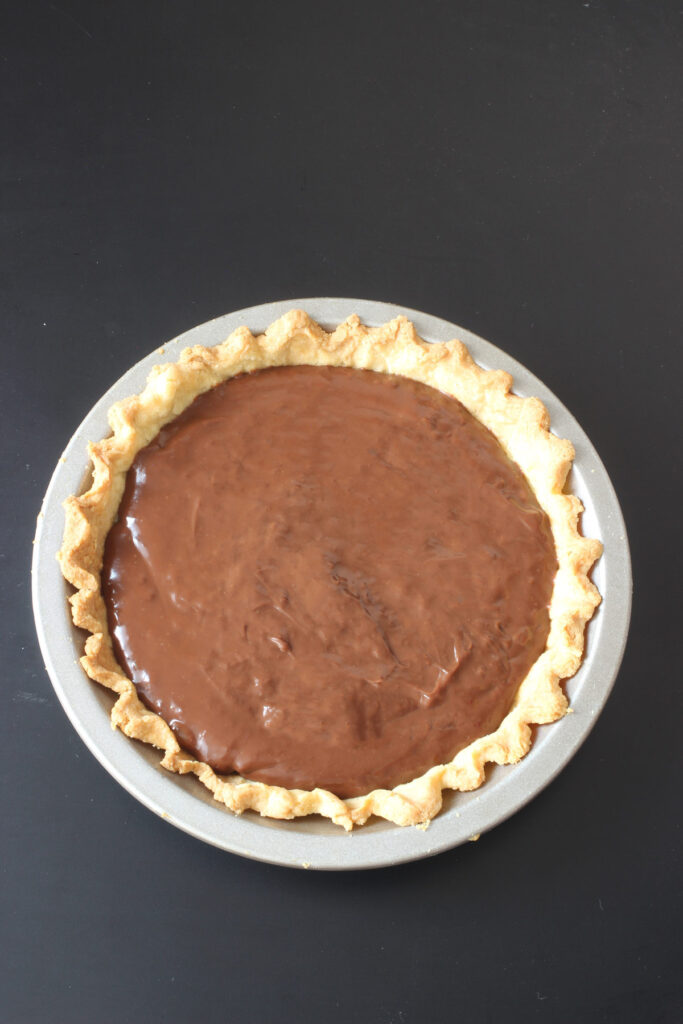
- Let the filling cool just a little and pour it into the cooled pie crust. If you let it cool too long, it will start to thicken before you get it in the pie crust and might get lumpy-bumpy.
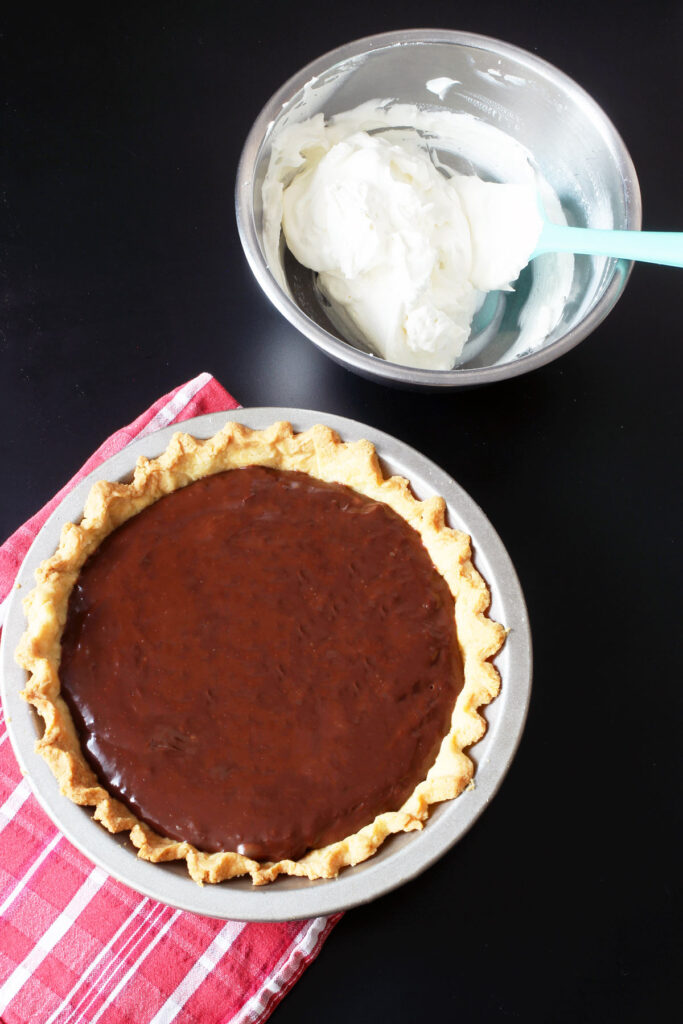
- Cool it to room temp and then chill the whole thing for several hours. Top with whipped cream.
And voila! Your own Homemade Chocolate Cream Pie!
Recipe costs
Knowing how much it costs you to prepare a recipe can help you decide if it’s the type of recipe to make regularly or one you might want to save for special occasions. Let’s crunch some numbers and see how this recipe pencils out.
- pie shell – $1.69
- sugar – $0.11
- cornstarch – $0.16
- cocoa powder – $0.16
- vanilla extract – $0.13
- salt – $0.02
- chocolate chips – $1.00
- milk – $0.42
- whipping cream – $1.37
- powdered sugar – $0.01
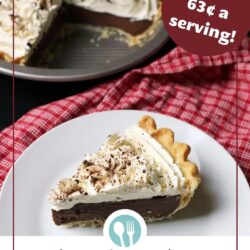
Made with non-sale prices at a midrange grocery store, this Chocolate Cream Pie costs $5.07 or 63 cents/serving!
How to save even more:
Here are some of the strategies you can use to make this recipe more economical:
- Stock up on ingredients when they are on sale. When you see a good price on butter, flour, sugar, and baking chocolates, buy a few extra packages to stash for later. You know you’ll use them.
- Shop the stores that have the best prices. When I did my big grocery store showdown, I learned that ALDI and Costco have the best prices for a lot of the things I buy. You will naturally save money if you shop the best store for the items YOU buy. This may not be ALDI or Costco, so you’ll need to do your own price comparisons. The time investment as your research it is super valuable!
Kitchen equipment
This recipe really couldn’t be easier than it is, but having the right kitchen tools can really make your time in the kitchen more enjoyable. Over time, I’ve honed my collection so that they are perfect for my needs.
Here are the tools that I use for this recipe:
- rolling pin – Necessary for making homemade pie crust.
- plastic wrap – Too much flour can make your dough tough, but too little makes it stick to your work surface. I use plastic wrap to help me roll the dough easily and transport it to the pan without tearing it. Stretch-Tite is the best, in my opinion.
- pie plate – The USA pans pictured are nonstick, silicone coated, meaning that the pie comes out super easily without any sticking.
- small Kitchenaid saucepan – I got a set of these pans for free in 2004. We still use them!
- wire whisk – be sure to get one with a sealed barrel so dishwater doesn’t drip into your food. Yuck.
- stainless steel mixing bowl – a good set should last you a lifetime.
- hand mixer – My Hamilton Beach version is going on a decade and still kicking.
- silicone spatula – I love this two-sided spatula/spoon. It’s great for stirring and scraping. I bought it originally to flip crepes, but I’ve since bought more since it’s so handy.
Homemade Chocolate Cream Pie
Ingredients
- 1 batch single pie crust
- ⅔ cup granulated sugar
- ¼ cup cornstarch
- ¼ cup unsweetened cocoa powder
- ¼ teaspoon salt
- 2 ½ cup milk
- ½ cup chocolate chips or chopped semisweet chocolate
- 2 teaspoon vanilla extract
- 1 cup whipping cream
- 1 tablespoon powdered sugar
- 1 square baking chocolate (semisweet) shaved
Instructions
- Preheat the oven to 375 ° Prepare the pie crust according to recipe directions. Pat into the pan. Line the crust with parchment paper and fill with beans. Bake until edges begin to color, about 15 minutes. Remove paper and weights and continue baking until golden brown.
- Cool completely on a wire rack.
- In a medium saucepan, whisk together the ⅔ cup sugar, cornstarch, cocoa powder, and salt.
- Whisk in the milk, stirring well. Cook over medium-high heat, whisking constantly until mixture begins to thicken, about 5 to 7 minutes.
- Whisk in the chocolate chips and 1 teaspoon vanilla until well blended. Allow mixture to cool slightly.
- Pour cooled mixture into baked and cooled pie shell. Cool to room temperature and then chill for several hours.
- Prior to serving, whip the cream, remaining teaspoon of vanilla, and the powdered sugar in a medium bowl until soft peaks are formed. If you know you are going to consume the pie in the next 24 hours, go ahead and top the pie with the whipped cream. Otherwise, serve the whipped cream alongside the pie.
Notes
Nutrition
This post was originally published on October 13, 2017. It has been updated for content and clarity.
Amber
My crust didn’t look great, but the pie tasted amazing. It was easy and I will definitely make it again. I can make the crust look a little better next time 🙂
Jessica Fisher
Yep, it takes practice. This past week I finally made a crust that I thought was pretty. And I’ve been doing this since I was ten. lol
Cheri A.
I made this for Thsnksgiving. It’s amazing and chocolatey and rich. Loved by everyone. I’ll be making it again for Christmas!
Thank you!
Jessica Fisher
So glad you enjoyed it. Thanks for sharing!
Rebecca
Does anyone know if the chocolate cream part would work if I used rice milk? My son is allergic to dairy. I have a pie crust recipe that I use and I can make coconut whipped cream, but I would love to be able to make the filling from scratch.
Jessica Fisher
One of my workshop participants used almond milk recently. I’m thinking rice milk should work just as well. Let me know how it goes!
Kari
I made this for thanksgiving. It tasted awesome but it never really ‘set’. I put saran wrap over before I put it in the fridge so it wouldn’t get that skin in top. Should I have not done that?
Jessica Fisher
I have found that you need to keep cooking it until it thickens, even if it’s longer than you would expect. I’m sorry it didn’t set up this time round. 🙁 The plastic wrap trick is fine. My husband likes the skin. Go figure.
Nia
Hi Jessica,
The photo of the sliced pie makes it appear the pie is so firm that it stands alone and doesn’t fall over like a pudding pie would do. Does yours always come out so firm? Mine didn’t and I’m just wondering if I did something wrong.
Jessica Fisher
I don’t think it always does. It has to do with how long it cooks down to thicken. I think moisture in the air can affect it as well.
Nia
Thanks, I feel better about my outcome. This pie is delicious, no doubt! So happy you shared the recipe with us. Thanks again 🙂
Michaelene
I had a few dozen broken mint chocolate shortbread cookies (I’ll try again next year, lol!), so I used those to make a crumb crust for this pie. Added some mint extract instead of the vanilla. Fabulous. I’ll have to try it again as written. I’m making mini ones in muffin tins for our New Year’s Eve party too. Thanks for sharing the recipe. So easy too!
Jessica Fisher
That sounds yummy! I’ve made it with the mint extract, but that cookie crust sounds amazing!
Momstarr
Do you use semi sweet or milk chic. chips?
Jessica Fisher
I have used semi-sweet and dark when I make this. I imagine milk would work fine, too.
Brooke Kingston
Jessica, my five-year old son Charlie and I made this together for Sunday dinner. We had so much fun with the awesome pie dough recipe. It was easy to handle and turned out beautifully after Charlie pressed it into the pie tin. We have a trick from my grandmother that works well for a flaky pie crust: add a pinch of baking powder to the dry ingredients before mixing!
The chocolate cream is TO.DIE.FOR delicious. Charlie watched while I cooked, and he loved licking the wisk! Thank you for giving us a fun and memorable baking project…this recipe is a keeper for sure!!
Jessica Fisher
Thanks for such great feedback. Love it. I am tempted to make it again this week, but we already have three desserts planned. LOL
Yuko
It looks yummy! Could you tell me what it means by “fill with beans”. or “pie weight”? so I bake the crust with aluminum foil cover with dry beans on top?
Thanks! Definitely making it this week!
Jessica Fisher
Yes, you need some kind of weight to hold the crust in place while it bakes. Otherwise, the crust shrinks back from the sides of the pan and slides into a puddle in the bottom. You can use dried beans or buy specially designed “pie weights” for this purpose.
Sarah K. @ The Pajama Chef
this pie sounds amazing!!
Meagan
This pie will be on my Thanksgiving menu for sure!
Merri
I dont have a blog or a link but here is my favorite pie!!!
Zucchini Sugar Cream Pie
Zucchini: Peel enough to make 1 1/2 cups
Cook 5 minutes in microwave
Combine in blender:
Zucchini
1 Cup sugar
3 Tablespoon flour
1/2 Tablespoon melted butter or margarine
1 Cup evaporated milk
1 teaspoon vanilla
1 egg
Pour into an unbaked pie shell – top with cinnamon
Bake: 425° for 15 minutes
350° for 10 minutes or until done (It will set a little after its out of the oven) It also freezes well.
Jessica Fisher
Zucchini? Wow, that’s a new one for me.
kelly d
did you read my mind jess??sat down with my thanksgiving(simplified)meal plan yesterday. after checking with my 7 peeps(kids) 4 of them voted for chocolate cream pie..checked you out to see if you had any better recipes and here you were!!!my hubby will thank you..one of his favs too!!thanks for all you do..btw, i am awaiting my cookbook delivery today(i am such a nerd..i keep tracking my package on amazon..lol)
Jessica Fisher
I’m a nerd right there with you. How fun that everyone will be making chocolate cream pie this year. I had a slice for breakfast. Yummy!
kelly d
just wanted to let you know I love your book!!sat down and read as much as possible until my 4 year old realized i was sitting still lol!!we made a batch of your chocolate chip banan bread with oatmeal and its in the oven now!!love to have great smells in the house when the kids get home from school!!thanks again!!cant wait to read some more after work tonite.i get off work at @2:30 am..which is my quiet reading time!!:)i can already tell i will be using soo many oif these recipes!!
Sarah Kay
This recipe could NOT have come at a better time! My husband wants a chocolate pie for Thanksgiving (which his momma always makes, but she won’t be able to join us this year) and I was up a creek since I’ve never made one. Then I checked your blog. Woo hoo! Thanks Jessica!
Barb @ A Life in Balance
Hands down we are a family that likes their pumpkin pie. However, since we’ll be having my mil joining us for Thanksgiving Dinner this year, I’ll be making a gluten-free pumpkin pie, too. Dh makes everything else. 😉
Wendy (The Local Cook)
yum, chocolate cream is one of my favorite pies! Thanks for hosting.
Mandi @ Life Your Way
Oh, man, this has my mouth watering!! And it looks so easy. My family may be thanking you tonight. 😀
Jennifer Blacker
Thank you for hosting. I’m sharing my chocolate french silk pie. Last year I made several pies for Thanksgiving, but this is the one people wanted first and finished up.