Prepping a Roast Chicken or picking up a rotisserie chicken at the grocery store is a delicious and economical way to enjoy a hearty protein. But, what do you do with it? How do you carve a chicken?!
Learning how to carve a chicken (or even a turkey) is a great skill to learn. Not only does it get great looking food on your plate, but it enables you to take advantage of the better priced, whole chicken.
Want to save this post?
Enter your email below and get it sent straight to your inbox. Plus, I’ll send you budget recipes and money-saving tips every week!
Jump to:
Whether you make a Crockpot Whole Chicken, roast one in the oven, or buy one from the grocery store rotisserie, serving a whole chicken is a great way to enjoy succulent chicken meat for a lower price. Not only that, but cooking chicken with bones tastes than cooking individual boneless, skinless breast.
The cooking step is pretty easy. It’s the “how to carve a whole chicken” that can be the challenge. How do you transform that perfectly brown and crispy chicken into serviceable pieces — without hacking it all to bits?
Carving Instructions
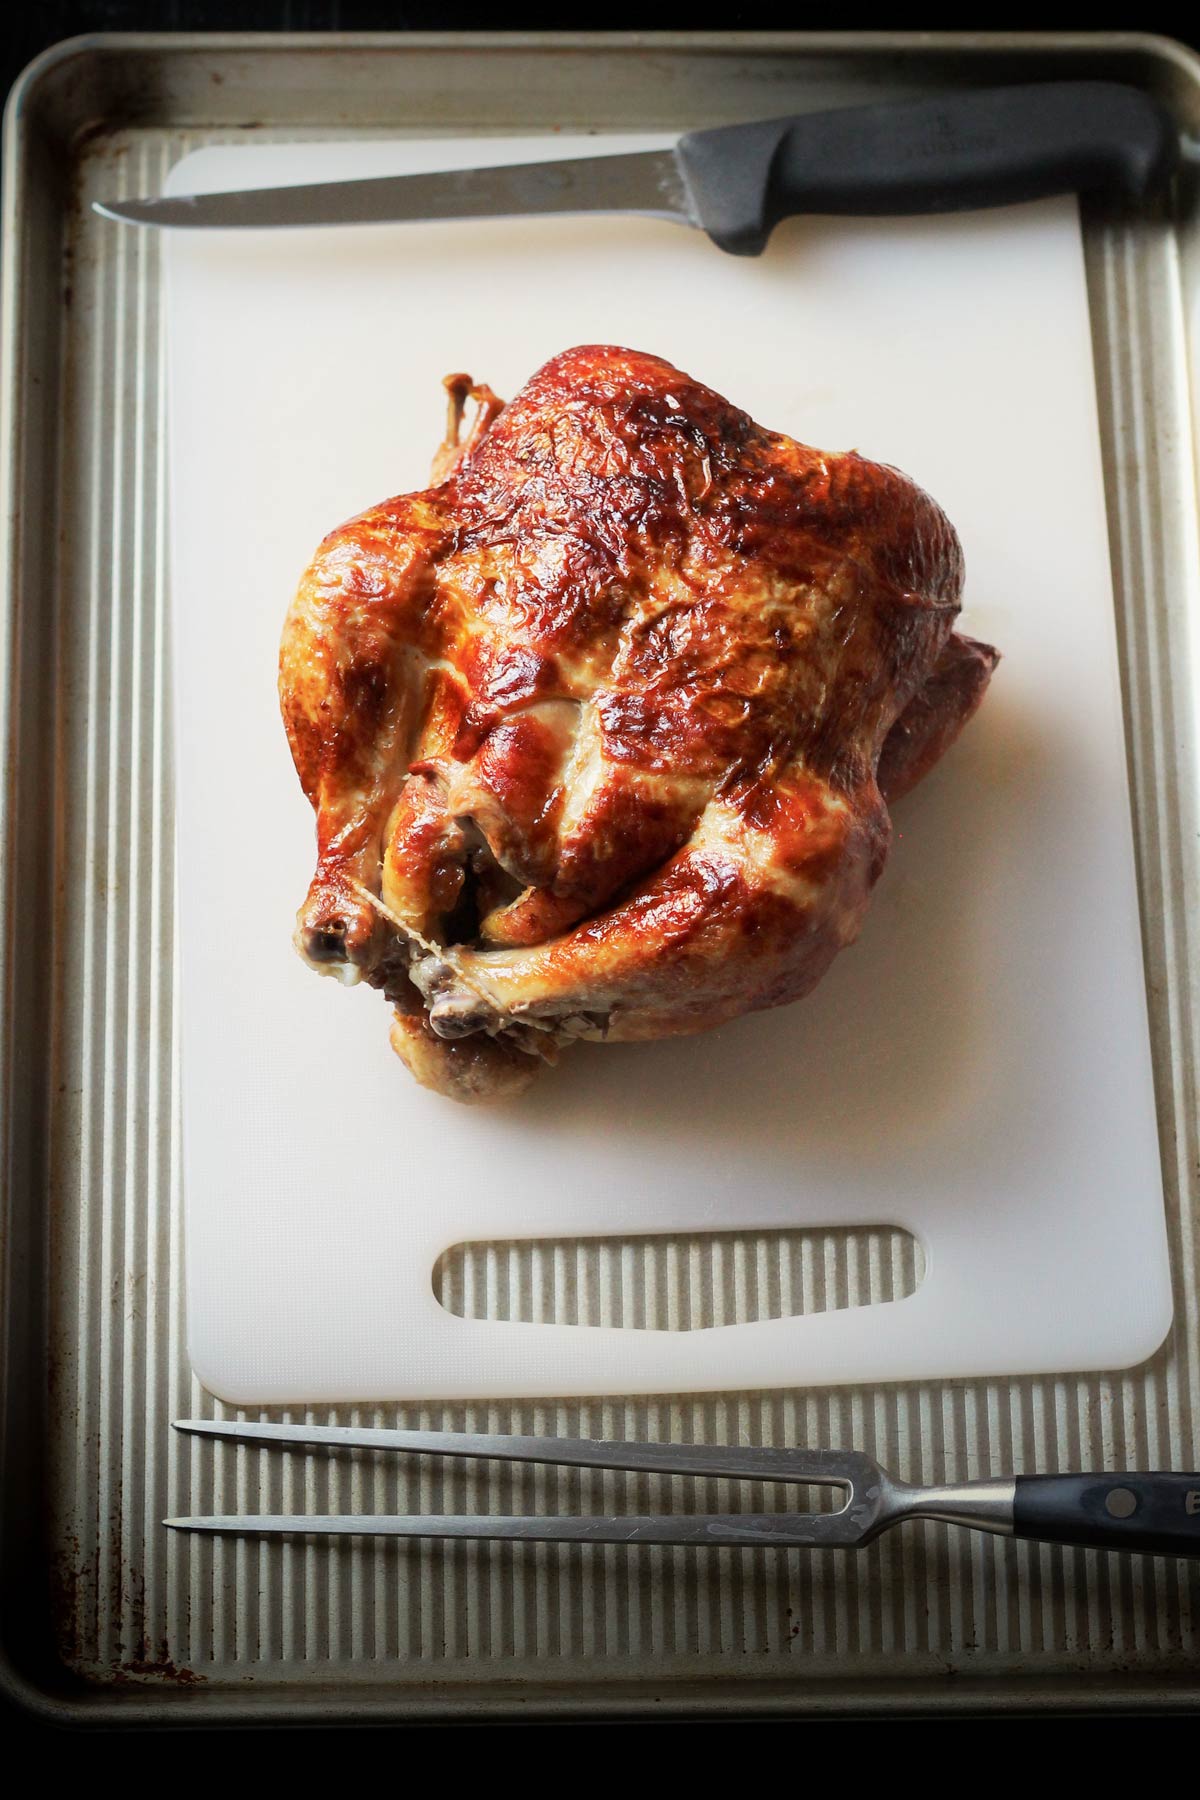
Pro Tip: I recommend that you carve a whole chicken on a cutting board placed inside a rimmed baking sheet. This is a great way to catch all the drips and keep your countertops clean. You’ll also need a boning knife and a carving fork.
Step 1: Remove the Legs
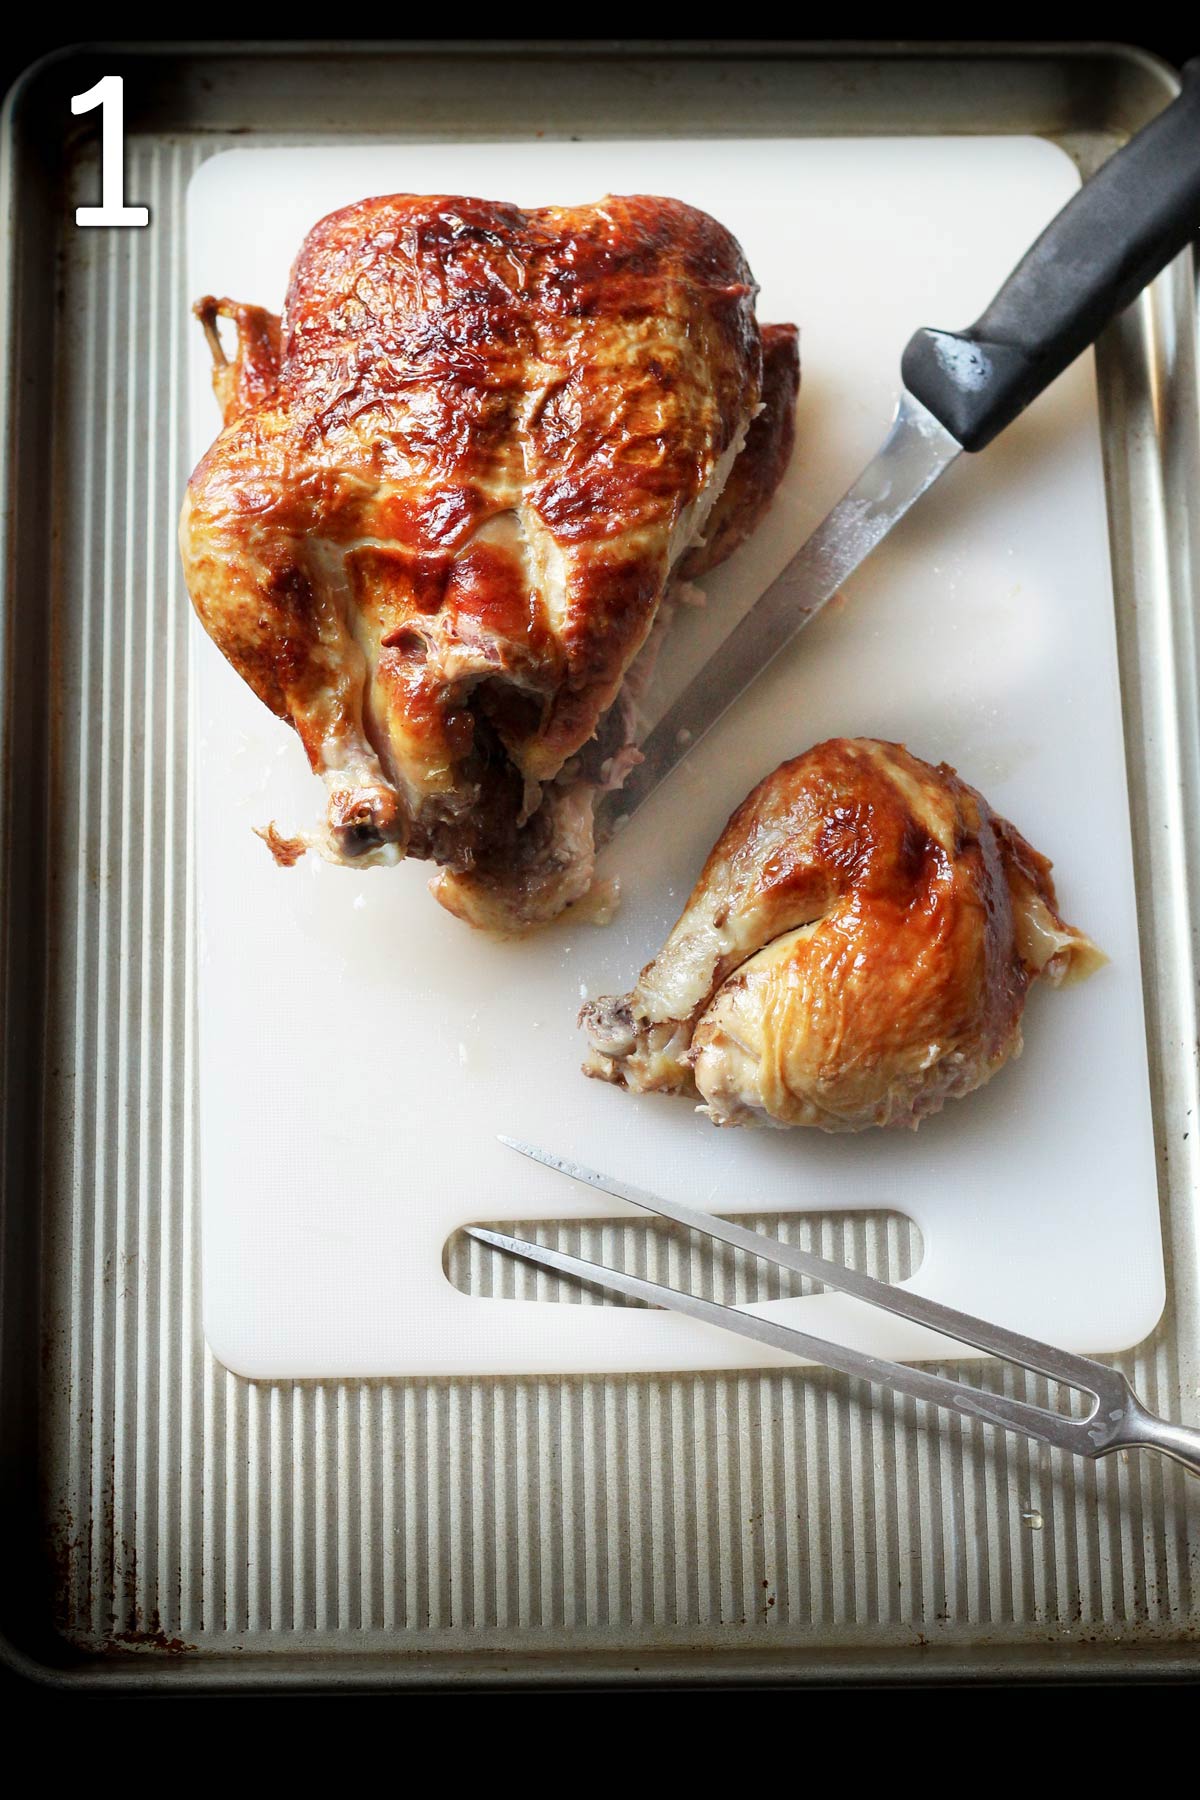
The first step is to remove the legs. You’ll place your carving fork into the breast and wiggle your knife in between the joint of the thigh where it connects to the bird. Separate the whole leg and then you can cut the thigh and drumstick apart.
Step 2: Cut the Thigh and Leg Apart
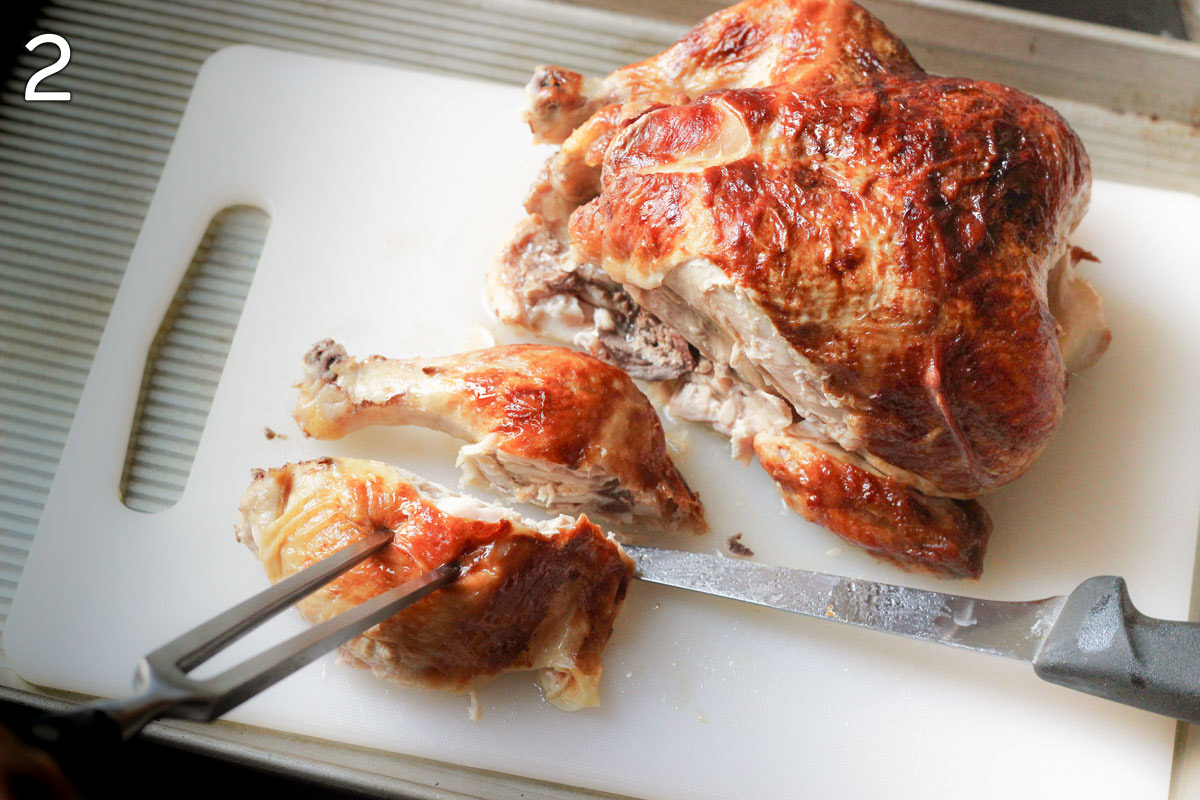
With the boning knife, find the joint between the thigh and the leg. Cut through this section so that you have two pieces.
Step 3: Do this for the other side.
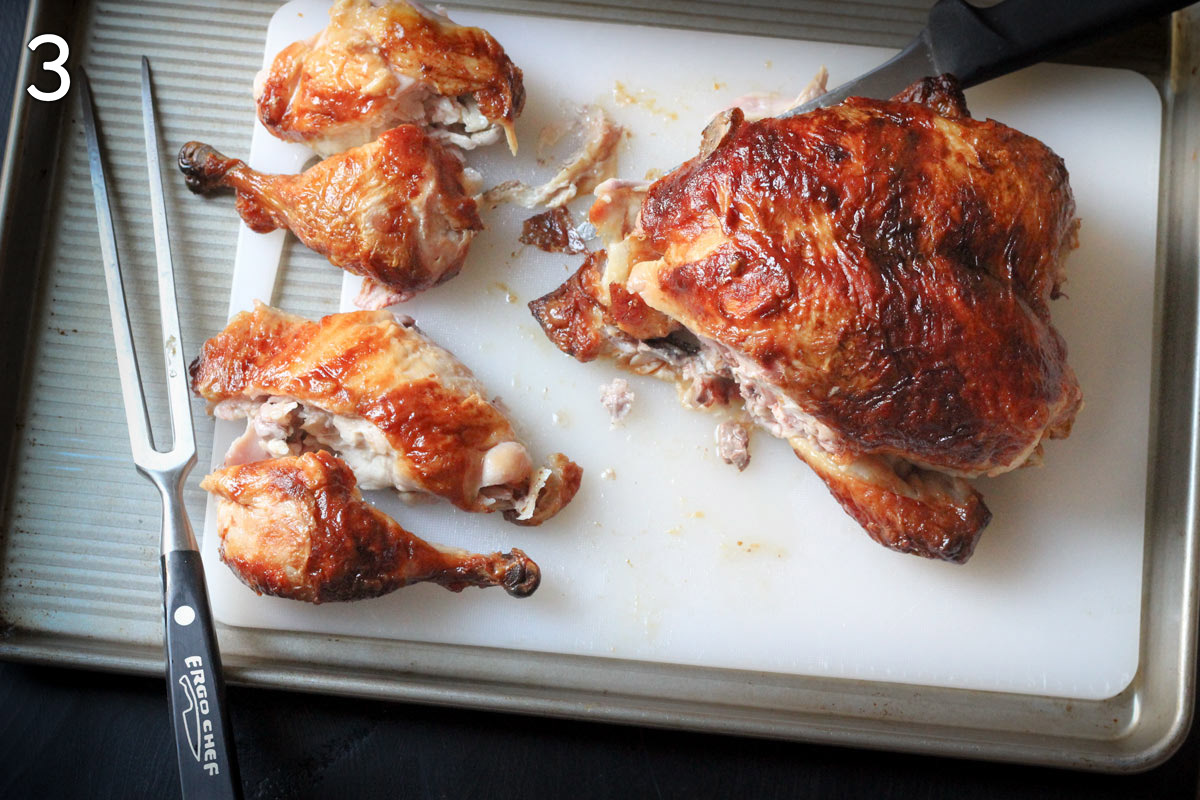
Repeat steps 1 and 2 for the leg quarter on the opposite side. You should now have two leg portions and two thighs.
Step 4: Slice Off the Breast Meat
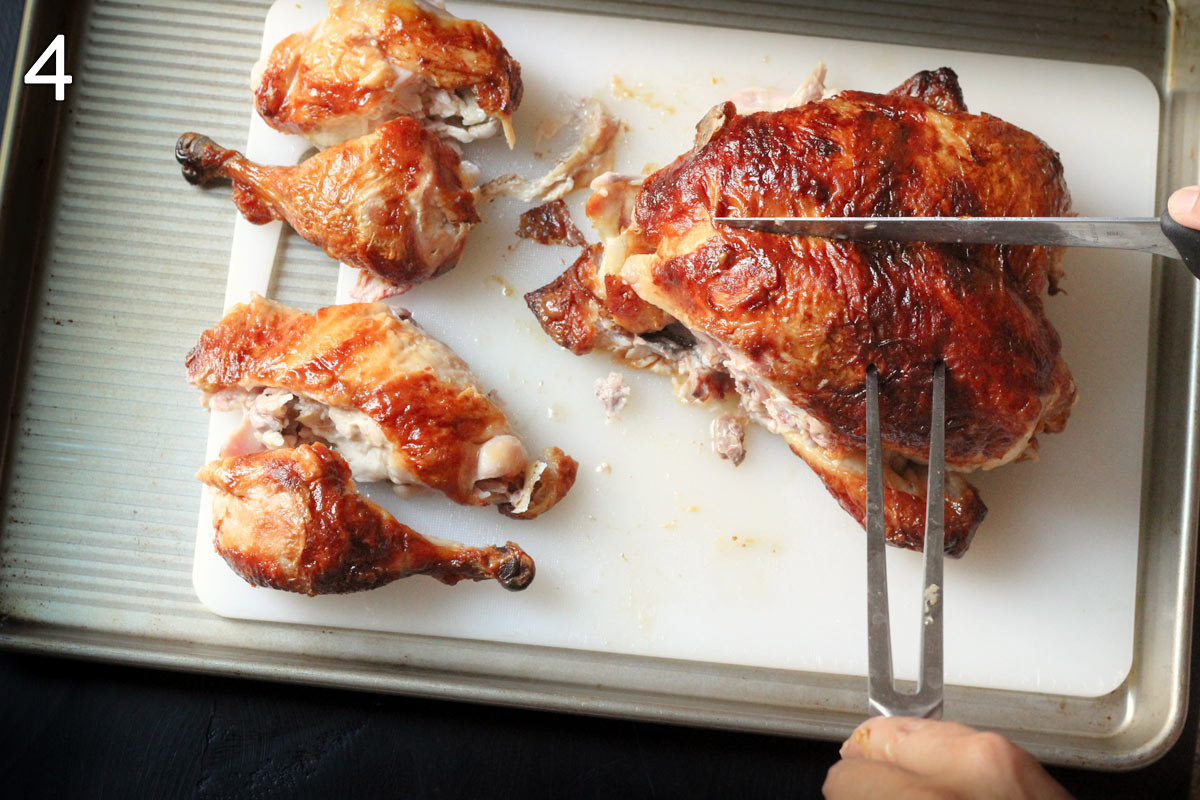
Once you have the legs removed, you can slice off the breast meat. Slice down the center, rubbing the knife against the center bone. Cut straight down the center and then slice the breast along the bottom to remove it from the center dividing bone.
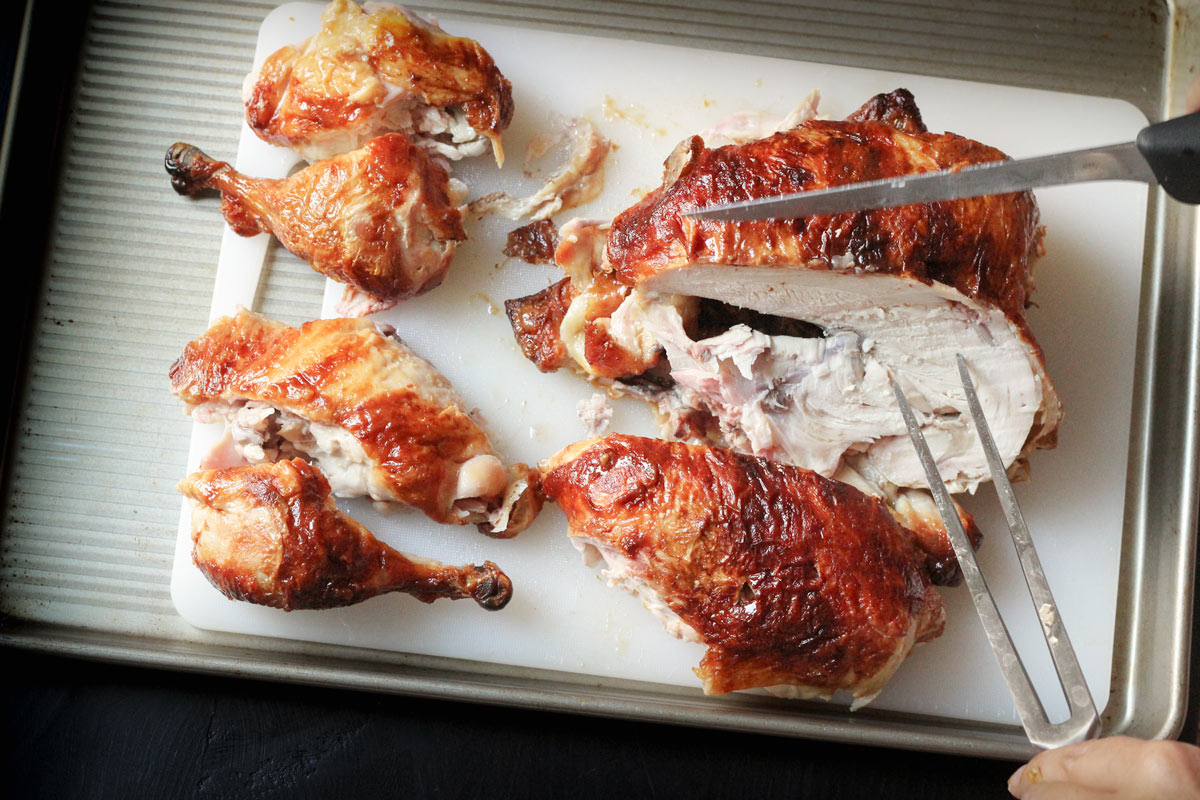
Repeat this on the other side.
You may miss the mark a bit and have some chicken meat remaining. That’s okay, you can remove this and use it in soup or casseroles. Repeat the process on the other side, so that both breast portions are removed from the carcass.
Step 5: Slice off the Wings
Lastly, slice away the wings, again wiggling your knife into the joint to separate the wing from the carcass.
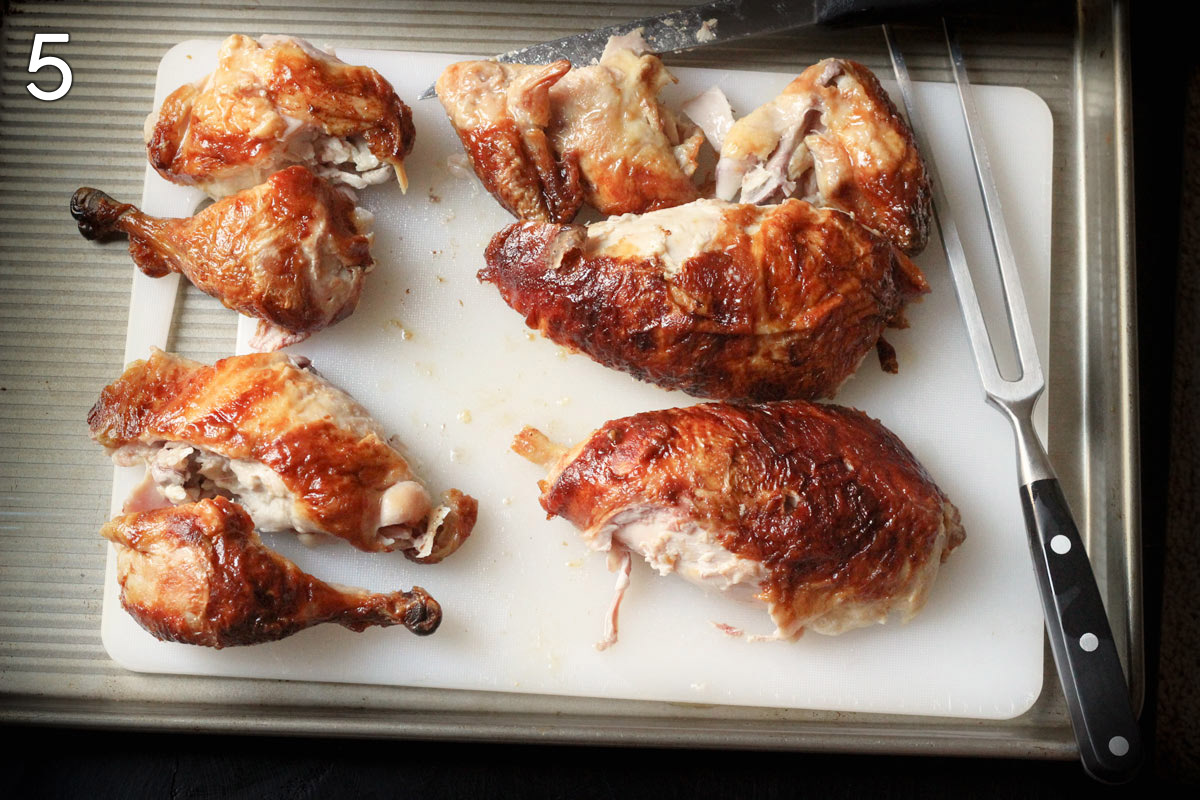
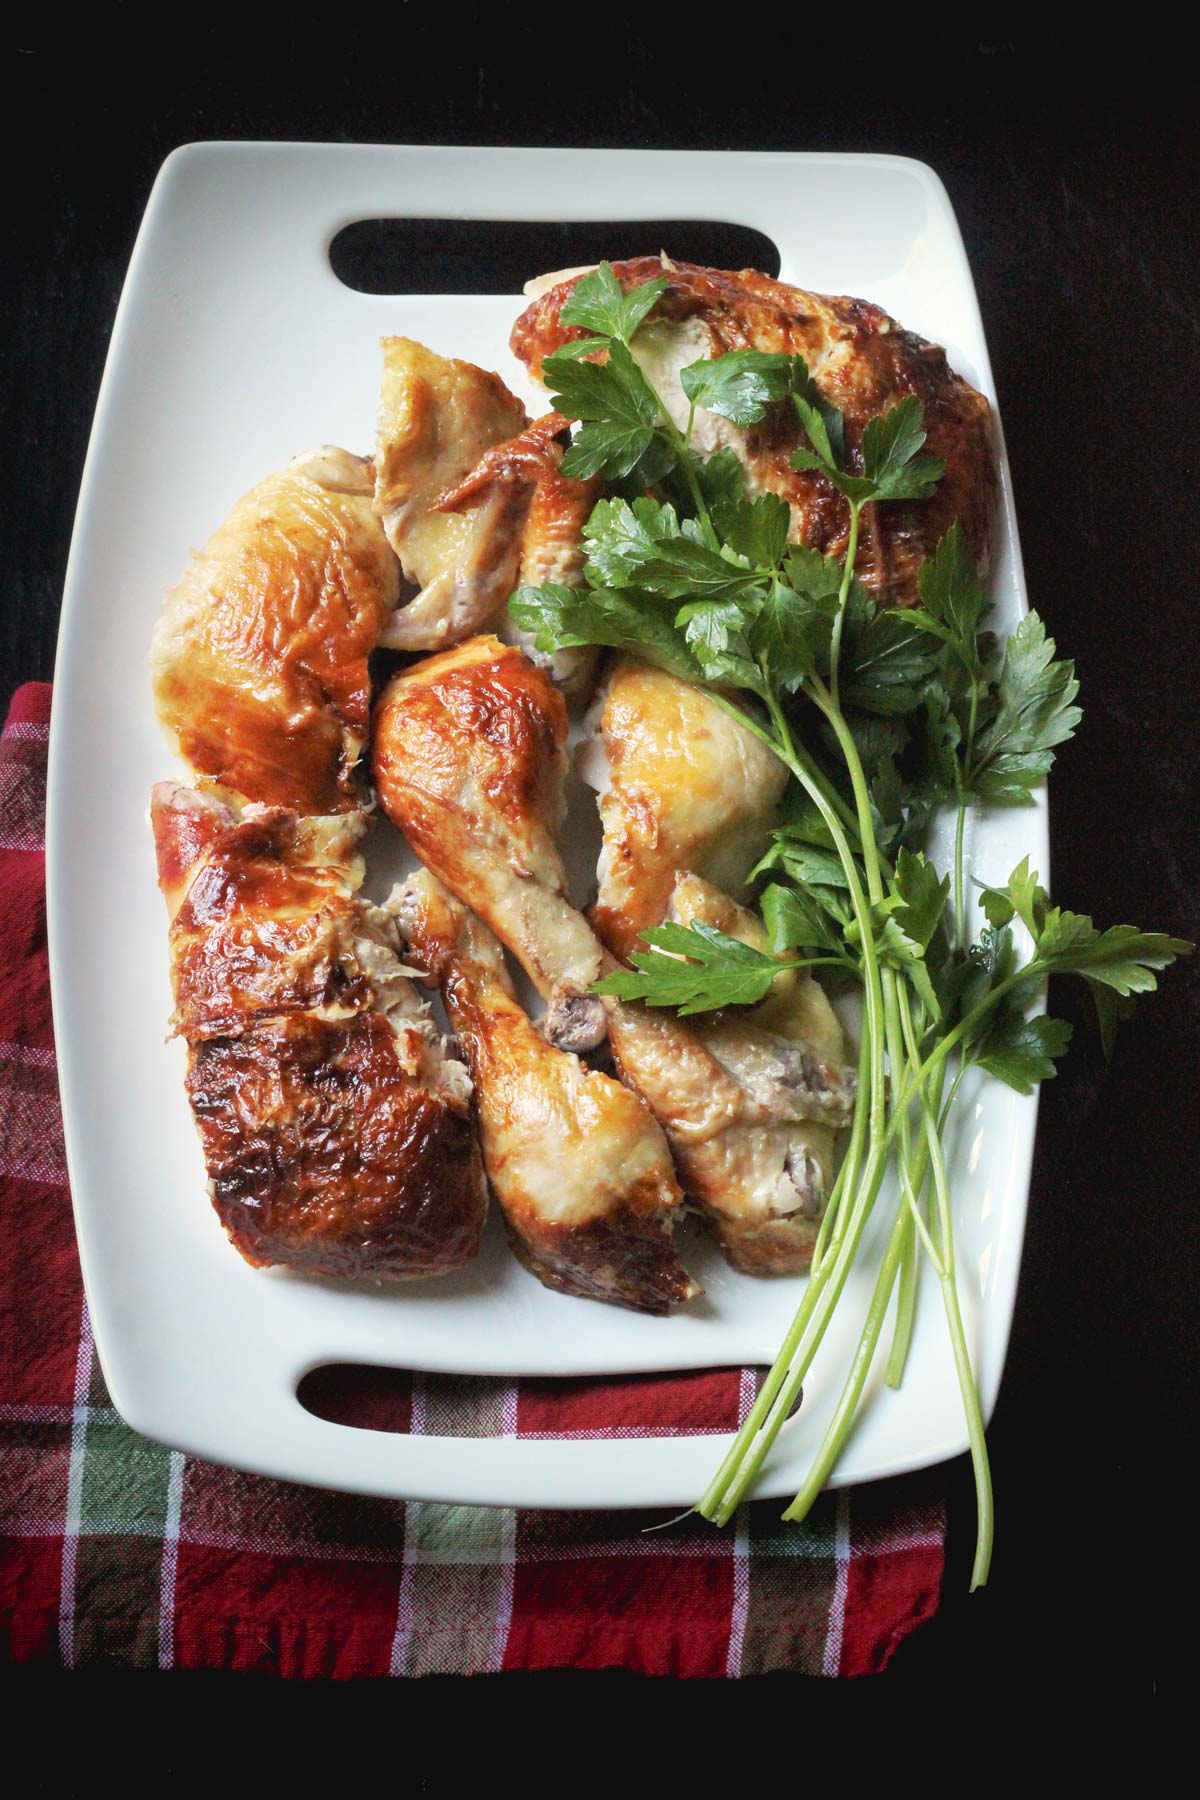
You should have eight pieces ready to serve. There may be remaining bits of meat on the carcass. Don’t leave this behind. If folks are waiting to be served, go ahead and enjoy the roast chicken. Then later, come back and with your fingers remove any small bits of meat left on the carcass.
There are two little nuggets of meat on the back of the chicken that you don’t want to miss. These are called the oysters. They don’t look particularly pretty, but they are super tasty!
The French call them “what the fool leaves behind.” Don’t be a fool! Remember to remove those.
FAQs
I like to use a boning knife, but a sharp chef’s knife is good as well. A carving fork can also be helpful.
Be sure to make chicken stock with the bones and any drippings you’ve got accumulated in your baking pan. It’s a fantastic building block for soups, gravy, and rice pilaf.
Cooked chicken is good in the refrigerator for up to 4 days. Store in an airtight container in the freezer for longer storage.
Favorite Chicken Recipes

Tell us what you think!
We love to hear your experiences with Good Cheap Eats. Click the STARS on the recipe card or leave a STARRED comment to let us know what you think of the recipe.
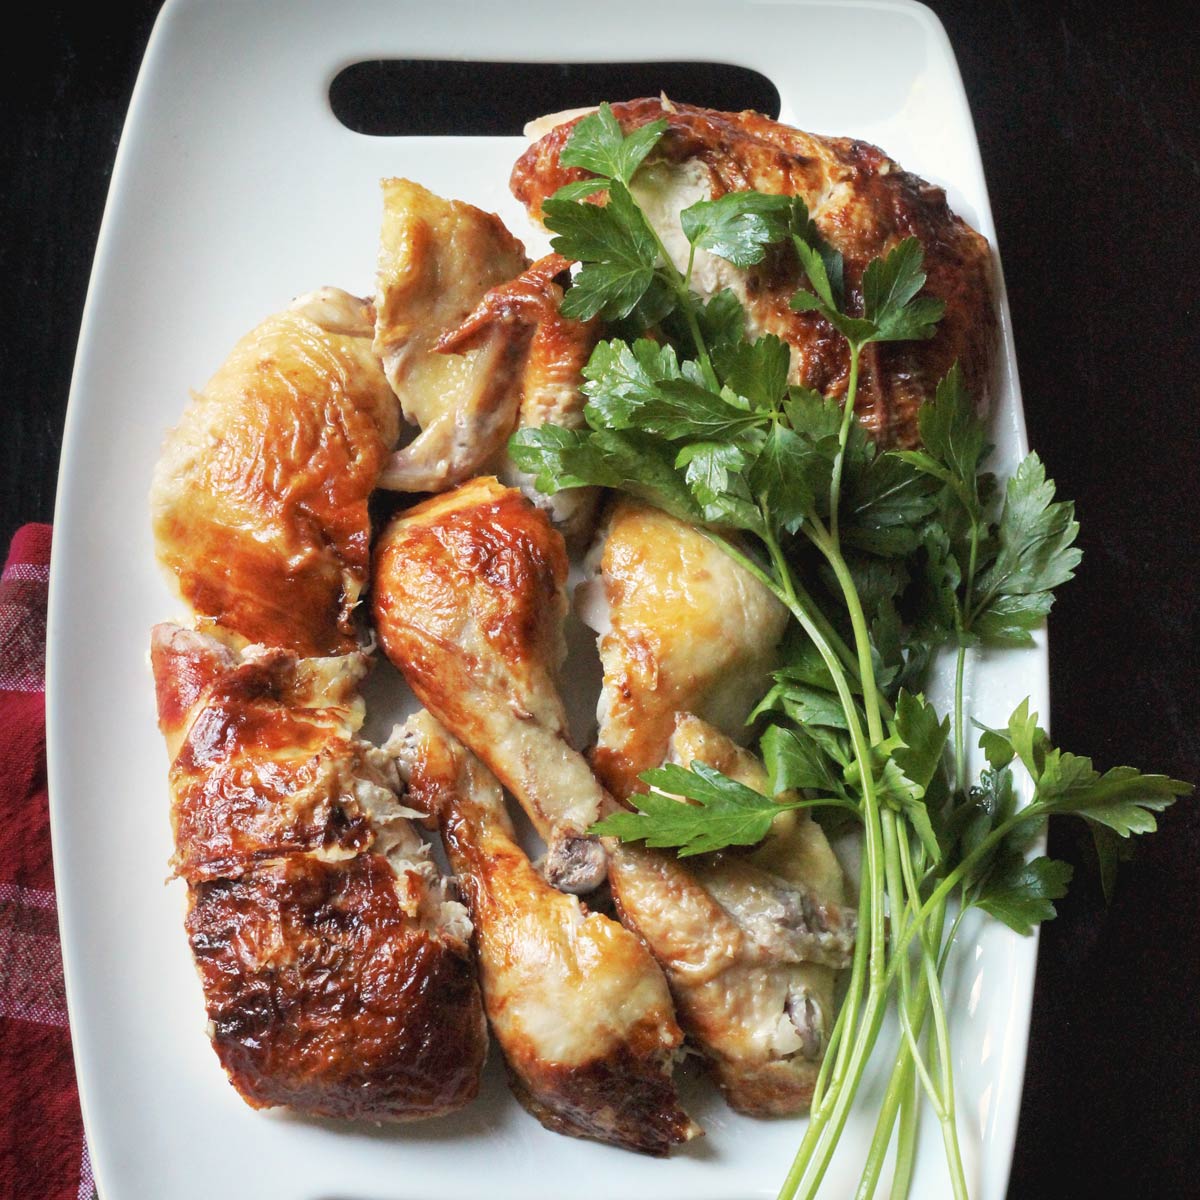
How to Carve a Whole Chicken
Equipment
- carving fork
- boning knife
- cutting board
- heavy duty sheet pan
Instructions
- Place the chicken on a cutting board set inside a rimmed sheet pan. This will catch the drips. Place your carving fork into the breast and wiggle your knife in between the joint of the thigh where it connects to the breast. Separate the whole leg and then you can cut the thigh and drumstick apart.
- With the boning knife, find the joint between the thigh and the leg. Cut through this section so that you have two pieces.
- Repeat steps 1 and 2 for the leg quarter on the opposite side. You should now have two leg portions and two thighs.
- Once you have the legs removed, you can slice off the breast meat. Slice down the center, rubbing the knife against the center bone. Cut straight down the center and then slice the breast along the bottom to remove it from the center dividing bone.
- Repeat this on the other side. You may miss the mark a bit and have some chicken meat remaining on the bone. That’s okay, you can remove this and use it in soup or casseroles. Repeat the process on the other side, so that both breast portions are removed from the carcass.
- Lastly, slice away the wings, again wiggling your knife into the joint to separate the wing from the carcass.
- Serve immediately.
Notes
Nutrition
This post was originally published on September 7, 2017. It has been updated for content and clarity.





Nate
You are right about Costco chickens! Large and cooked well for $4.99!!! You can not beat the price and they are very tasty!
Jessica Fisher
We love them, too!
Alice E
A very informative post. I would suggest that you could probably cut the breasts into two servings each as they are much meatier than the other pieces. My mom always did when frying them. Also, there can be quite a bit of little pieces of meat on the backs, it you pick it off, especially on the larger rotisserie chickens from Costco. Love those Costco chickens. As an alder couple who prefer dark meat, I usually save the breasts to chop or slice and use in noodles, soup or rice dishes.
Jessica Fisher
Yes! Great point about cutting the breast in half!
Kirstin
This was helpful, Jessica. I always get someone else to carve the chicken because I don’t know how to do it.
Jessica Fisher
It definitely takes some practice, but it’s not hard. You can totally do it!