

Want to learn how to make real buttermilk? It’s incredibly easy and so much cheaper than buying it at the store. Learn this quick and easy method to make your own cultured buttermilk at home.

Want to save this post?
Enter your email below and get it sent straight to your inbox. Plus, I’ll send you budget recipes and money-saving tips every week!
Buttermilk Dressing with Dill
So, buttermilk. It’s delicious in baking. It’s awesome in dressings. It’s works magic as a marinade.
It’s also incredibly expensive to buy at the store. And incredibly inconvenient if you do most of your shopping at stores that don’t carry buttermilk.
Lucky for you and me, it’s incredibly EASY to make real buttermilk at home.
A few months back, I decided that I needed to remedy the situation. I want to do the bulk of my shopping at ALDI and Costco, but neither carry buttermilk. And we go through a lot of buttermilk. At least a quart a week, sometimes a half-gallon.
I’ll confess at the outset. I’m a buttermilk snob. I think buttermilk does amazing things for baked goods, marinades, and dressings. But I don’t believe that buttermilk substitutes are always up to snuff.
That lemon juice and milk nonsense doesn’t really produce light and flaky biscuits. And it certainly doesn’t do your salad dressing any favors.
While I will concede that a combination of milk and yogurt makes a fair substitute in baked goods, the resulting dressing is still left wanting. You need real buttermilk.
And this recipe is a great way to use a lot of milk before it goes bad.
What’s The Difference Between Real Buttermilk And Cultured Buttermilk?
And by “real buttermilk”, I mean cultured. It is just not in our best interests (financially or otherwise) to churn enough butter to get that kind of buttermilk. Who in the world does that anymore? Let’s be real — in the 21st century.
For further clarification, see what the Food Lover’s Companion says:
Buttermilk of times past was the liquid left after butter was churned. Today it is made commercially by adding special bacteria to nonfat or low fat milk, giving it a slightly thickened texture and tangy flavor. Some manufacturers add flecks of butter to give it an authentic look.
Those who may get caught up on semantics, I’m talking about how to make cultured buttermilk at home.
Thankfully for you and for me, it’s super easy to make real buttermilk, this kind of “real buttermilk” by adding that special bacteria to milk, at home.

A few months ago I started experimenting making real buttermilk at home. I’ve been culturing buttermilk for a few months now and finding it to be a super easy process to work into my weekly kitchen tasks.
How to Make Cultured Buttermilk at Home
Initially, I used this buttermilk starter to create a fresh batch of buttermilk.
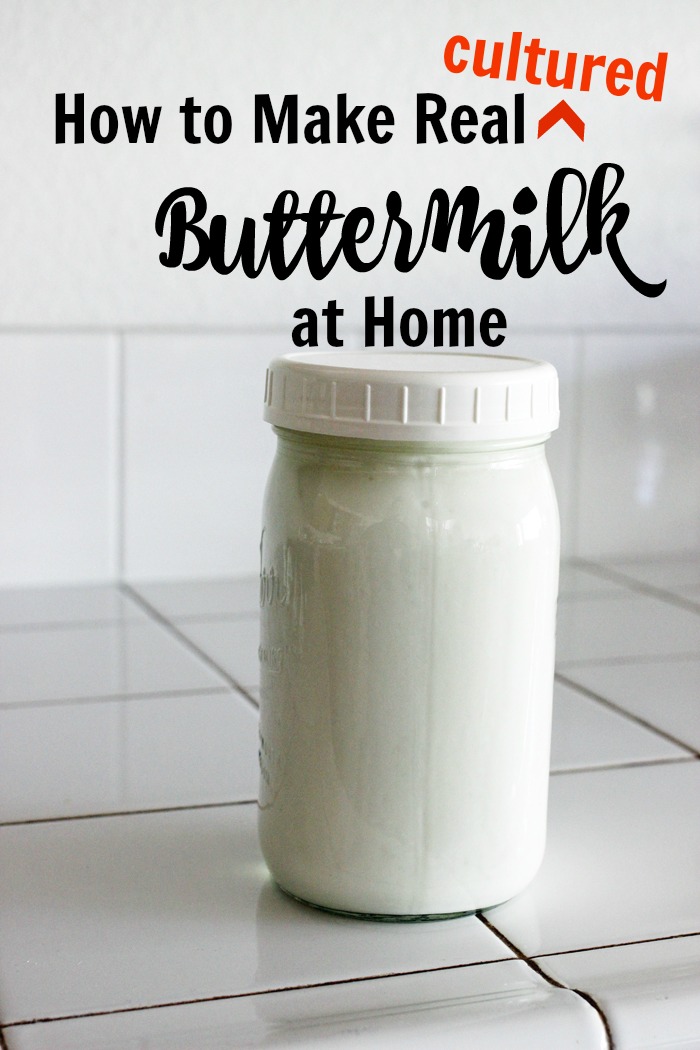
If you buy this starter, simply follow the directions on the package. Since I was keeping my costs as low as possible, I did not invest in a thermos-like container or Yogotherm. Instead I mixed my milk and starter in a quart-size canning jar. I capped it with a plastic lid, wrapped it in a couple beach towels, and let it sit atop my refrigerator overnight. Voila! Buttermilk!
After crunching the numbers, however, I realized that it wouldn’t save me any money unless I could make several batches from this original starter. So, I started experimenting. Here are some observations:
- I use whole milk because I like a thicker buttermilk.
- I don’t have to heat the milk when culturing buttermilk using the previous batch. I’ve tried it both ways and since overheating it once, realized it’s a step that can be skipped. I simply add ½ cup buttermilk (I just eye-ball it actually) to the quart jar and fill the jar with regular milk.
- Culturing 12 hours seems to do the trick. Any longer may cause some curdling. Overheating the milk can do the same. This curdling goes away with whisking, however, so it’s not a big deal.
- As long as the milk is thick and smells like buttermilk, you’re good to go.
- I have not tried this process with grocery store buttermilk, but my research says it works.
- Reculture your buttermilk within 7 days for best results.
I can’t tell you how incredibly easy this is to do! Sometimes, I make a few batches right in a row so that we always have some on hand.

Make real buttermilk and use it in these great recipes:
- Buttermilk Dressing with Dill
- Delicious Ranch Dressing
- Homemade Blue Cheese Dressing Recipe
- Gramma John’s Buttermilk Donuts
- Buttermilk Cornbread
- Buttermilk Corn Waffles
- Flaky Buttermilk Biscuits
- Grilled Chicken in Buttermilk-Yogurt Marinade
- Creamy Garlic Dressing with Buttermilk & Herbs
Tell us what you think!
We love to hear your experiences with Good Cheap Eats. Click the STARS on the recipe card or leave a STARRED comment to let us know what you think of the recipe.
Cultured Buttermilk
Instructions
- In a quart size canning jar, combine the buttermilk and milk. Secure the cap.
- Place the jar in a warm, dark place for 12-24 hours. I wrap mine in beach towels and place it above the refrigerator.
- Refrigerate until ready to use.
Notes
- I use whole milk because I like a thicker buttermilk.
- I don’t have to heat the milk when culturing buttermilk using the previous batch. I’ve tried it both ways and since overheating it once, realized it’s a step that can be skipped. I simply add ½ cup buttermilk (I just eye-ball it actually) to the quart jar and fill the jar with regular milk.
- Culturing 12 hours seems to do the trick. Any longer may cause some curdling. Overheating the milk can do the same. This curdling goes away with whisking, however, so it’s not a big deal.
- As long as the milk is thick and smells like buttermilk, you’re good to go.
- I have not tried this process with grocery store buttermilk, but my research says it works.
- Reculture your buttermilk within 7 days for best results.
Nutrition

Janet M Hook
Okay so question, could I do this with the heavy cream I make my butter with and or the buttermilk that is the by product of that? I have actually been buying cultured when I can get it but it’s been really hard to come by and the holidays are coming…I have been making as much of our own food products as possible for going on 3 years now and it’s been amazing… Id love to have cultured butter and buttermilk without having to source extra from now on…thanx
Jessica Fisher
I’m not exactly sure. The buttermilk culture is supposed to go in milk. I imagine that cream would work, but I don’t know if it would work with what’s left after you make butter. That kind of “buttermilk” isn’t the same as what we buy at the store. If you try it, let me know how it goes.
Savvy
Can you please clarify “buttermilk”?. I can make buttermilk when I make my own butter, but this is not the same as cultured. I can’t get any cultured buttermilk where I am, not even packets. I’ve been trying to find how to start this process from scratch and it seems like no one knows.
Jessica Fisher
No, cultured buttermilk is a commercial product akin to yogurt in terms of fermentation, etc. I often use equal parts yogurt and milk for a buttermilk substitute. Hope that helps!
Jenna
Hi — originally, people didn’t pasteurize their milk so churning the milk would incorporate a bit of air & consequentially bacteria. Also, it’s my understanding that churning was done later in the day, so the milk was sitting for possibly hours. That’s one reason European butters have much more depth of flavor than US products. If you have a raw milk source, maybe that will get you closer to the results you’re looking for.. HTH, GL
Gourmet Grubber
Thank you for sharing this. I used whole milk and some leftover store-bought, cultured buttermilk. It took my first batch about 18-20 hours since my kitchen was about 69°F but it worked! Looking forward to trying another batch in another week. Thanks, again, for sharing, Jessica 🙂
Jessica Fisher
Glad to hear it was successful!
Bob
Not sure about buttermilk but I hypothesized that I could use pasteurized milk to make yoghurt. The experiment failed and I returned to sterilizing at 80 – 82 C.
Jessica Fisher
I’ve read the same about making yogurt. It must be heated. In my experience, creating the first batch of buttermilk, heating it was helpful, but in subsequent batches from the same culture, I could use cold from the fridge for buttermilk.
Bob
Thanks. I must check around Ottawa Canada here to see if I can find a culture. It appears much easier than yogurt to produce after the initial batch so worth investigating.
Jessica Fisher
You should be able to order it online if you can’t find it locally. I have a link in the post.
Karen Milby
That is what I did exactly. It worked well. I heated some milk to 180 degrees because I was making yogurt and used part of it to start the buttermilk. Subsequent batches I didn’t heat the milk. I use 1/3 of a cup starter and finish filling my quart container. It is done almost always in 12 hours.
Jessica Fisher
Great!
Mary
I’m so happy to find these instructions. When I was growing up this was my little job, sometimes, to use previous made buttermilk, add whole milk and stir, cover with a saucer or little towel leave out all night and the next morning it was buttermilk! But I was doubting if there was other directions that I forgot, so I’m so happy to find this!!. Everytime I would google how to make buttermilk, it was the lemon thing.?
Jessica Fisher
That lemon thing is nonsense. lol. Glad I could help.
Leslie
What do you mean by “reculture your buttermilk every 7 days”?
Jessica Fisher
You can repeat the process once a week and keep the buttermilk going.
Christie Grewe
What’s the difference between yogurt cultures and buttermilk cultures? Could I use yogurt as a buttermilk starter?
Jessica Fisher
No, they are different. This post explains it: https://www.quora.com/How-do-buttermilk-and-yogurt-differ
Christie Grewe
Thank you ?
Bla
Were on our 7th or eight batch. We bought a 1/2 gal container of butter milk and when there was just a little left, we filled it with whole milk and then sat in on the heater vent in the kitchen floor overnight. The next day it was buttermilk! We just repeat when it is getting low using the original buttermilk container. Super easy. It tastes like yogurt to me though and I can drink it straight whereas I can’t do that with store bought buttermilk. I tried this same experiment using yogurt as a starter without success. When I’ve made yogurt, I use powdered milk and make it double strength and add some yogurt starter and I will get yogurt out of that. I may not have let the yogurt experiment (without making it double strength) sit long enough.
Jessica Fisher
Thanks for sharing your experience with commercial buttermilk!
Grandma Loy
I have used this idea with store-bought buttermilk for many years. I also freeze excess buttermilk and use it for cooking. Since a half cup of buttermilk is the smallest unit of measurement I use, I freeze multiples of half cups. I pour the buttermilk into snack size zip-top bags and remove as much air as I can. I then put the bags of buttermilk into a quart size, zip-top freezer bag, write on the bag how many snack bags of buttermilk it contains, date and freeze. This way I can take out as many bags of buttermilk as a recipe calls for. These thaw easily under running water, or cut the bags open and put in a microwave-safe bowl and microwave in 30-second increments at 50% power until thawed. I also like to keep powdered buttermilk from Saco on hand in my fridge to use if I just happen to be completely out of buttermilk. I prefer this to the lemon juice/vinegar and milk combo.
Jessica Fisher
Thanks so much for your input!
Brooke
I have always wondered about this. If I add regular old cultered buttermilk to regular milk it will all become buttermilk?! This this so cool.
Jessica Fisher
A commenter below you says she’s done it with store-bought for a long time!
Alice E
Do you think this would work in smaller batches. A quart is really too much for just the two of us.
Jessica Fisher
Yes, absolutely!
Melissa in GA
Don’t you just love the plastic lids for the jars? I use both sizes in my kitchen.
Jessica Fisher
Yep. Game changer.
Jac
So you’re just using store bought whole milk? Not raw?
Jessica Fisher
Yes. I’m using pasteurized regular milk.
Karen
I’m definitely trying this! Can you do this indefinitely or does it get less ‘potent’ after X number of many batches? Do you think there would be any issue with using raw milk vs. pasteurized?
Jessica Fisher
I think I’m on my 6th or 7th batch right now. Not sure how far it can go.
Do some research on the raw issue. I read that using pasteurized milk allowed you to skip the heating process. Not sure if you can skip that step if you use raw milk.
Jenna
Depends on the culture being used by the manufacturer. If it’s been modified for speed or some other desired trait, yes it won’t breed true [it won’t perform consistently through generations.] If it is a heritage strain, then it’ll will remain consistent, as long as conditions are amenable [clean container so no competing bacteria/mold/etc; suitable temps; and so forth]. HTH, GL.
Jana
I have been doing this for years with the grocery store buttermilk. It is super easy and works great. Thanks for sharing!
Jessica Fisher
Good to know. Thanks for confirming that the internets said!
Roberta
I’ll have to try this. It sounds even easier than making homemade yogurt.
Jessica Fisher
Yes! It’s much easier than that. And that’s not hard.